Search results for "egg incubators":
Products
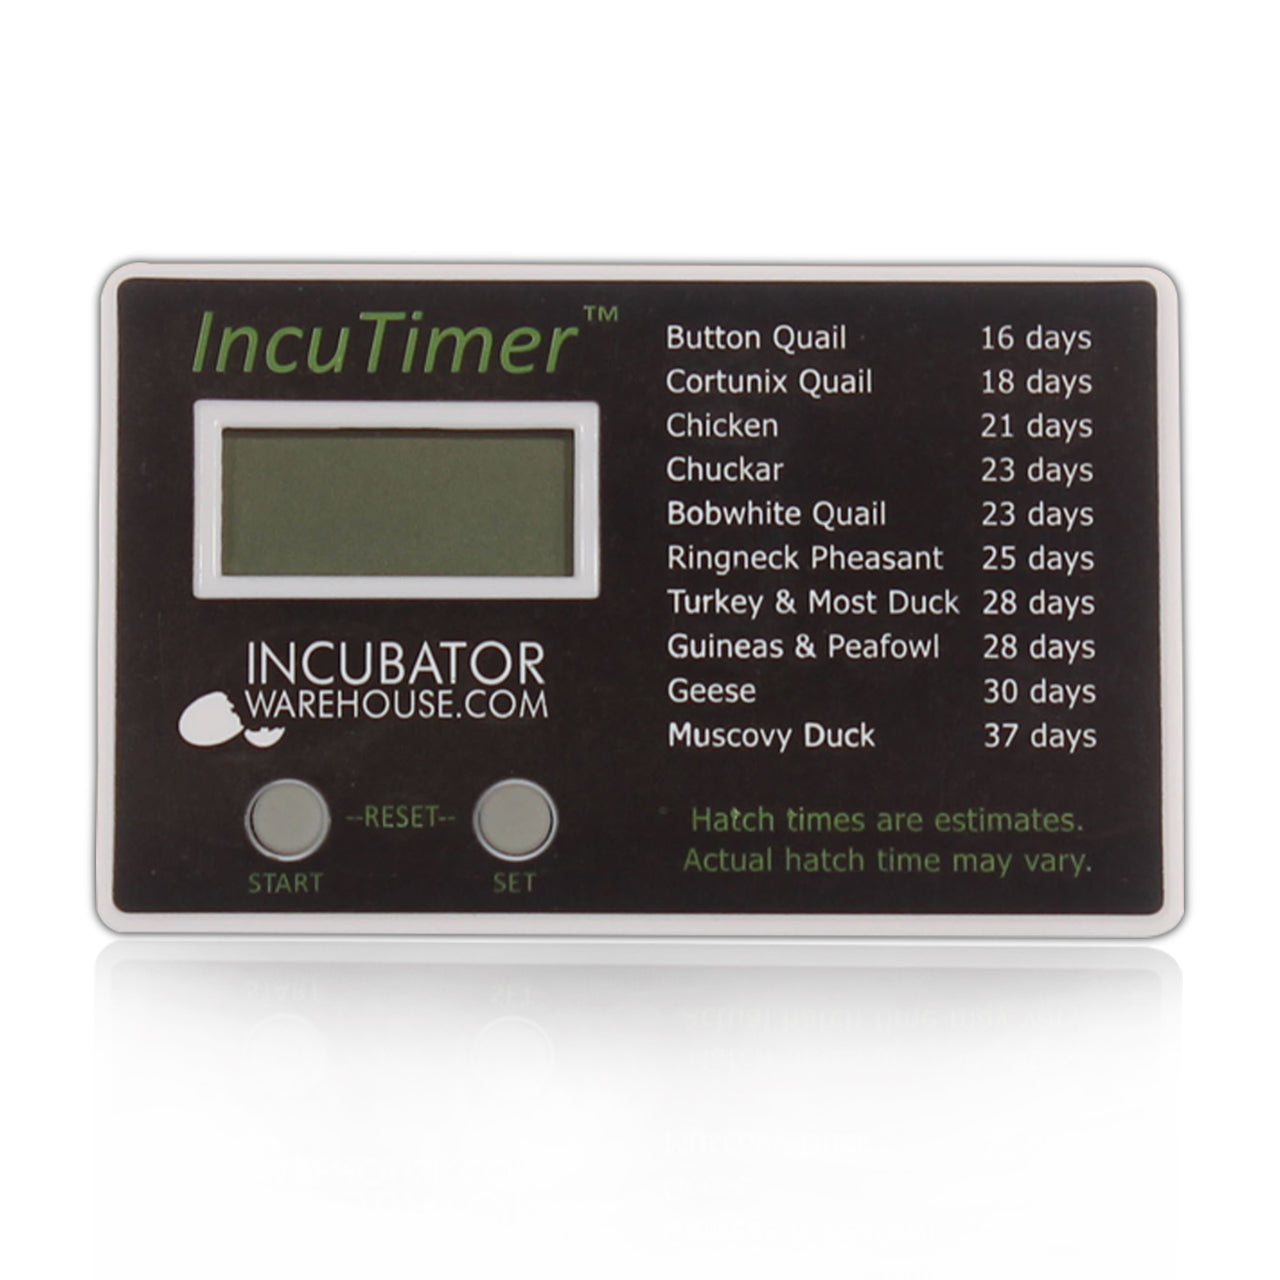
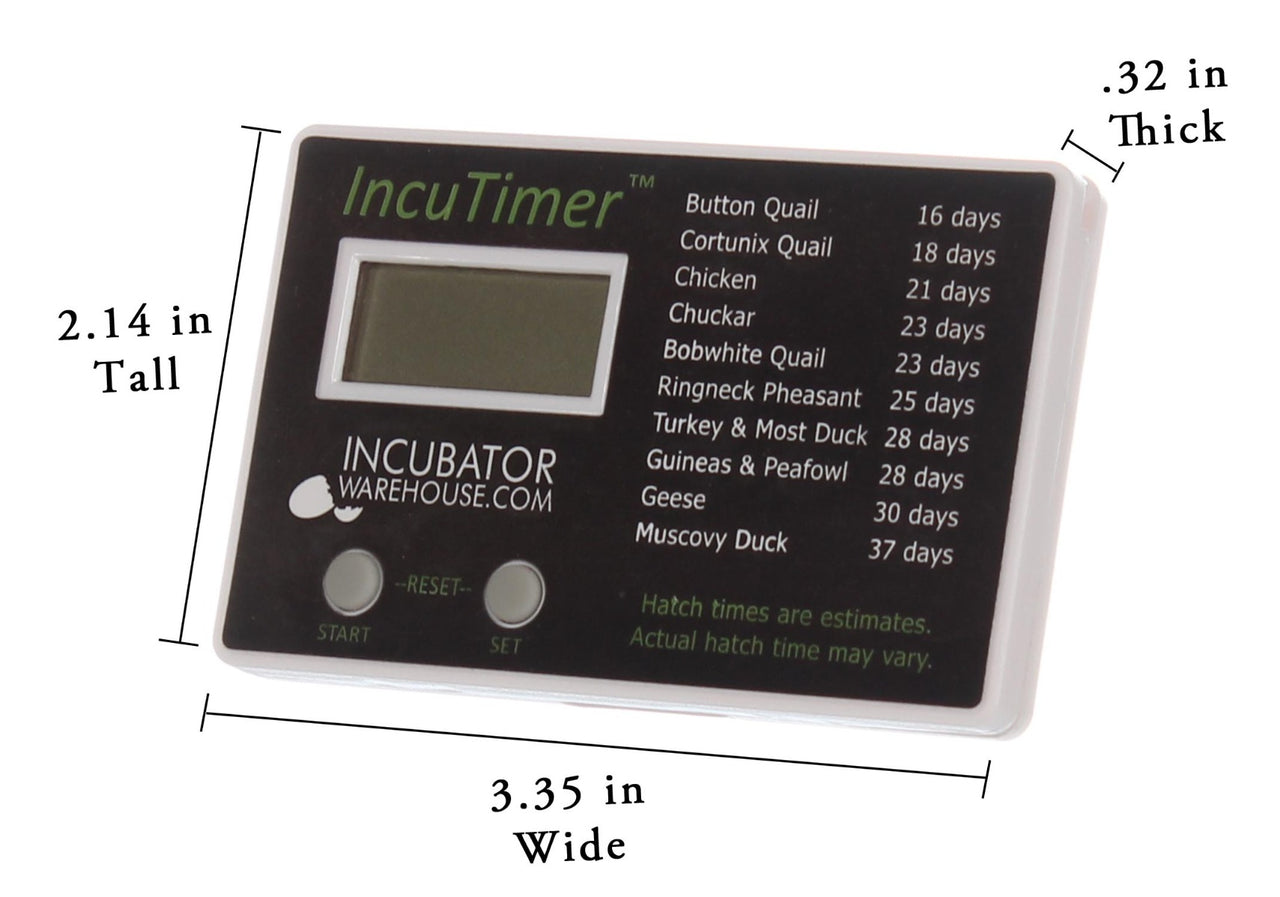
IncuTimer™ Digital Hatch Countdown Timer for Egg Incubator
$15.99
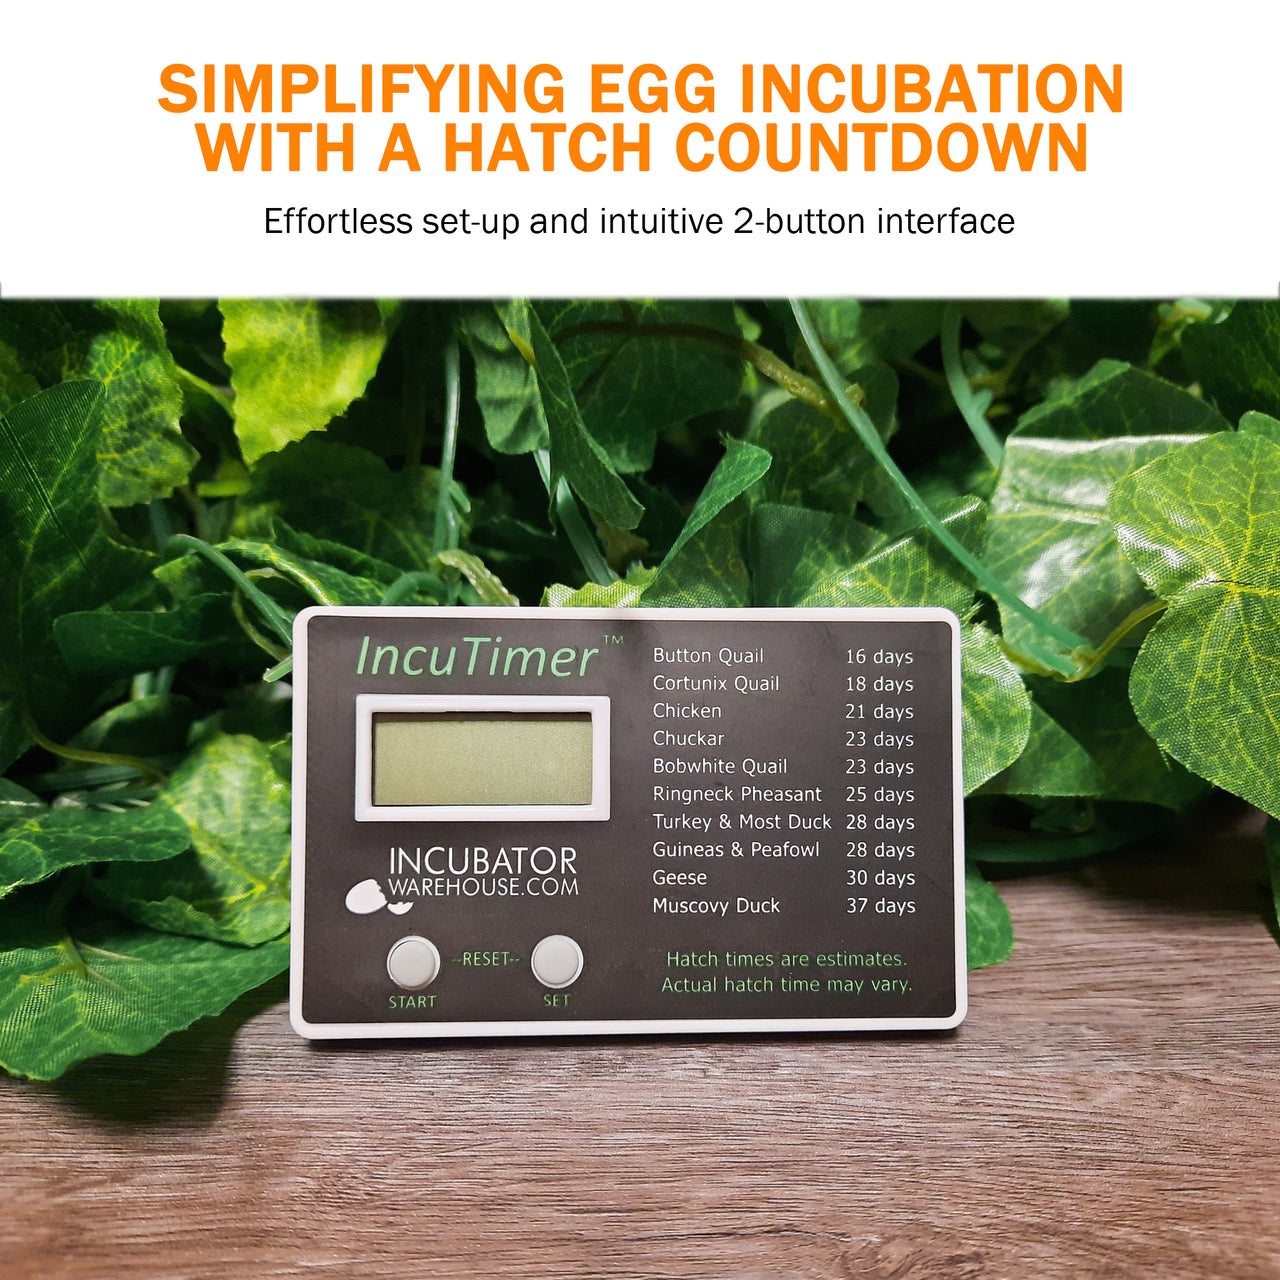
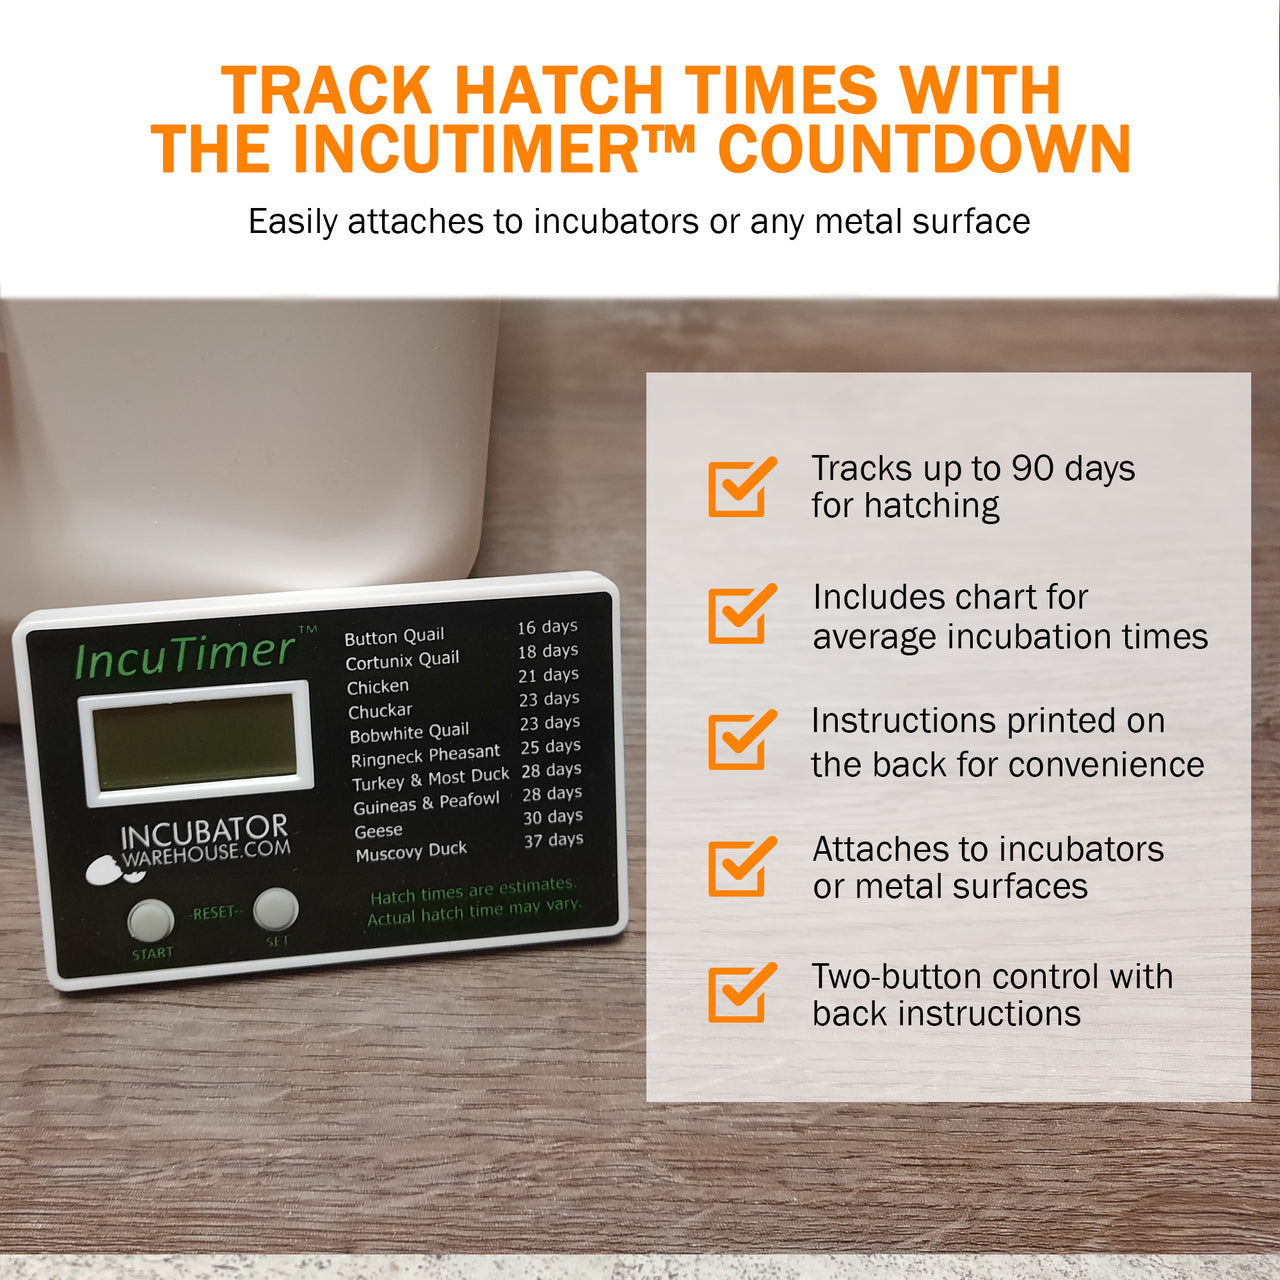
IncuTimer™ Hatch Countdown Timer – Your Smart Egg Incubation Assistant Take the guesswork out of egg incubation with the IncuTimer™—a precision-built egg turner motor with timer that tracks your hatch countdown with accuracy and ease. Ideal for poultry farmers and hobbyists, this compact timer simplifies incubation with a 90-day countdown, built-in hatch chart, and alarm feature.
Product Description
Managing hatching schedules just got easier with the IncuTimer™ Digital Countdown Timer. Designed to complement your egg turner motor with timer setup, this tool ensures precise incubation tracking for eggs of all kinds—chickens, ducks, quail, and more.
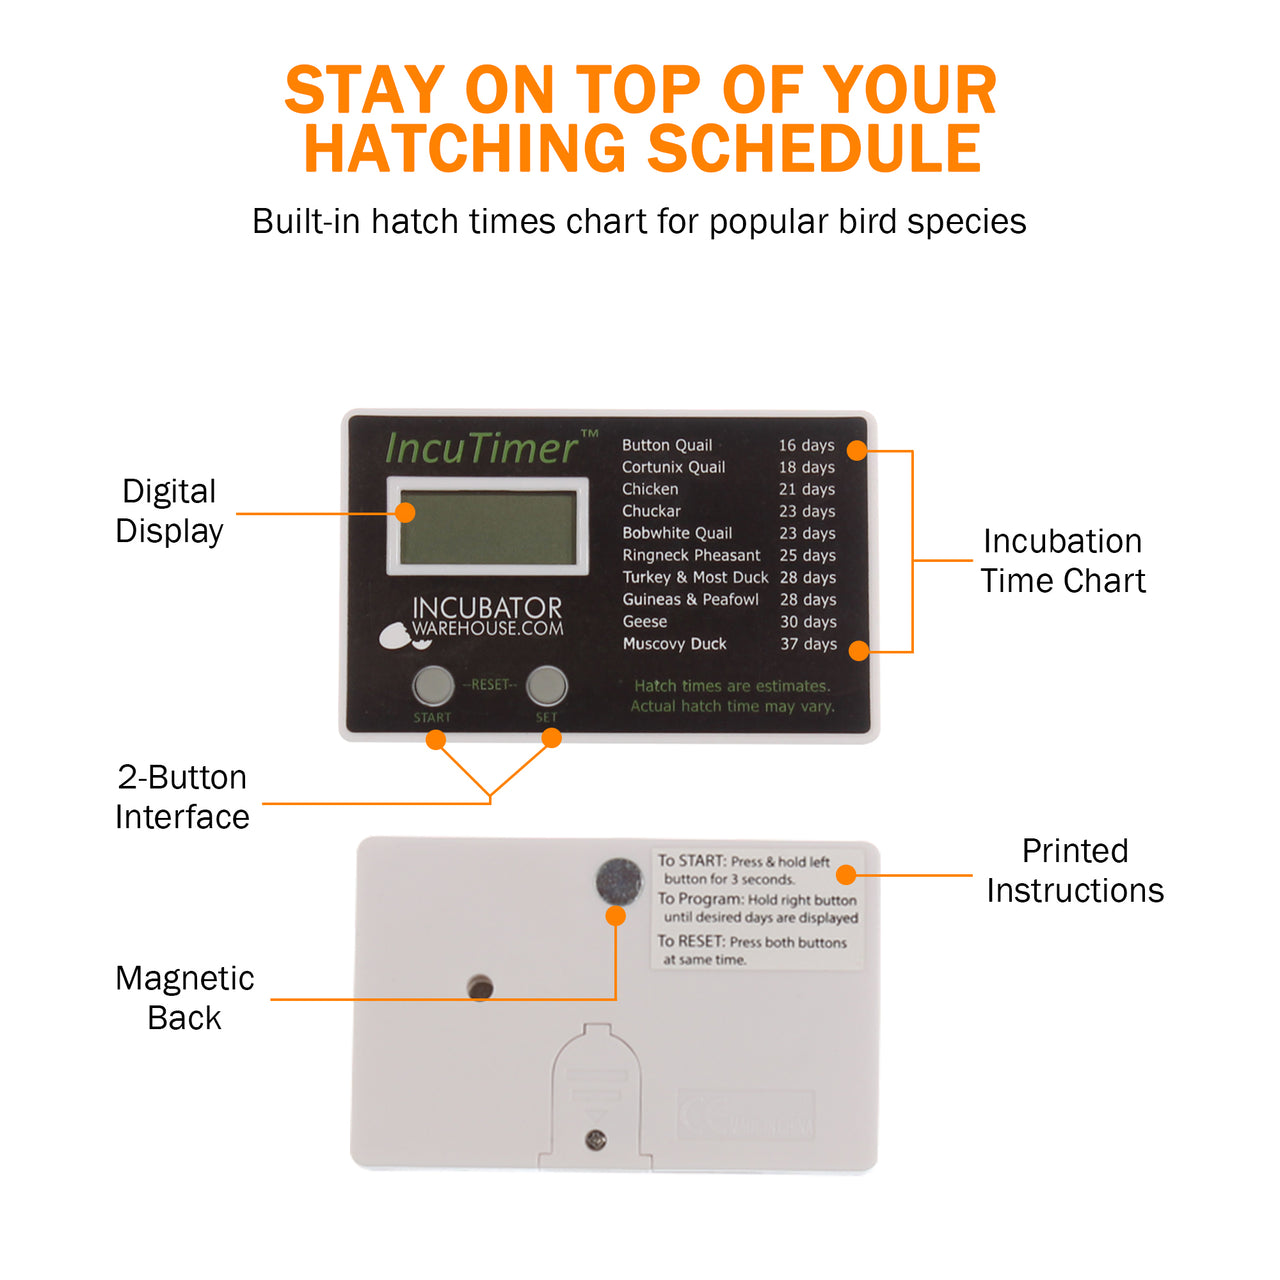
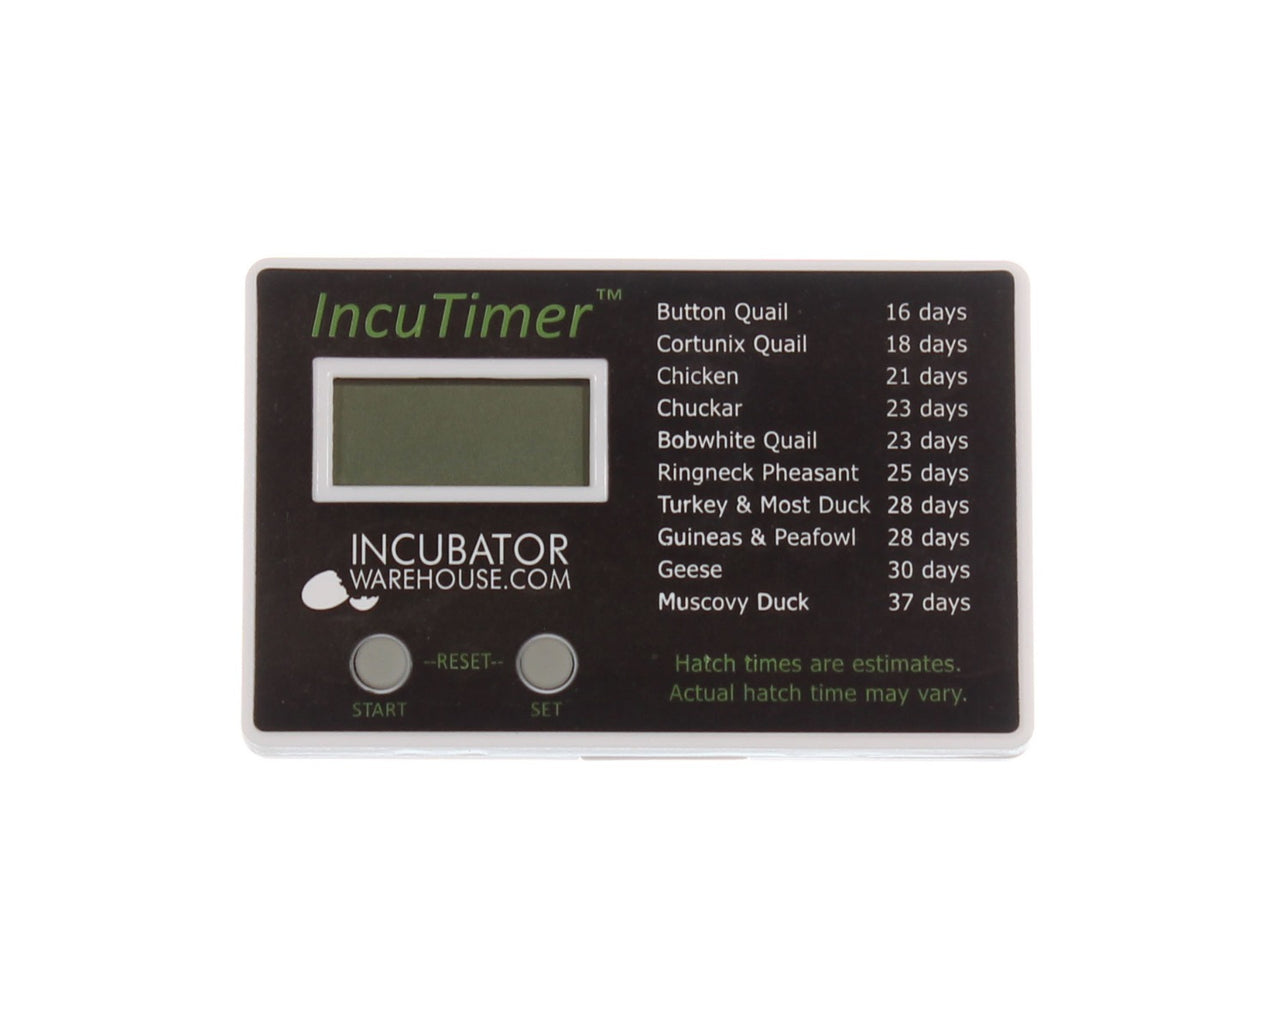
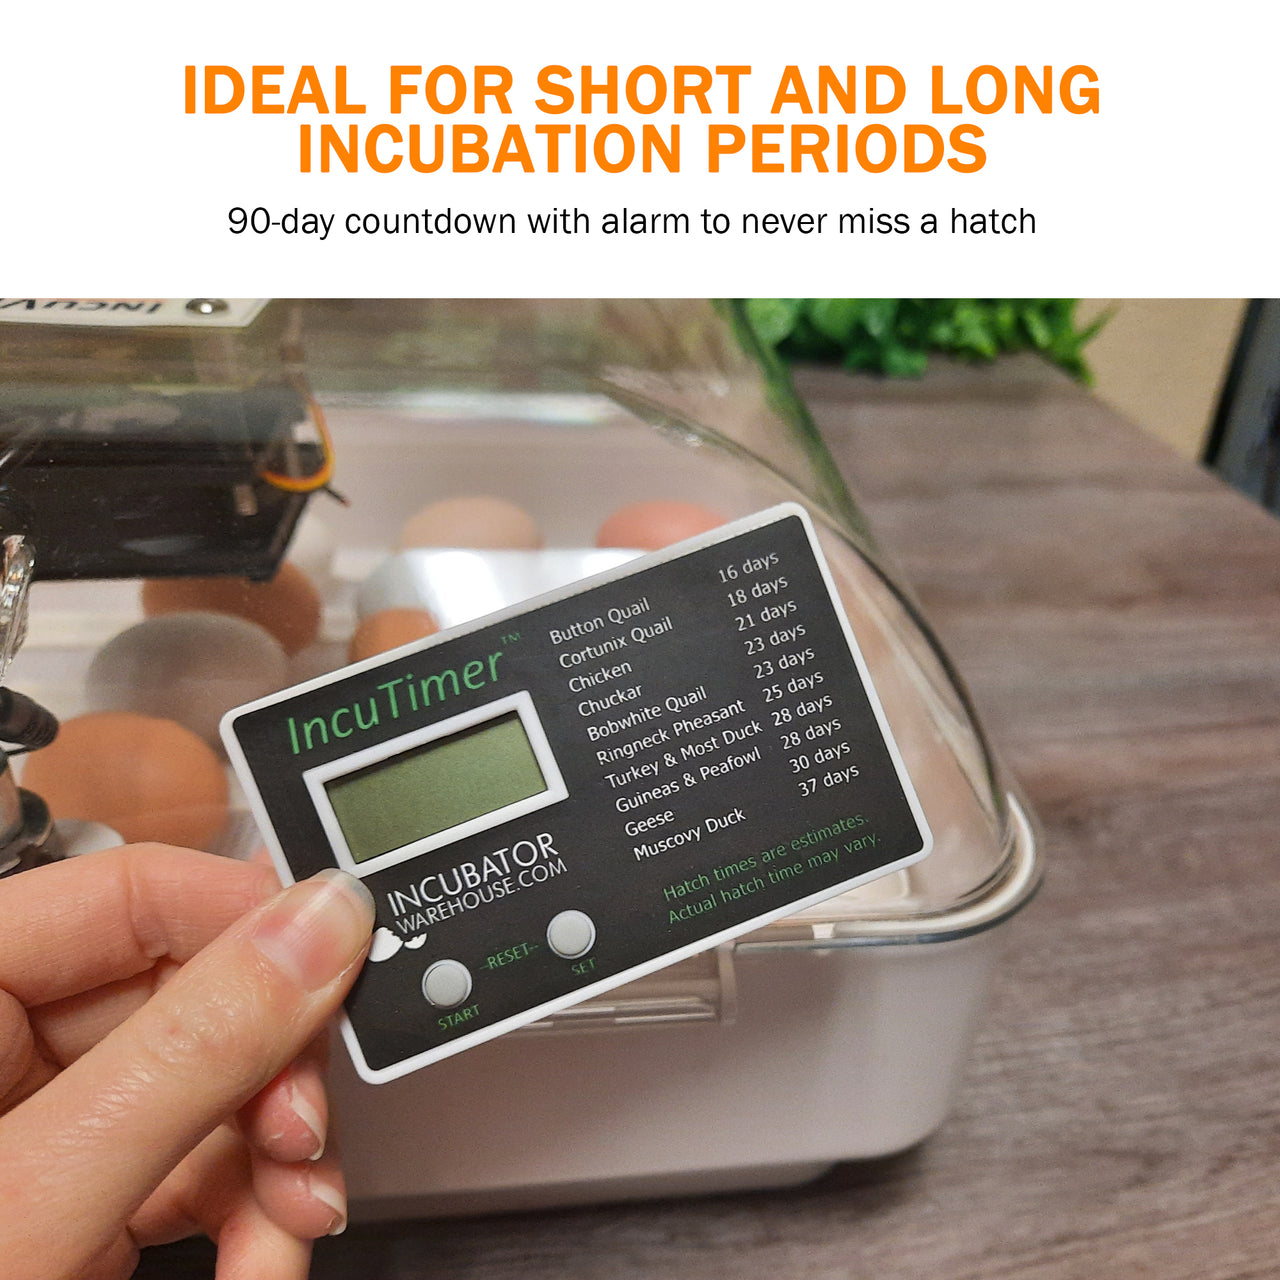
With its 90-day countdown range, the timer displays time remaining in days, hours, and minutes, helping you plan and monitor incubation effectively. A built-in hatch chart gives average incubation times for popular species, making it the perfect assistant for beginners and experts alike.
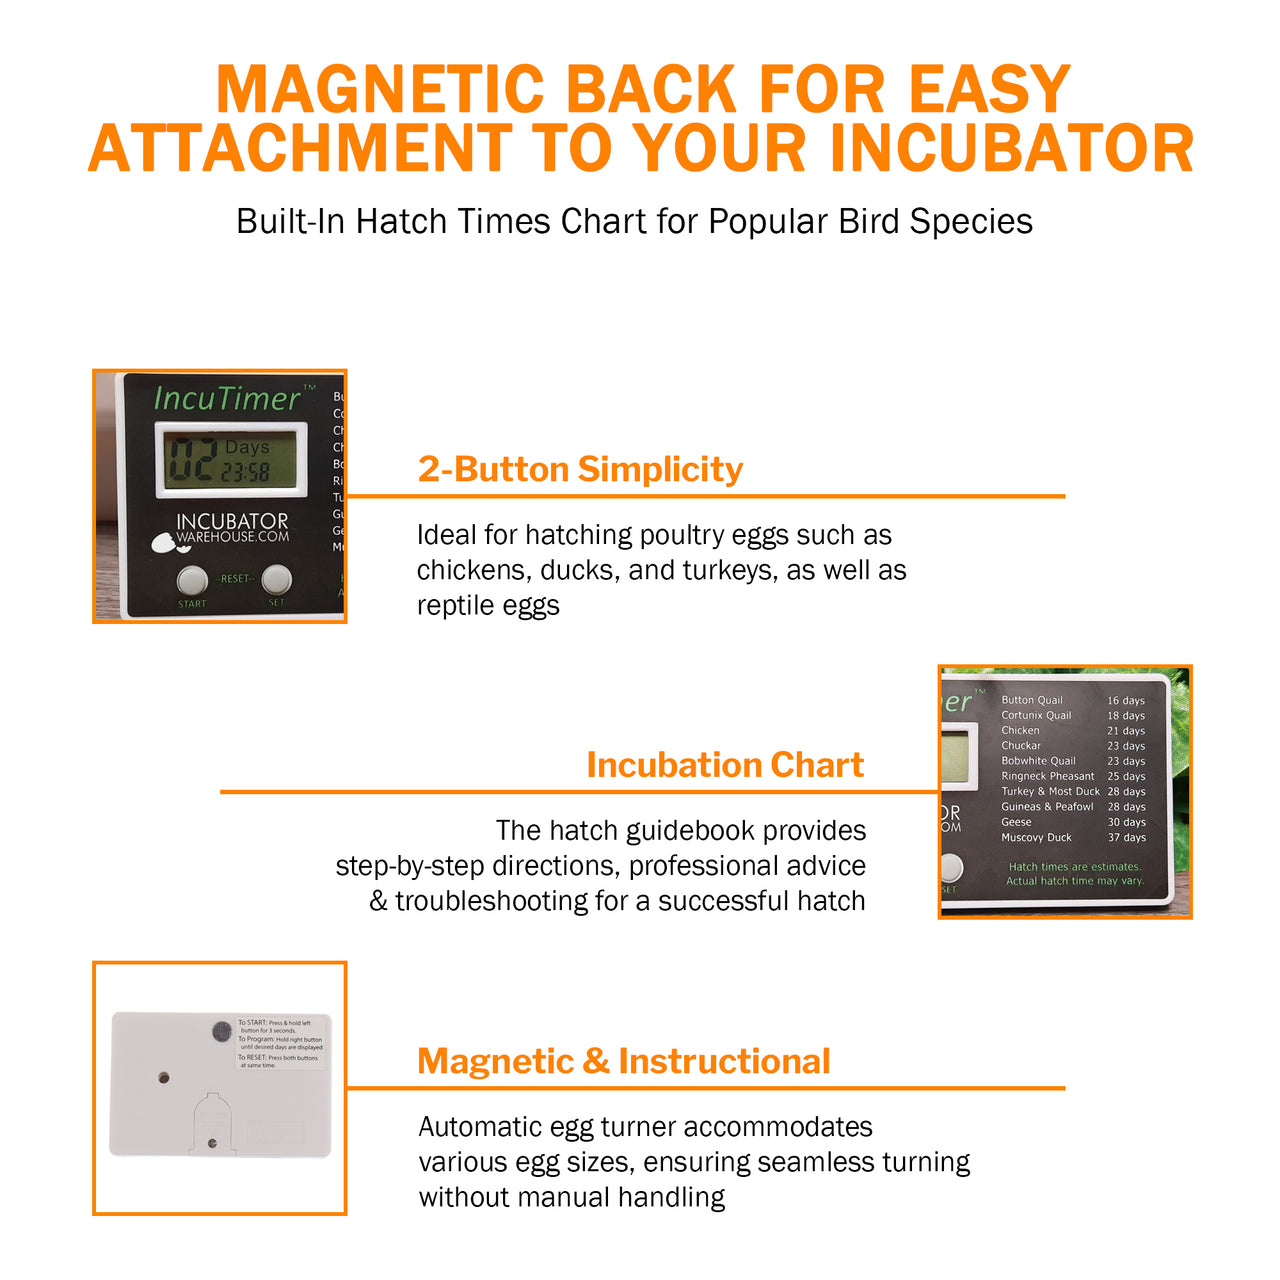
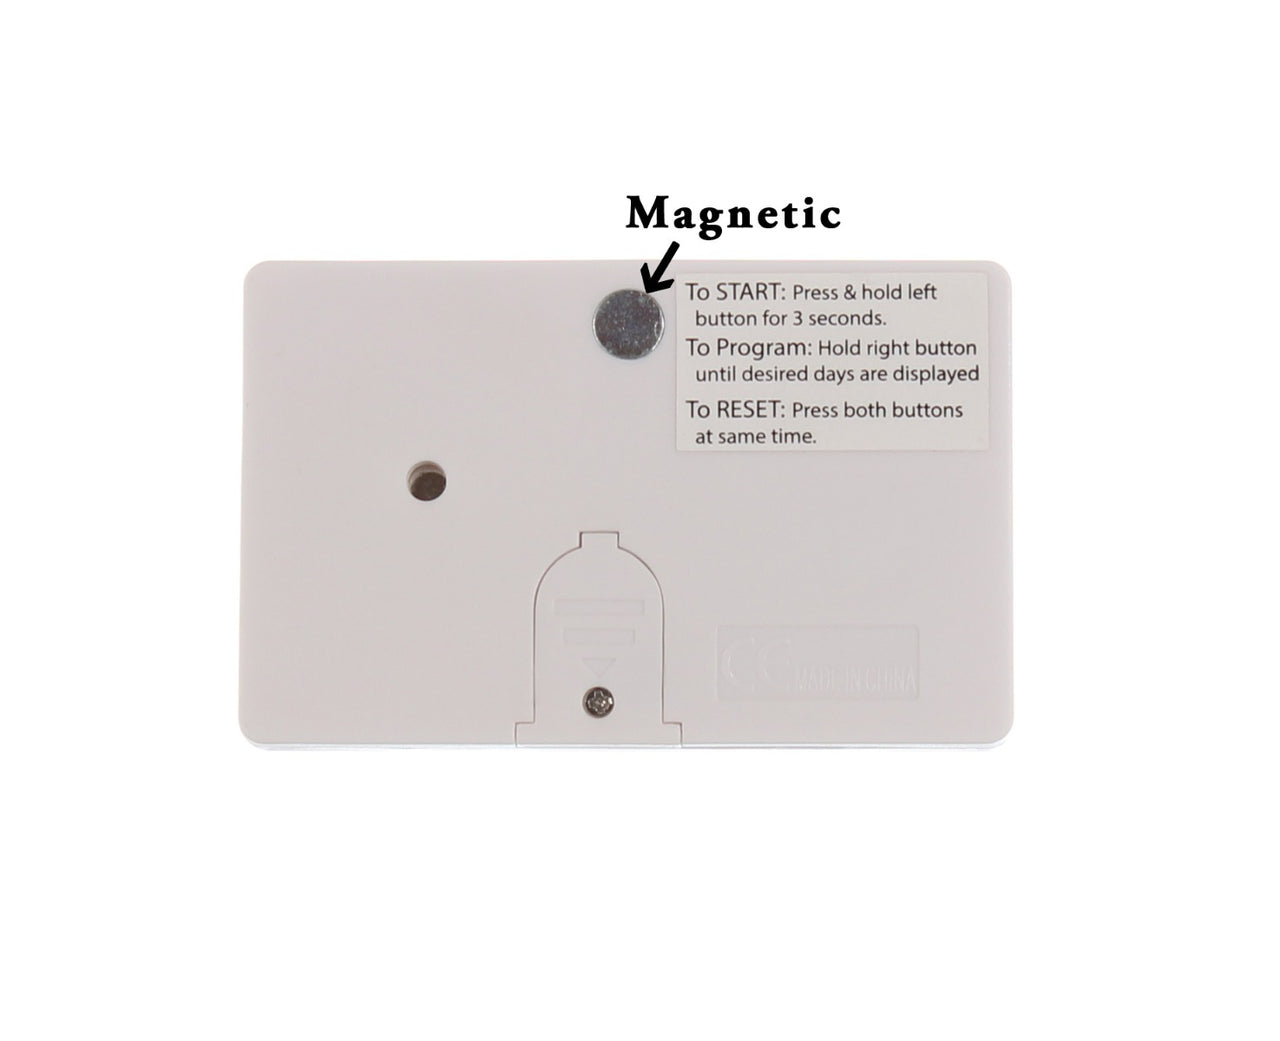
Its magnetic back allows easy mounting to any metal incubator, and the printed instructions on the back ensure you'll never misplace setup guidance.
Product Information
Product Type: Egg incubator countdown timer
Power Source: LR1130 battery (included)
Display: Digital countdown – days, hours, minutes
Operation: Simple 2-button system=
Color: White
Material: Durable plastic
Technical Details
Countdown Limit: 90 days
Built-in Alarm: Sounds when countdown reaches 0
Built-In Chart: Average hatch times for quail, chicken, duck
Attachment: Magnetic backing for incubator or fridge
Battery Type: LR1130 button cell
Product Measurements
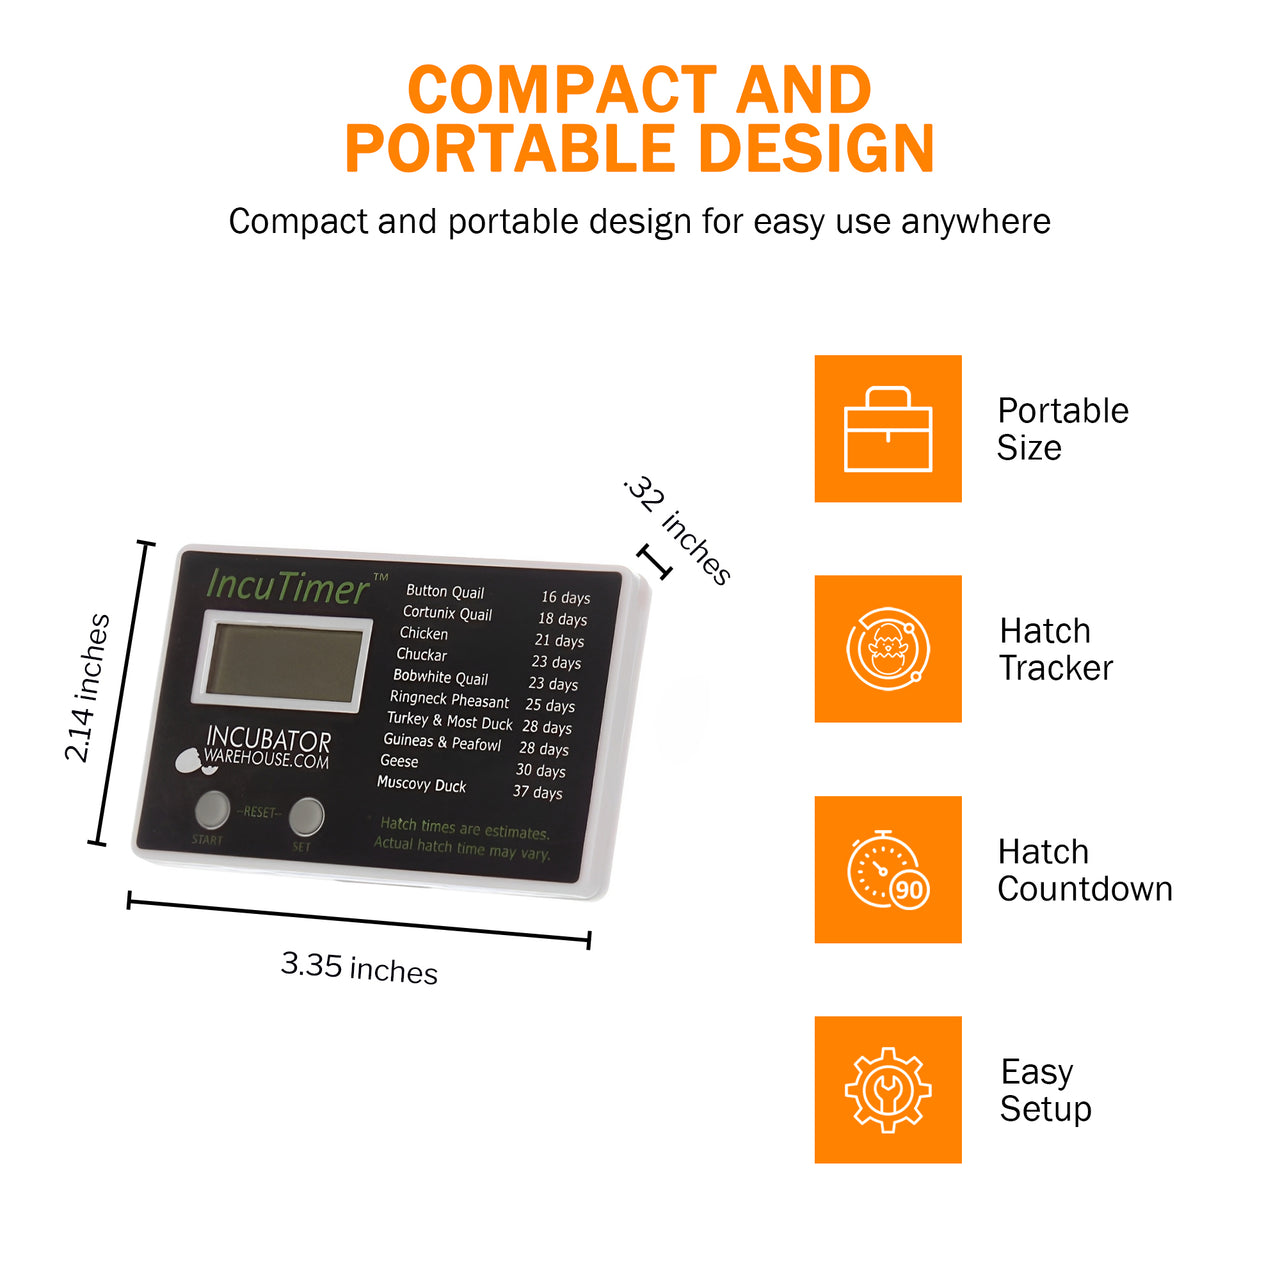
Dimensions: 3.35" (L) x 2.15" (W) x 0.25" (H)
Weight: 0.06 lbs
Additional Features
Ideal for pairing with incubator egg turner timer systems
Works well alongside programmable incubator egg turner timers
Compact and fits most egg incubator timer setups
Printed instructions for quick reference
Helps maintain consistent hatch schedules in incubator motor timer setups
Warranty & Support
Backed by Incubator Warehouse’s commitment to quality. For product questions, setup help, or warranty support, contact our U.S.-based customer service team.
3018 - Hova-Bator GQF Incubator Thermometer/Hygrometer
$38.99
Product Features:
Superior Accuracy: Officially rated as one of the most accurate incubator thermometers by GQF.
Easy External Readings: Features a 4-inch stem that fits into a 5/32" hole, allowing you to monitor the temperature from outside the incubator.
Wide Temperature Range: Measures from 25°F to 125°F, with one-degree increments for precise tracking.
Clear, Large Display: The 2-inch dial display makes temperature readings quick and convenient.
Wet Bulb Functionality for Humidity Control: Comes with pre-attached wicks that absorb water from the humidity pan, allowing you to determine relative humidity levels accurately.
Designed for Circulated Incubators: This thermometer should be used exclusively in forced-air incubators for best results.
Includes 2 Year Incucare Warranty.
Product Description:
Maintaining the correct temperature and humidity levels inside an incubator is essential for successful egg incubation. Whether you are breeding poultry, reptiles, or exotic birds, accurate environmental control is key to achieving high hatch rates. This GQF Incubator Thermometer / Hygrometer is a top-tier instrument designed to provide highly precise temperature and humidity readings, ensuring an optimal incubation environment.
This wet bulb thermometer is an industry favorite due to its accuracy, easy readability, and durable construction. It is specifically designed for use in circulated air incubators, where a fan evenly distributes heat and humidity, allowing for precise measurements that can significantly impact the success of your hatch.
This thermometer is equipped with a wet bulb system, which accurately measures relative humidity. It comes with attached wicks, which must be placed in a water-filled humidity pan. As the water evaporates from the wick, the thermometer measures the cooling effect, allowing you to calculate humidity levels precisely using a wet bulb chart.
Unlike traditional digital hygrometers, the wet bulb method is more reliable and consistent in measuring humidity, making it ideal for serious breeders and hatchery operators.
This thermometer is one of the most accurate incubator thermometers available. It is manufactured by GQF, a trusted name in incubation equipment. It features a 4-inch (10 cm) stainless steel stem designed to be inserted through a 5/32-inch hole in your incubator. This allows for easy external monitoring without opening the incubator, preventing unnecessary heat and humidity loss.
The temperature scale ranges from 25°F to 125°F (-4°C to 52°C) and is marked in 1-degree increments, allowing for precise adjustments to your incubator’s settings.
Unlike small digital displays that can be difficult to read, this thermometer features a large, 2-inch analog dial. The clear, high-contrast markings ensure that temperature readings are visible at a glance, even in dimly lit incubator rooms.
The 4-inch probe will be inserted through a small pre-drilled hole in your incubator, ensuring a secure and stable fit. This allows continuous monitoring without opening the incubator door, helping maintain stable temperature and humidity.
Why Choose the Hova-Bator GQF Incubator Thermometer?
Unlike digital thermometers and hygrometers, which can be affected by battery life, calibration issues, or sensor degradation, the Hova-Bator GQF Incubator Thermometer / Hygrometer provides consistent, reliable, and highly accurate readings.
This professional-grade thermometer is trusted by poultry, reptile breeders, and hatchery operators worldwide. It is the best choice if you need a dependable, long-lasting solution for monitoring your incubator.
How to Use the Wet Bulb Thermometer in Your Incubator
Insert the Thermometer – Place the 4-inch probe into the 5/32-inch hole in your incubator.
Position the Wick – Ensure the wick is in the humidity pan and properly soaked for accurate wet bulb readings.
Read the Temperature – Check the 2-inch dial for accurate readings in one-degree increments.
Determine Humidity Levels – Use a wet bulb temperature chart to calculate relative humidity based on the wet bulb reading.
Maintain Proper Incubation Conditions – Adjust temperature and humidity as needed for optimal hatching success.
Important Notes Before Purchase:
For Circulated Air Incubators Only – This thermometer is designed specifically for incubators with fan-driven airflow. It is not recommended for still-air incubators, as the readings may not be accurate.
Requires Knowledge of Wet Bulb Readings – This thermometer is ideal for experienced users who understand how to calculate humidity using wet bulb temperatures. If unsure, refer to a wet bulb conversion chart or online humidity calculator.
Invest in accurate incubation monitoring with this wet bulb thermometer. With precision temperature control and reliable humidity measurement, it is an essential tool for serious breeders.
Shop now and ensure the best conditions for your incubator.
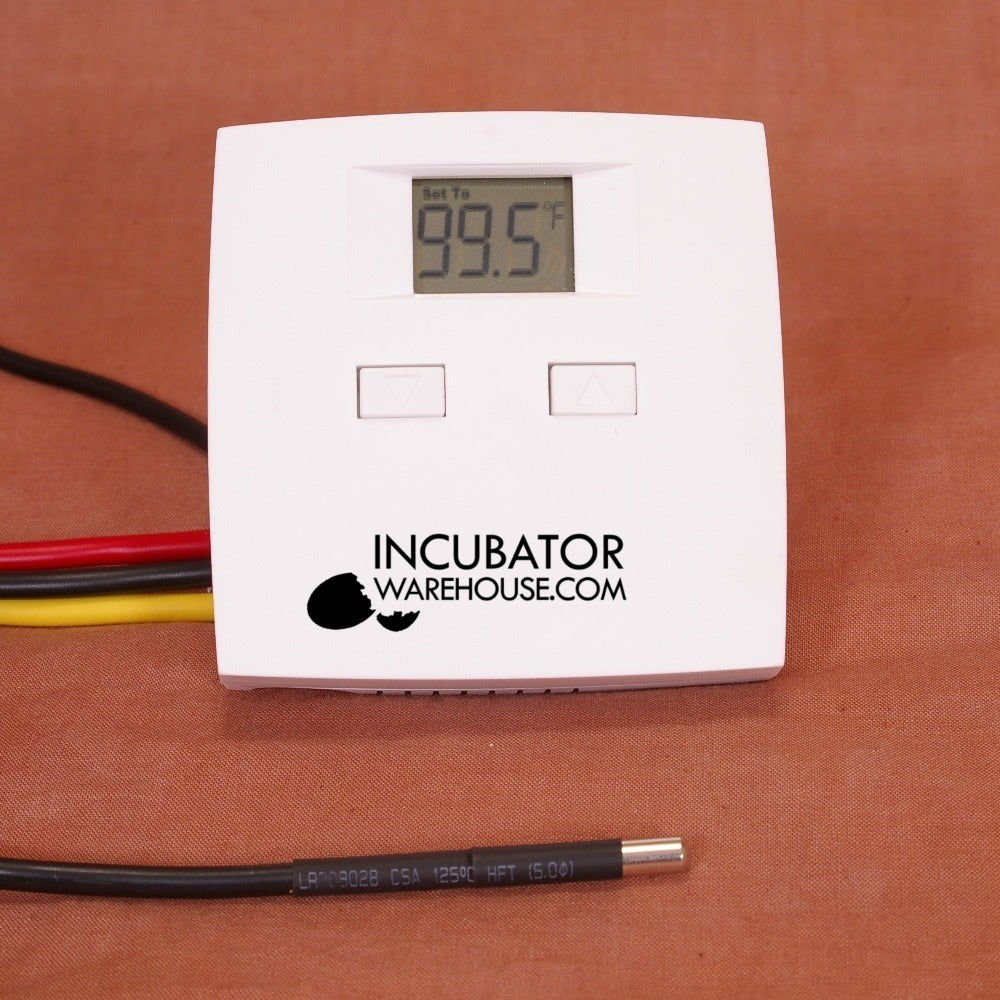


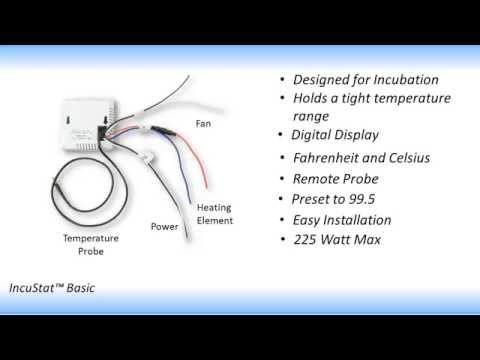


IncuStat™ Basic Digital Electronic Egg Incubator Thermostat (220/240V AC)
$64.99
About this item
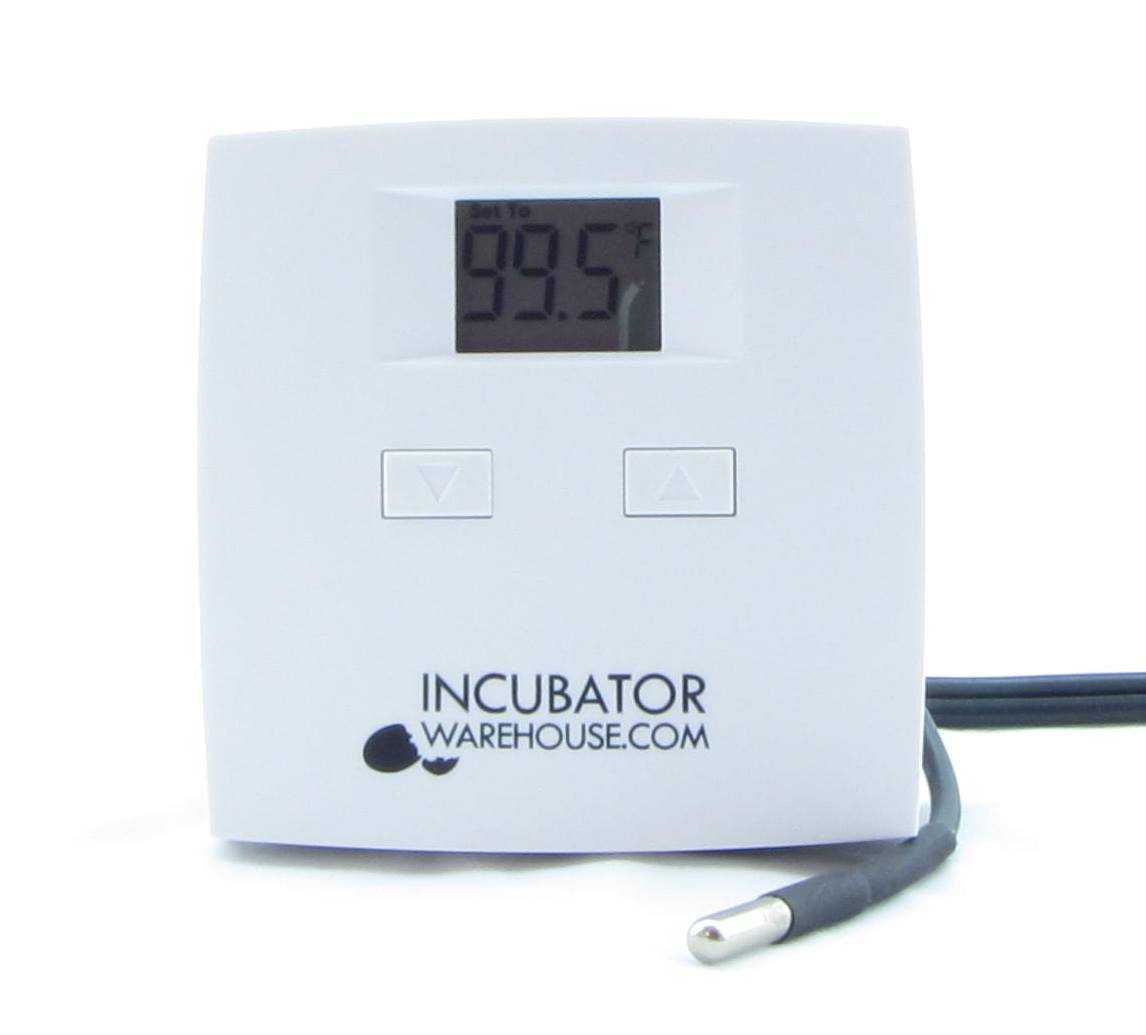
Looking for precise temperature control for your hatching setup? This digital incubator thermostat is designed to maintain consistent heat, ensuring optimal conditions for eggs, reptiles, or other temperature-sensitive environments. Whether you’re raising chicks, quail, or even reptiles, this thermostat for egg incubators offers reliable performance with minimal setup.
With its built-in temperature sensor, this incubator thermostat with sensor ensures accurate readings and quick adjustments. Ideal for DIY incubators or replacing older controls.
Product Description
The Digital Electronic Egg Incubator Thermostat is a compact and efficient temperature controller made specifically for incubation. It’s ideal for poultry, reptiles, and small-scale hatchery setups. This reptile incubator thermostat is easy to wire and program, making it a great choice for both beginners and experienced hobbyists.
This unit works by turning your heat source on or off to maintain your set temperature. The digital display shows current temps clearly, while the sensor accurately reads real-time changes. It's compatible with heating elements like light bulbs, heat tape, or ceramic heaters, making it incredibly versatile.
Whether you're building a homemade egg incubator or need a dependable controller for reptile breeding, this thermostat ensures peace of mind with every hatch.
Product Measurement
Thermostat Unit Size: 4.75" x 2.25" x 1.75"
Sensor Cable Length: Approx. 39" (1 meter)
Temperature Range: 0–110°C (32–230°F)
Display Type: Digital LED
Technical Details
Power Supply: 110V AC (Standard US Plug)
Max Load: 1,000 Watts
Accuracy: ±1°C
Sensor Type: Waterproof NTC temperature sensor
Control Type: On/Off switch control
Heating Only (no cooling function)
Additional Information
Great for poultry hatchers, DIY projects, or pet reptile enclosures
Simple wiring with labeled terminals
Clear digital display with temperature readout in °C
Lightweight and compact design for easy installation
Warranty & Support
We stand behind the quality of our products. This digital incubator thermostat includes a 6-month limited warranty against manufacturing defects. Our U.S.-based support team is available to help with setup, troubleshooting, or any product questions you may have.
For extended support or installation tips, visit our help center at Incubator Warehouse.

Replacement Single Egg Tray for Maticoopx 30 Incubator
$5.99
Single yellow egg tray for Maticoopx 30 egg incubator only, not compatible with Maticoopx 30
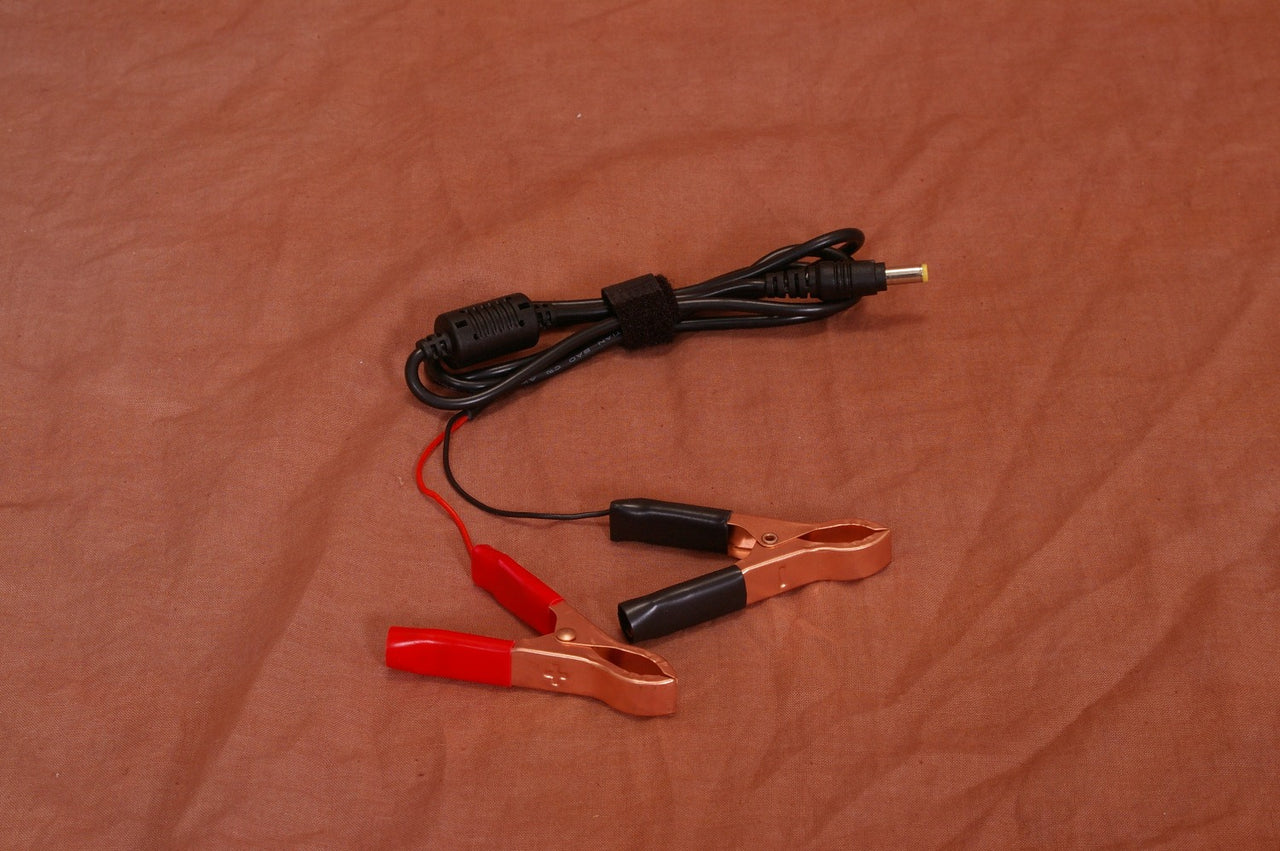


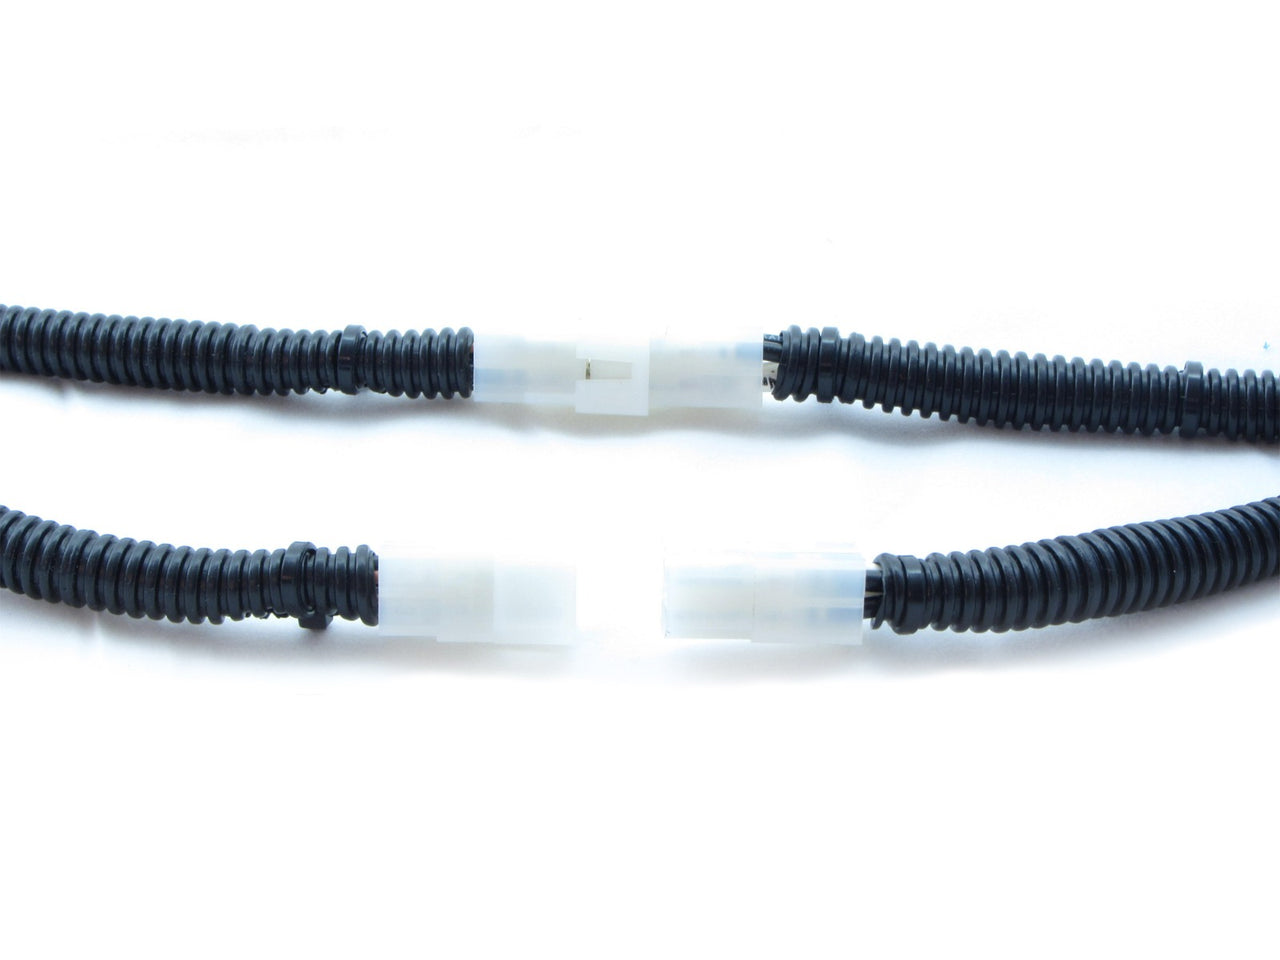
Battery Clip Connector Set for Genesis 1588 or IncuKit Mini / IncuView | 12V DC Power Solution
$14.99
IMPORTANT: Choose your incubator model above
Product Features:
Reliable Backup Power: Never worry about sudden blackouts affecting your incubator’s performance.
Simple Clip-On Design: Alligator-style battery clips ensure a strong grip on any 12V DC battery terminals.
Easy Connection: Barrel connector plugs directly into your Genesis 1588, IncuKit Mini, or IncuView incubator (Select your model above).
Versatile Power Solution: Perfect for emergency use, rural areas, and off-grid farming setups.
Plug & Play Convenience: No technical setup is required. Simply clip, plug, and power.
Includes 2-Year IncuCare Warranty.
Product Description:
If you rely on an incubator for hatching eggs, you know how critical a stable power source is. But what happens if there’s a power outage? Or what if you’re off the grid, relying on solar energy or battery power?
Introducing the Battery Clip Connector Set – the perfect solution to keep your incubator running smoothly, no matter where you are. Whether you own a Genesis 1588 Egg Incubator or an IncuKit Mini/IncuView (Choose your model above), this battery clip ensures a continuous power supply using a 12V DC battery.
Versatile Compatibility
Works with Genesis 1588 Incubator (Make sure to select correct model)
Compatible with IncuKit Mini (Make sure to select correct model)
Designed for IncuView (The IncuKit Mini model works for the IncuView)
Suitable for any 12V DC battery setup
Power outages can be unpredictable and devastating when incubating eggs. This backup power solution ensures your incubator remains operational even when the main power supply is unavailable. Simply connect the battery clip, and your incubator will continue functioning without interruption.
NOTE: Please select the appropriate connector type from the options before purchasing:
Easy Alligator Clip Connection – Securely attaches to the positive (+) and negative (-) terminals of any 12VDC battery.
Reliable Barrel Connector – Easily plugs into the power wire of the Genesis 1588 or the power port of the IncuKit DC/IncuView for a stable connection (Choose your model above).
Perfect Backup Power Solution – Ideal for those experiencing frequent power outages, ensuring continuous incubation without interruptions.
If you live in a remote location or depend on solar energy, this battery connector is the perfect power solution for your incubator. Instead of relying on unstable electricity, use a 12V battery as your primary power source.
Best Use Cases:
Solar-Powered Farms – Charge a 12V battery with solar panels and keep your incubator running 24/7.
Remote Farming Locations – Maintain stable incubation conditions without traditional electricity.
Homesteaders & Off-Grid Enthusiasts – A simple, reliable way to power your incubator anywhere.
Backup Generators – A cost-effective alternative to running a generator for incubation.
Setting up your DC battery clip connector is quick and easy. Watch this short tutorial to see exactly how to connect it with the Genesis 1588 and IncuKit DC / IncuView:
Don’t let power outages ruin your incubation process. Get your battery clip connector today and keep your incubator running smoothly anytime, anywhere.

Replacement Heater for Maticoopx 30 Egg Incubator
$28.99
This OEM replacement heater is designed exclusively for the Maticoopx 30-Egg Incubator. It restores proper, consistent heating performance and helps maintain the stable environment needed for a successful hatch.
If your incubator is struggling to reach temperature, fluctuating more than normal, or recovering slowly after the lid is opened, the heater may need to be replaced. Installing a new heater returns the unit to optimal performance.
Features
Direct OEM replacement for the Maticoopx 30-Egg model only
Restores consistent, even heat
Easy installation
Durable construction for long service life
Helps maintain ideal incubation conditions
Compatibility:
This heater is ONLY compatible with the Maticoopx 30-Egg Incubator.
It is not interchangeable with the Maticoopx 20-Egg heater or other brands/models.
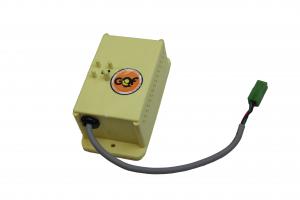

3282 - Inside Sensor Assembly (2016 & Later)
$80.99
Keep your GQF 1500 series incubator running accurately using the 3282 - Inside Sensor Assembly. Made of premium material, this replacement sensor ensures optimal humidity level stability in your incubator, resulting in better hatching results.
Product Description:
Designed to monitor relative humidity and control hatching conditions, the GQF 3282 - Inside Sensor Assembly is designed explicitly for GQF Part 1500 series incubators equipped with the 3258 Digital Command Center. This sensor provides an accurate reading in stable conditions within your incubator. This is crucial for maintaining a stable environment during the hatching process.
To ensure compatibility with this sensor, verify that the date stamped on both the front and back of your new model MS series thermostat is dated 2016 or later.
Product Features:
Perfect Fit: For GQF 1500 series incubators with the 3258 Digital Command Center.
Accuracy Humidity Control: Store eggs under proper temperature and humidity to stimulate development, ensuring the chicks grow healthily.
Durable: Long-term stability, durability, and reliable sensor readings.
Simple Installation: Your incubator features minimal downtime and a fast, easy installation process.
Sturdy Construction: Built to last, day in, day out, withstanding cravings and demand.
Technical Details:
Part Number: 3282
Model: Inside Sensor Assembly
Date Stamped Requirement: AFTER 2016
Type: Humidity Sensor
Additional Information:
Installation: No special tools are needed; the suction cup design makes setup easy.
Maintenance: Please clean dust and residue regularly to maximize sensor sensitivity.
Package: Other accessories not included
Material: Cotton.
Size details: US One
Size=China
Rightsize 18.x25.End.
Warranty:
Covered by a 2-year warranty from Incubator Warehouse, ensuring peace of mind and reliable support.
Grab Now!
Ensure your incubator operates at its peak performance with this precision sensor. Ready to upgrade to an even easier installation and quieter fan with better hatches?


Replacement Base for Maticoopx 20 (w/out Motor)
$29.99
This is a replacement base only for the Maticoopx 20-Egg Incubator. It includes just the base and motor housing/mount—no lid, heater, fan, turner, hardware, or electronics.
Only compatible with Maticoopx 20
Power Supply for Hova-Bator Genesis 1588 Egg Incubator (And all other HovaBator 12V Incubators)
$24.99
When hatch day is approaching, you need a power supply that you can trust. Our incubator power supply is designed for continuous use, ensuring that your incubator, including the popular Hova-Bator Genesis 1588, stays powered and ready to support your hatching process. With universal compatibility and a reverse polarity adapter, this power supply is built for reliability.
Product Description:
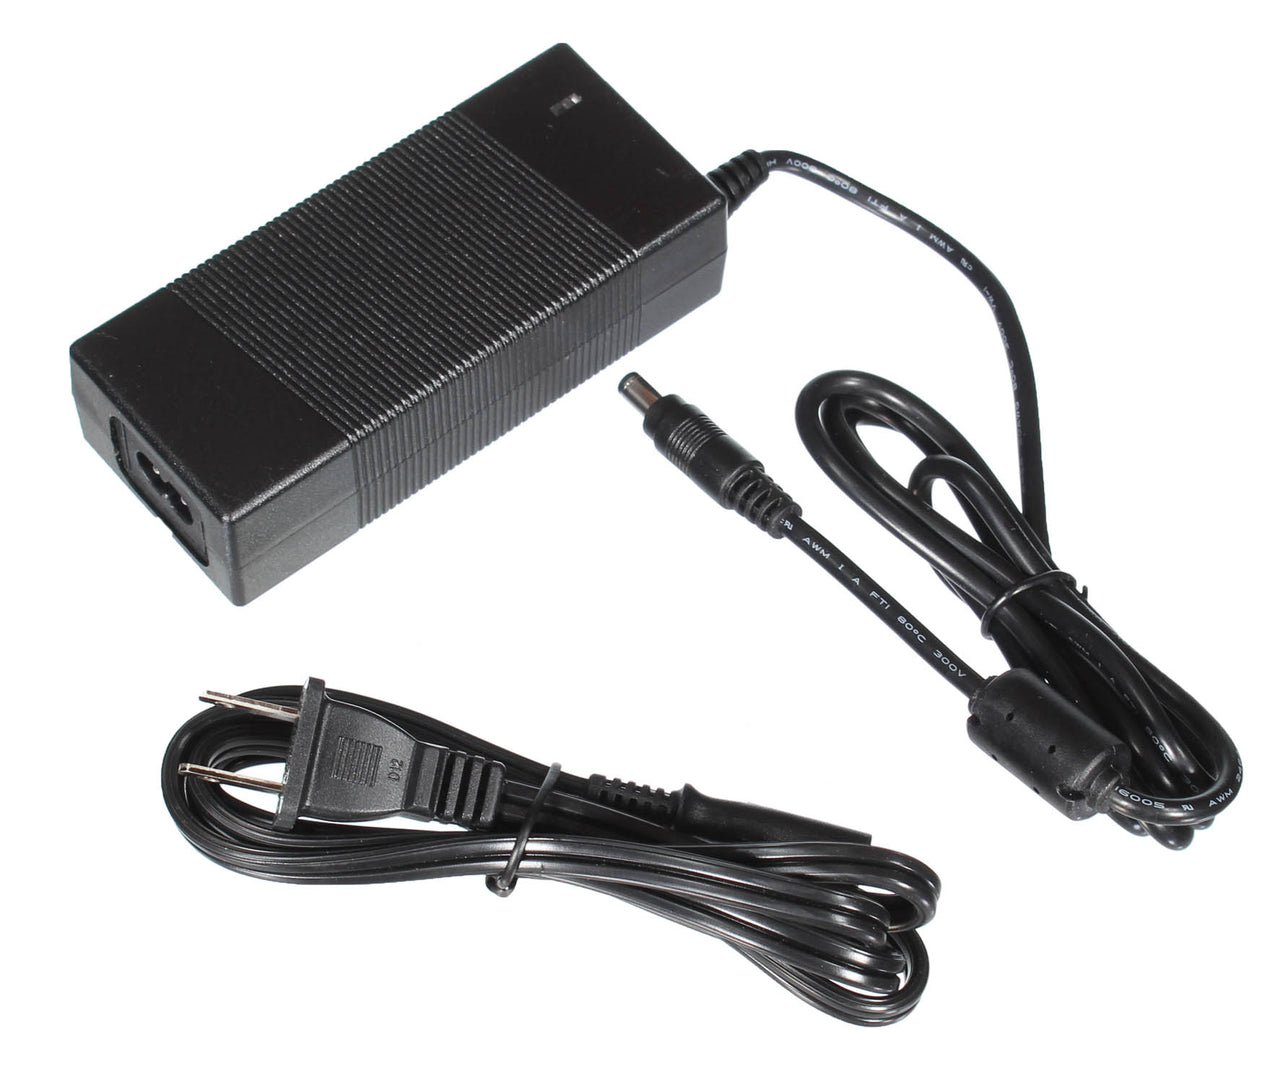
When hatch day is approaching, reliable power is crucial for success. This incubator power supply is designed to keep your Hova-Bator Genesis 1588 and other 12V incubators running smoothly, ensuring consistent energy during critical hatching hours. With a universal voltage input (110-240V AC) and 12V 5A output, it’s perfect for continuous, 24/7 use.
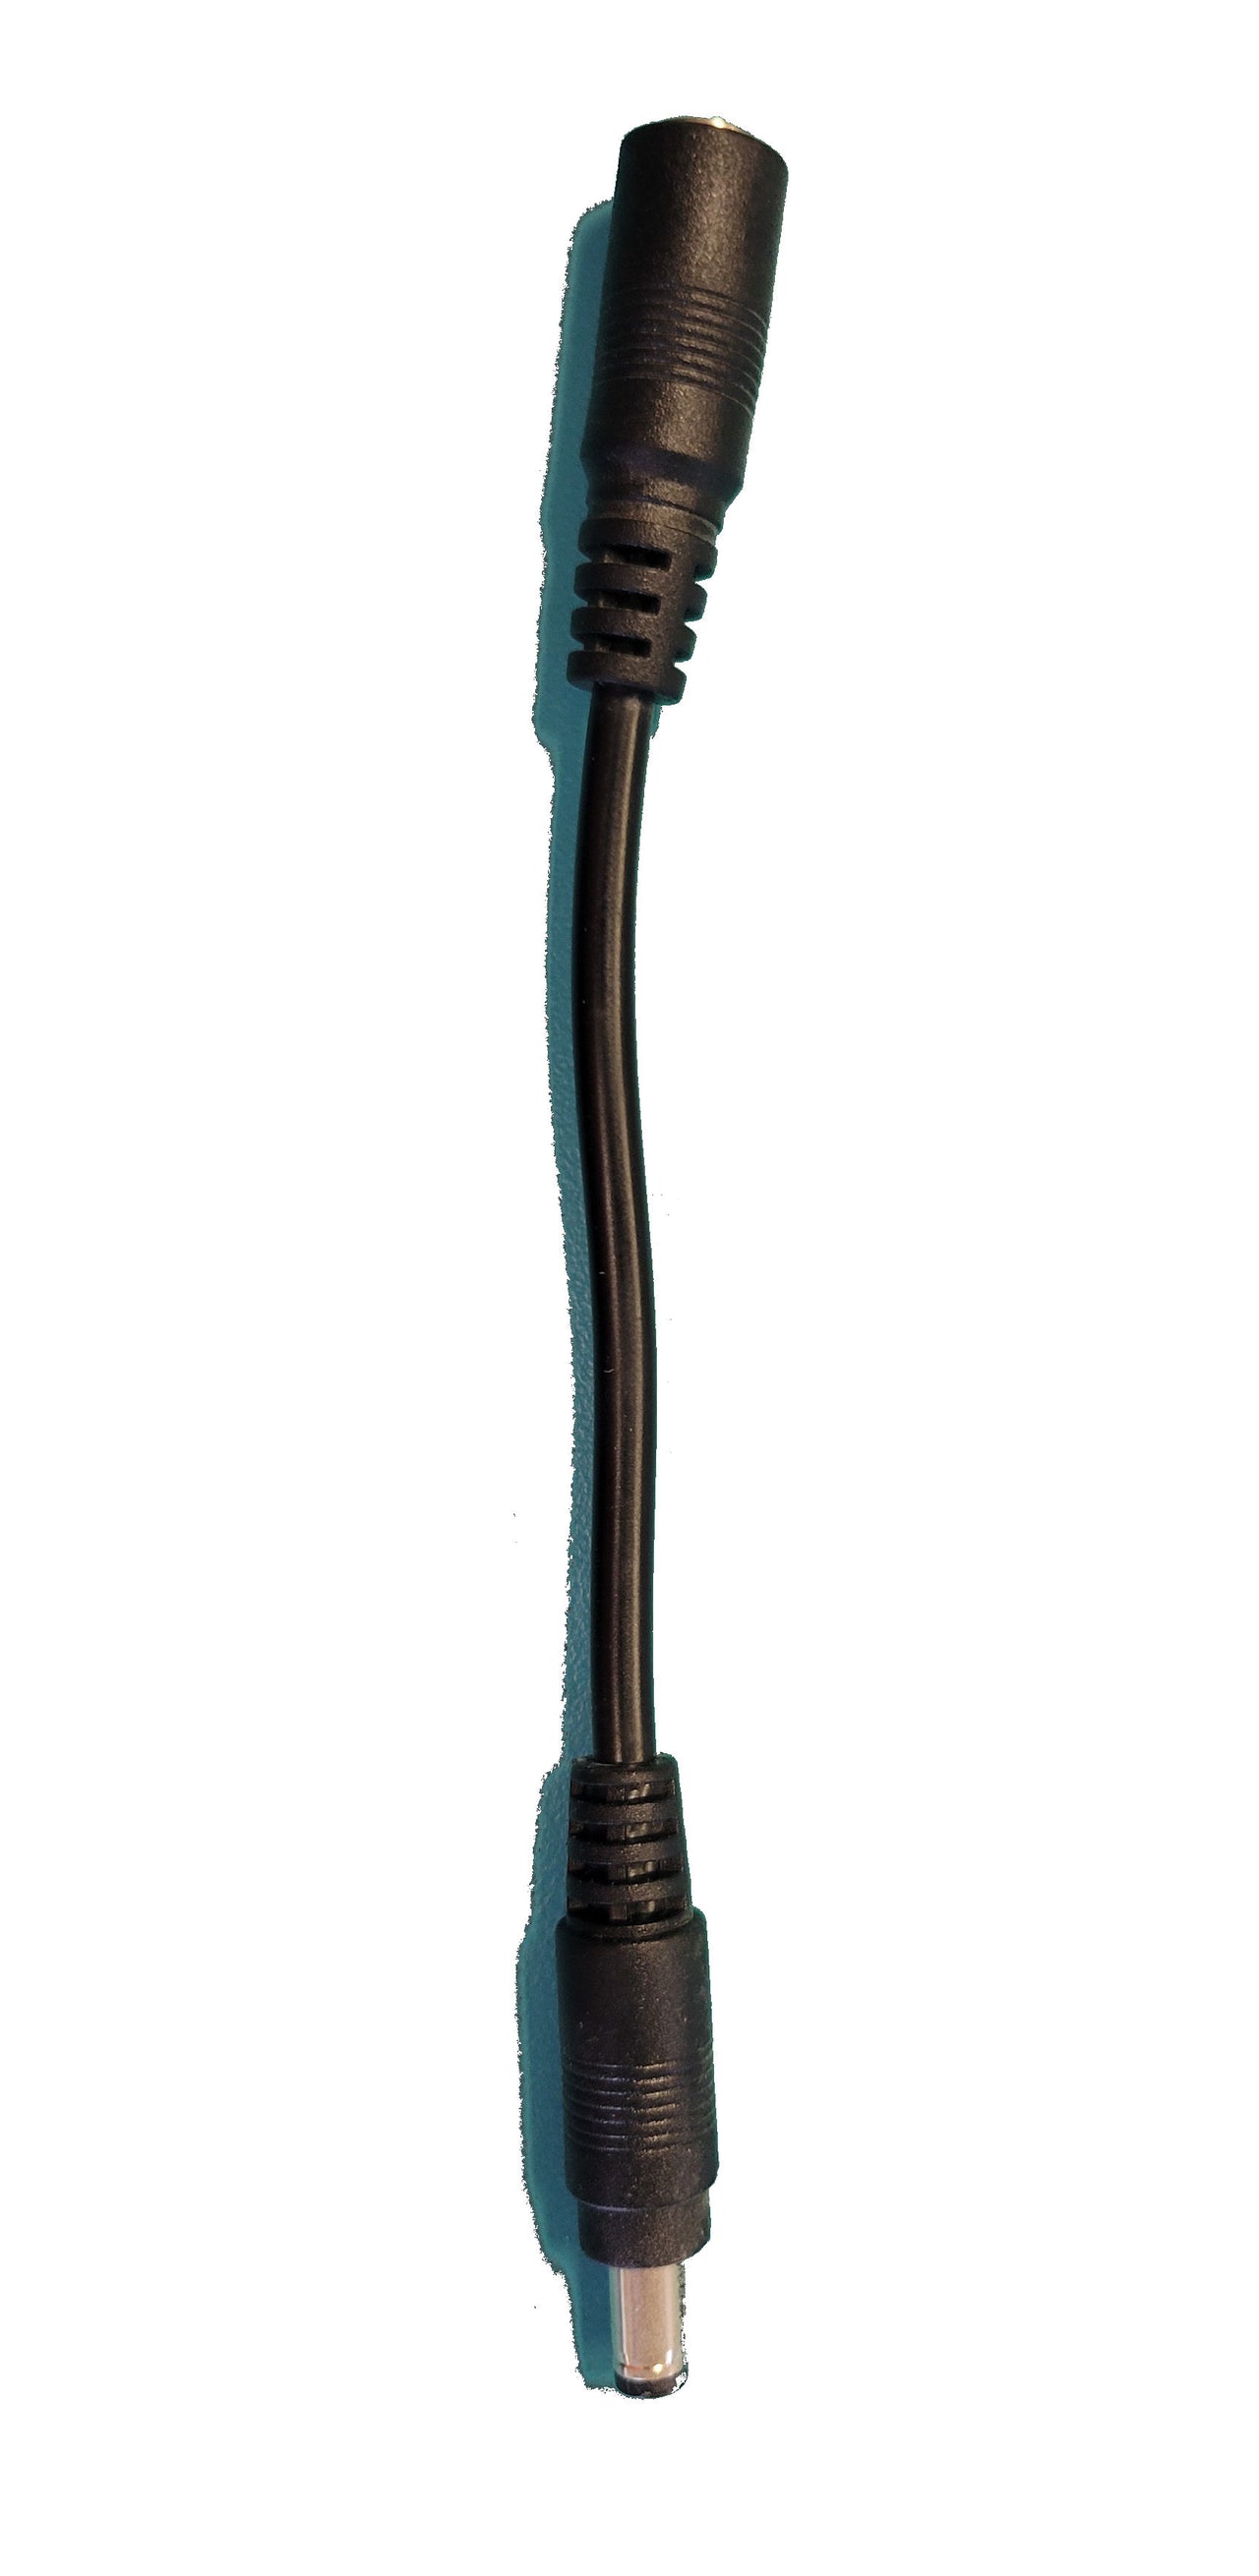
This power supply also includes a reverse polarity adapter, ensuring safe operation for Genesis models. Tested for real-world performance, it’s the ideal replacement for your incubator’s original power supply, offering peace of mind and dependable results.
Product Features:
Universal Compatibility: Works with all 12V Hova-Bator incubators, including Genesis 1588 and Nurture Right 360.
Heavy-Duty Design: Built for 24/7 use without overheating or failure.
Reverse Polarity Adapter Included: Ensures safe operation for Genesis 1588 models.
Certified Safe: UL, CE, FCC, RoHS, GS, ICC, and TUV certified for quality and safety.
Reliable Replacement: A high-performance alternative to OEM power supplies.
Compact Design: Easy to set up with a standard U.S. 2-prong plug.
Warranty Included: Comes with a Two-Year IncuCare Warranty for peace of mind.
Why Choose Our Power Supply?
This incubator power supply is perfect for poultry hobbyists, teachers, and reptile breeders who need a dependable, certified replacement. It guarantees stable energy output, keeping your Hova-Bator incubator running smoothly throughout the hatching cycle. The included reverse polarity adapter protects your Genesis 1588 from damage. Trust our power supply to maintain consistent performance during critical hatching hours.
What’s in the Box?
12V 5A Power Supply Unit
U.S. Standard AC Plug Cable
Reverse Polarity Adapter (for Genesis 1588)
Product Specifications:
Input Voltage: 110V–240V AC
Output Voltage: 12V DC, 5 Amps
Compatibility: Works with all 12V Hova-Bator Incubators
Plug Type: Standard U.S. 2-Prong
Certifications: UL, CE, RoHS, FCC, GS, TUV, ICC
Polarity Adapter: Yes (For Genesis 1588)
Warranty: Manufacturer's Warranty Applies
Customer Tips & Best Practices:
Plug in the adapter before connecting to the incubator.
Always use the polarity adapter if using the Genesis 1588 model.
Store the power supply in a dry, cool place when not in use.
IMPORTANT NOTICE:
The Genesis 1588 uses REVERSE POLARITY. Always use the included polarity adapter to prevent damage or failure. Not using the adapter may void your warranty.
Get Ready for Your Next Hatch!
Ensure your incubator gets the power it needs with our reliable 12V incubator power supply. With universal compatibility, high safety standards, and a two-year warranty, it's the perfect replacement for your Hova-Bator power adapter. Order now and ensure your next hatch goes off without a hitch!

EZ Incubator Water Trough Filler
$5.59
$7.99
Keeping the proper humidity inside your incubator is key to a successful hatch. The EZ Water Trough Filler makes it simple, precise, and mess-free. Designed for all incubator types, this tool helps you add water with ease while keeping your eggs undisturbed.
Product Description
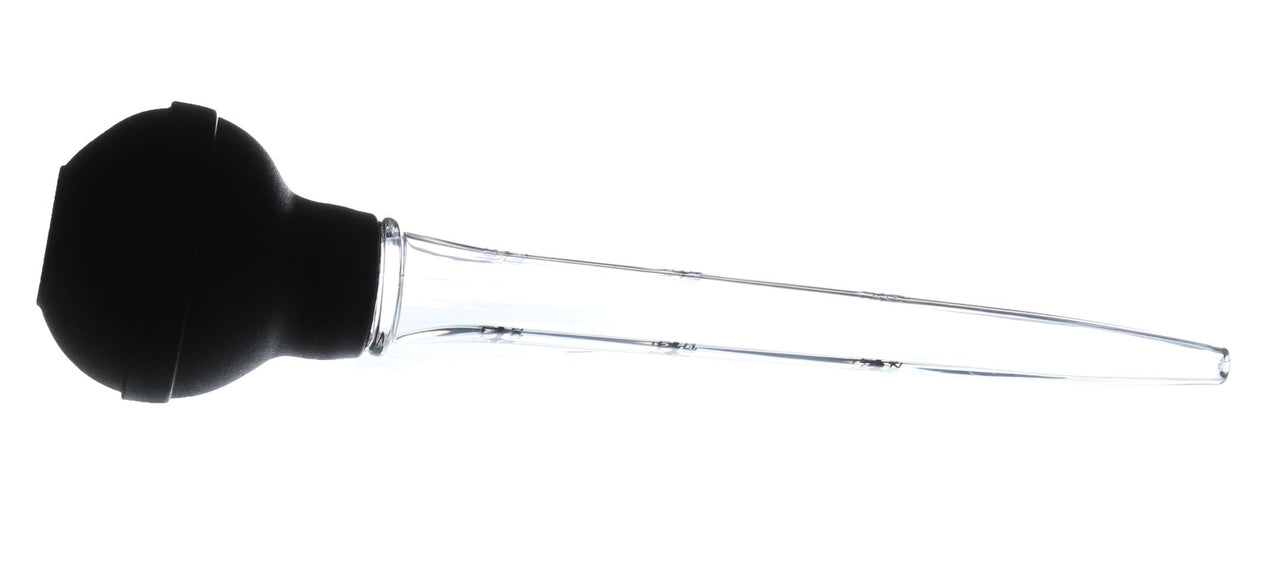
Managing incubator water levels has never been easier. The EZ Incubator Water Trough Filler from Incubator Warehouse is built to deliver precision hydration every time. Its clear tube and ergonomic bulb allow you to monitor and control water placement with zero mess.
Unlike traditional droppers or waste removers that often spill or overflow, this trough filler provides precise control. Just squeeze, aim, and release—water flows exactly where it’s needed. Whether you’re hatching chicken eggs, duck eggs, or reptiles, maintaining humidity has never been this reliable.
Product Features
Accurate water control – Prevents spills and overflows.
Universal fit – Works with all major incubator models.
Clear tube design – Easily track water flow.
Ergonomic grip bulb – for comfortable, one-handed use.
Durable build – Long-lasting for multiple hatching seasons.
No egg disturbance – Refill trays without moving eggs.
Technical Details
Material: Premium-grade plastic & rubber
Tube: Transparent, slim nozzle design
Operation: Manual squeeze bulb
Weight: Lightweight and easy to handle
Package includes: 1 Water Trough Filler.
Additional Information
Compatibility: Works with small tabletop and large incubators
Maintenance: Rinse with warm water after each use
Usage: Ideal for chicken, duck, and reptile eggs
Multi-use: Can also function as a dropper or cleaning waste remover
Warranty
This product is backed by our Two-Year IncuCare Warranty, exclusively from Incubator Warehouse. Enjoy reliable performance and peace of mind with every purchase.
Grab It Now!
Take the stress out of hatching. Maintain your incubator at the perfect humidity level with the EZ Water Trough Filler. Order now from Incubator Warehouse and hatch with confidence!
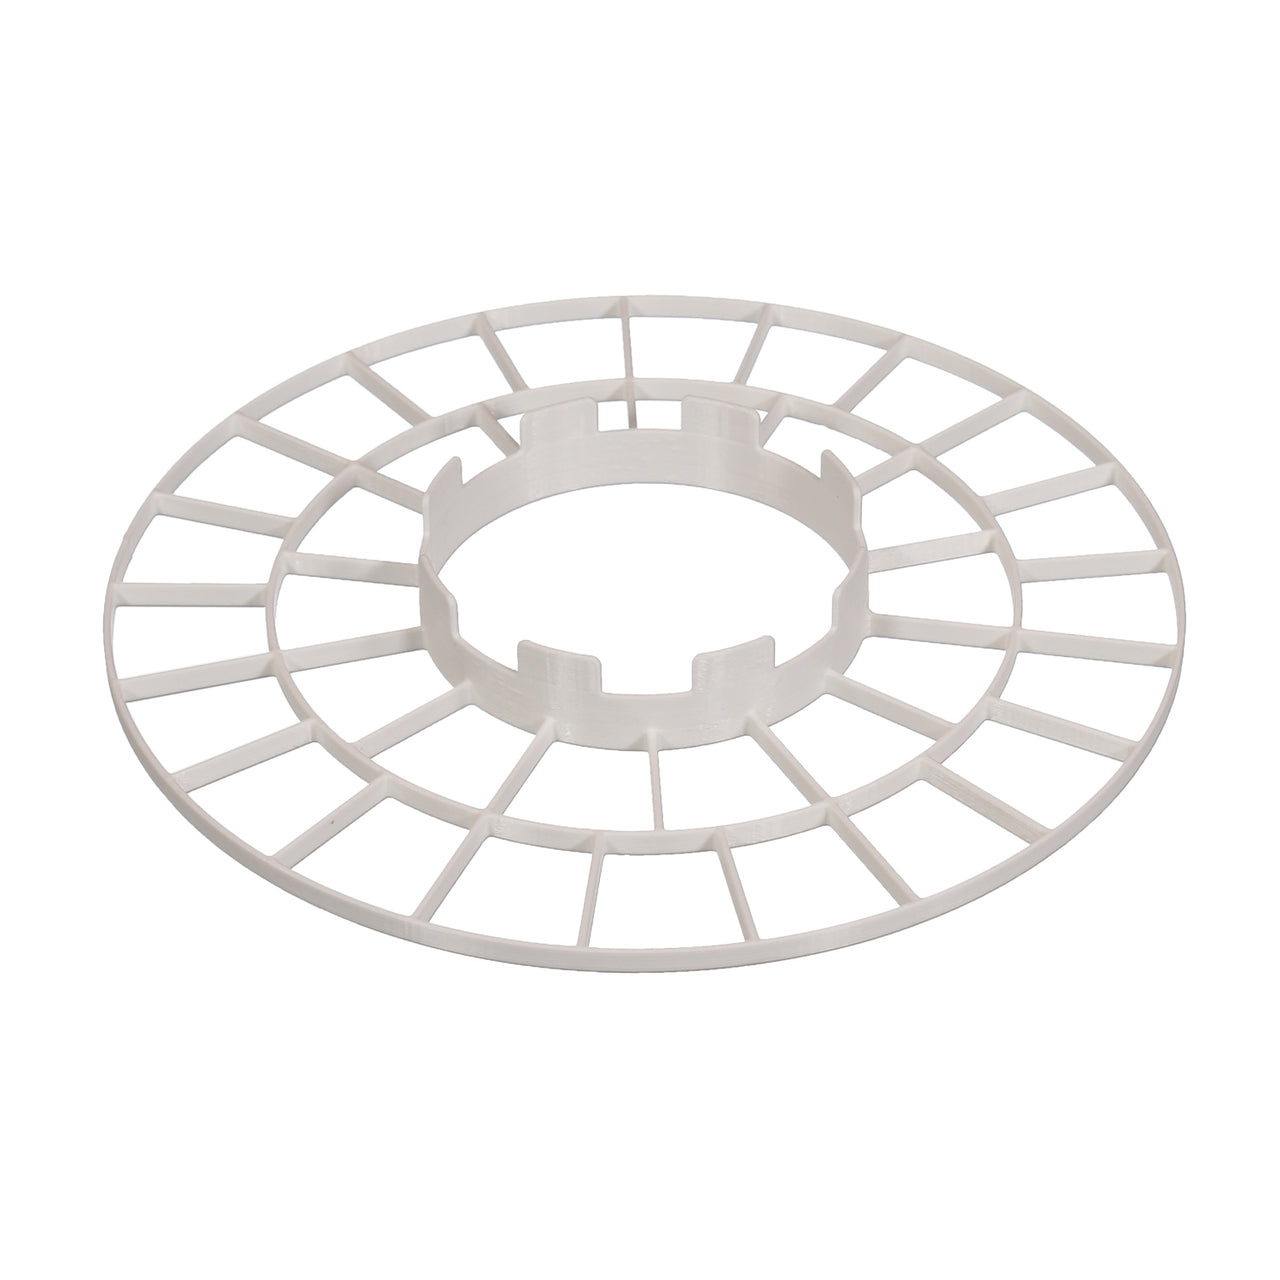
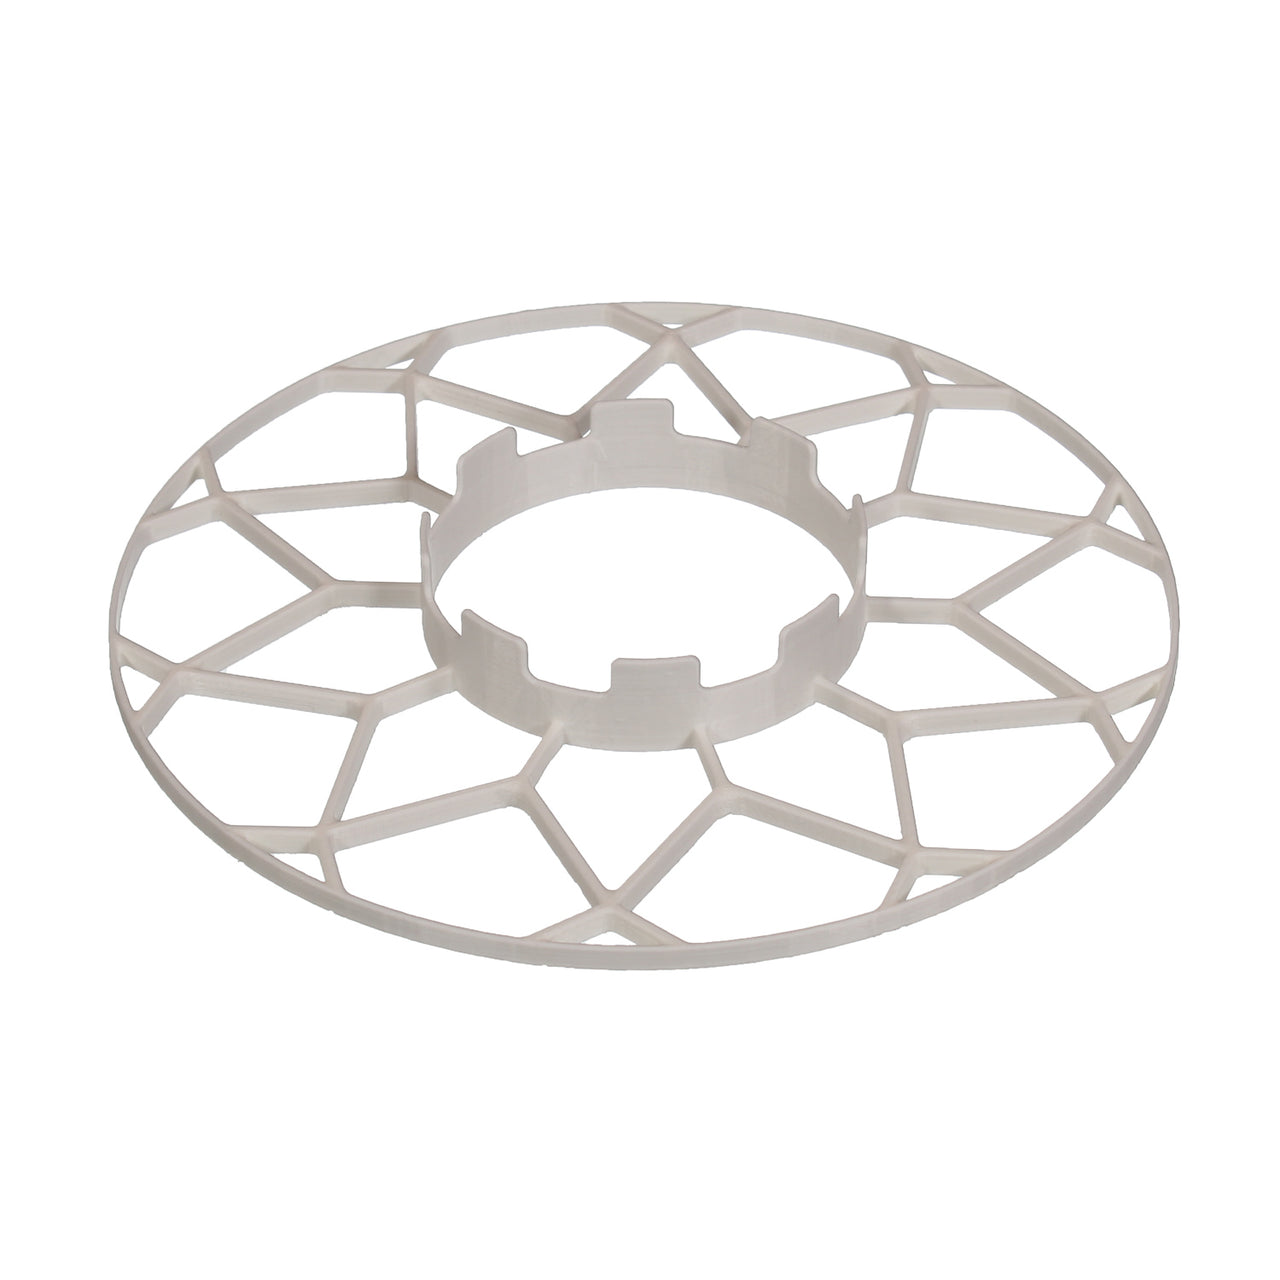
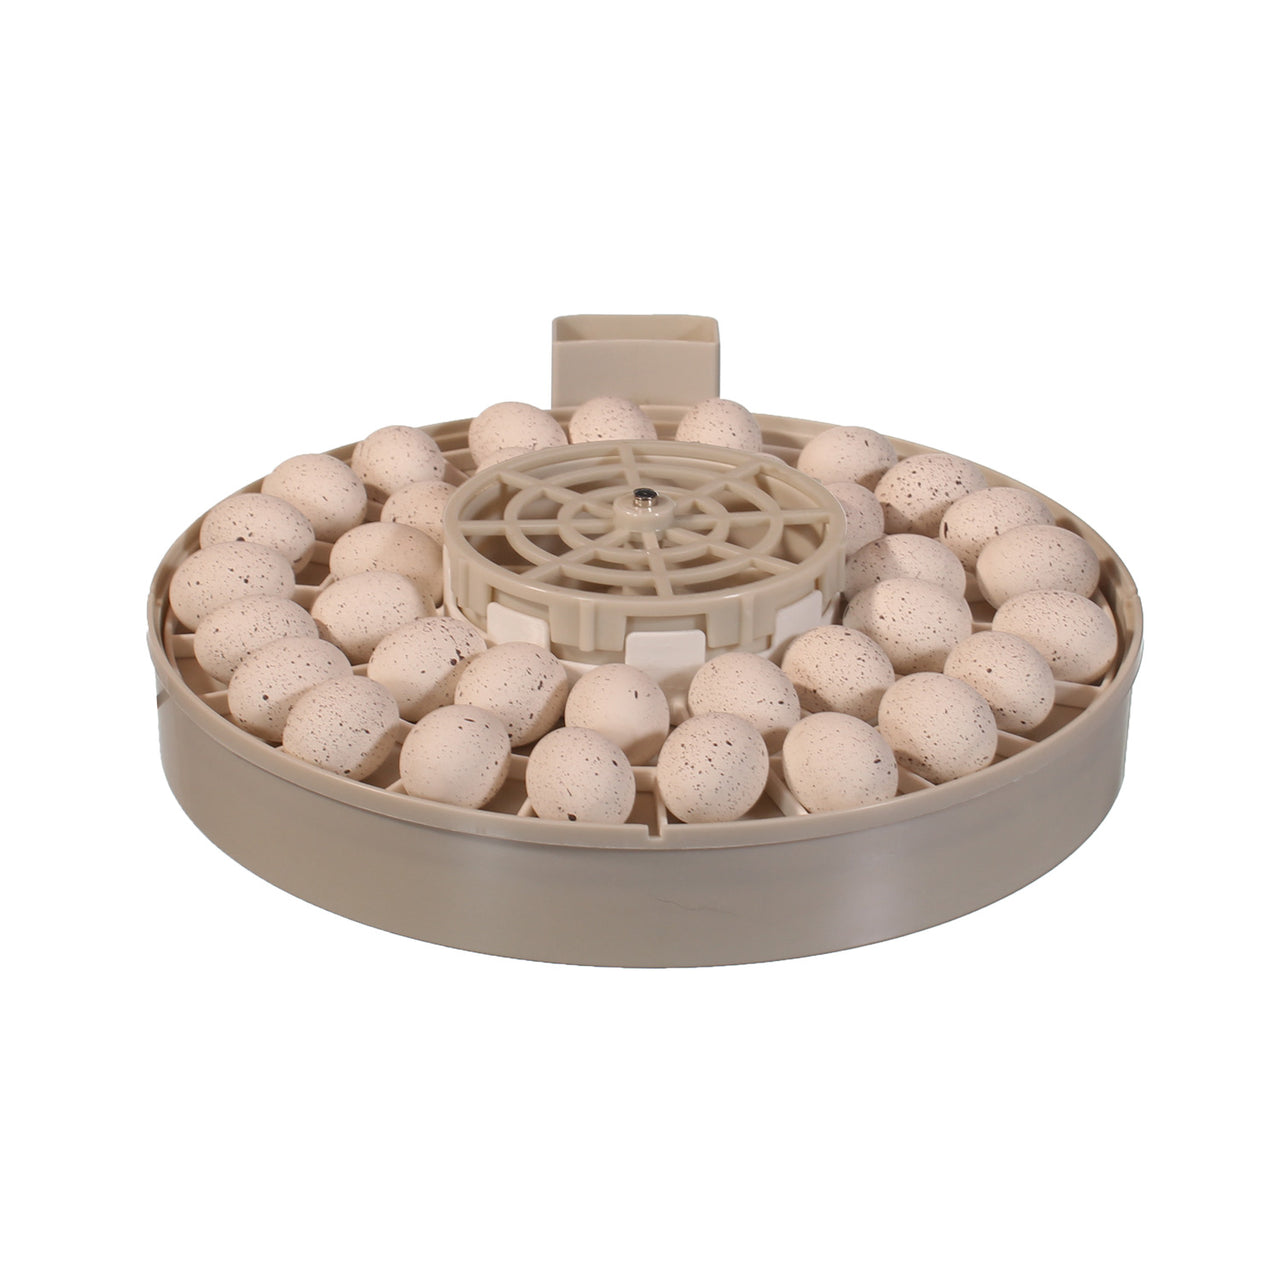
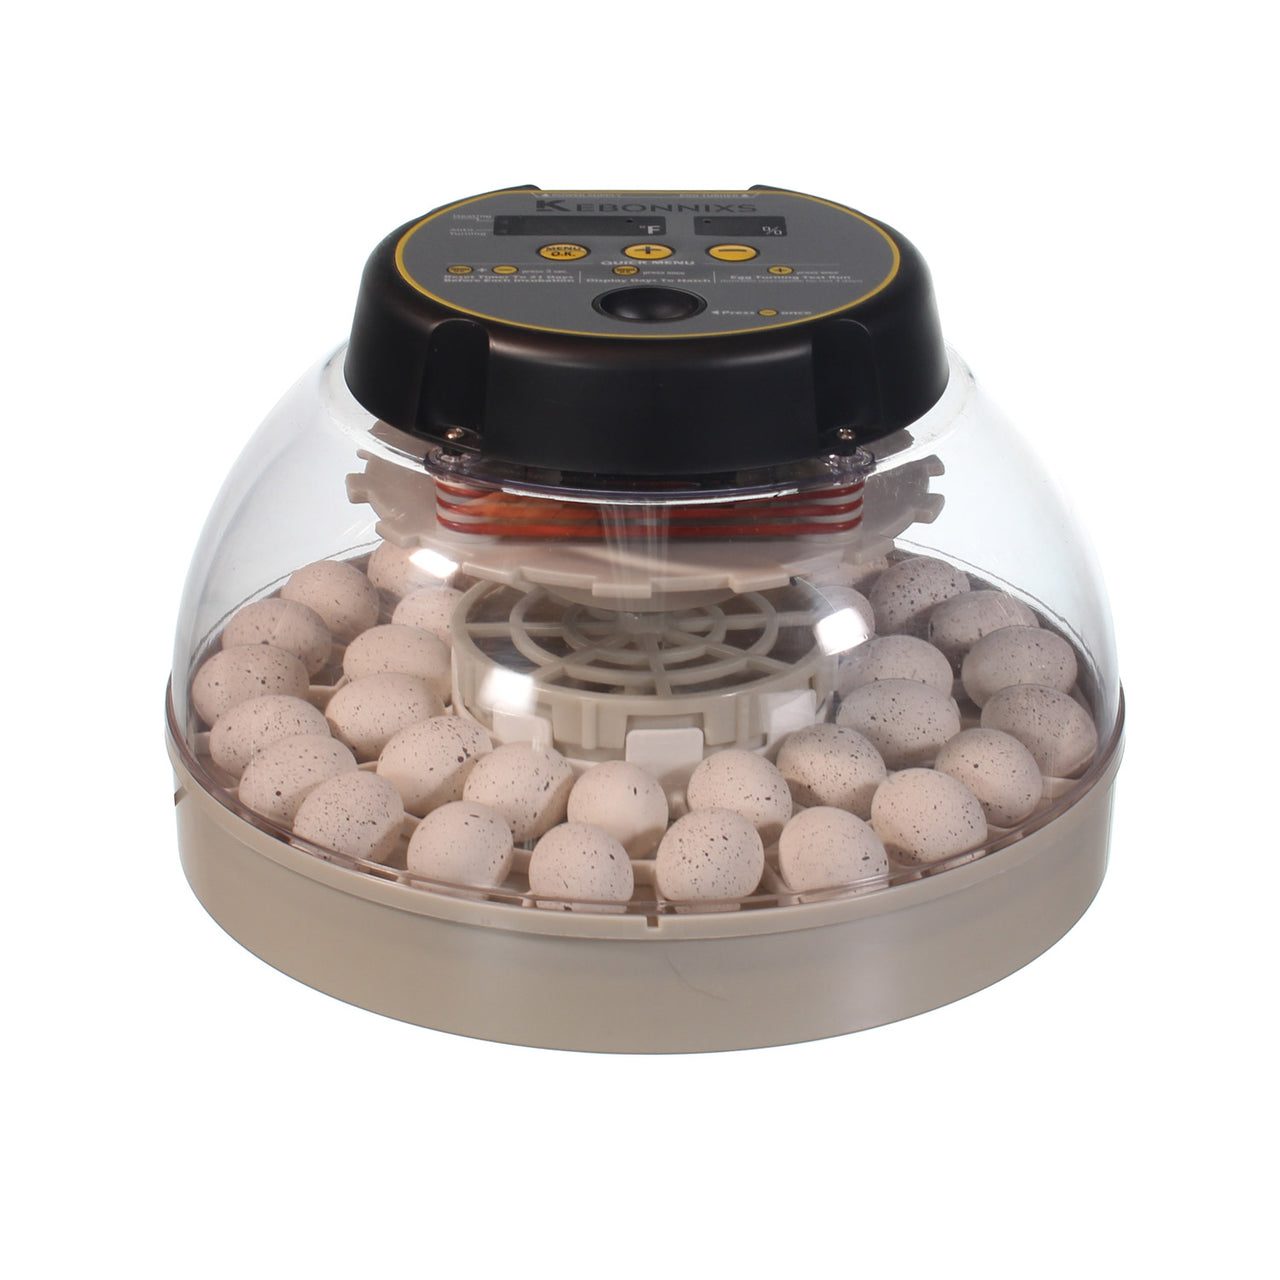
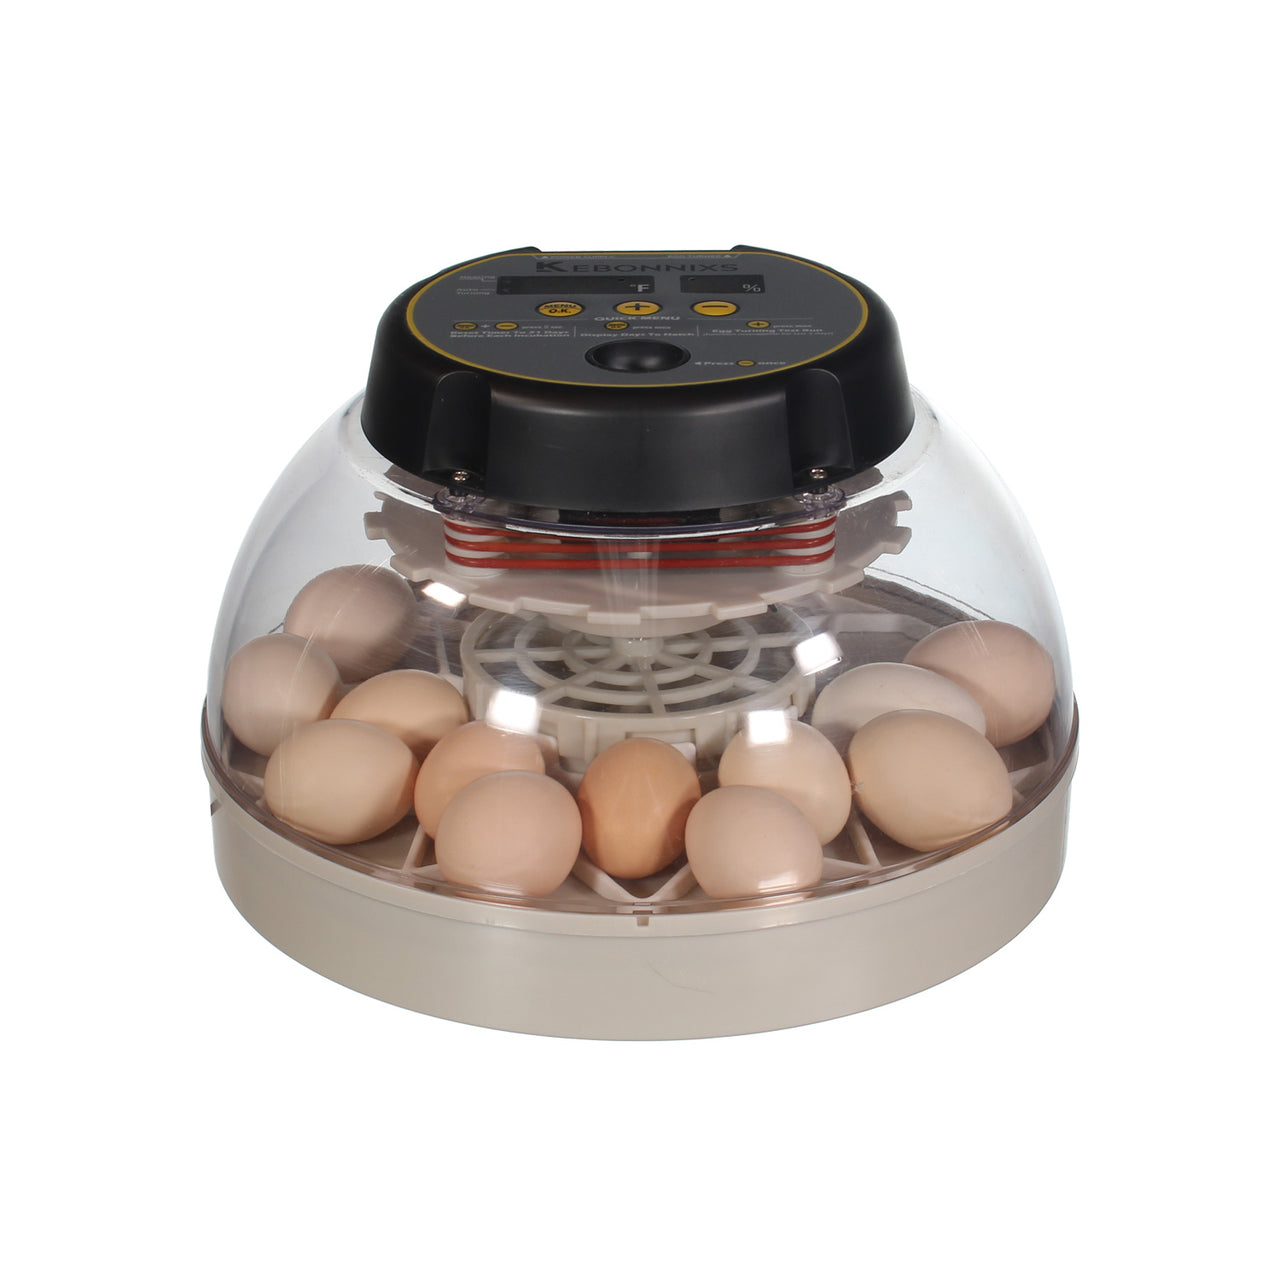


Egg Trays for Kebonnixs Egg Incubator (Various Sizes)
$19.99
$34.99
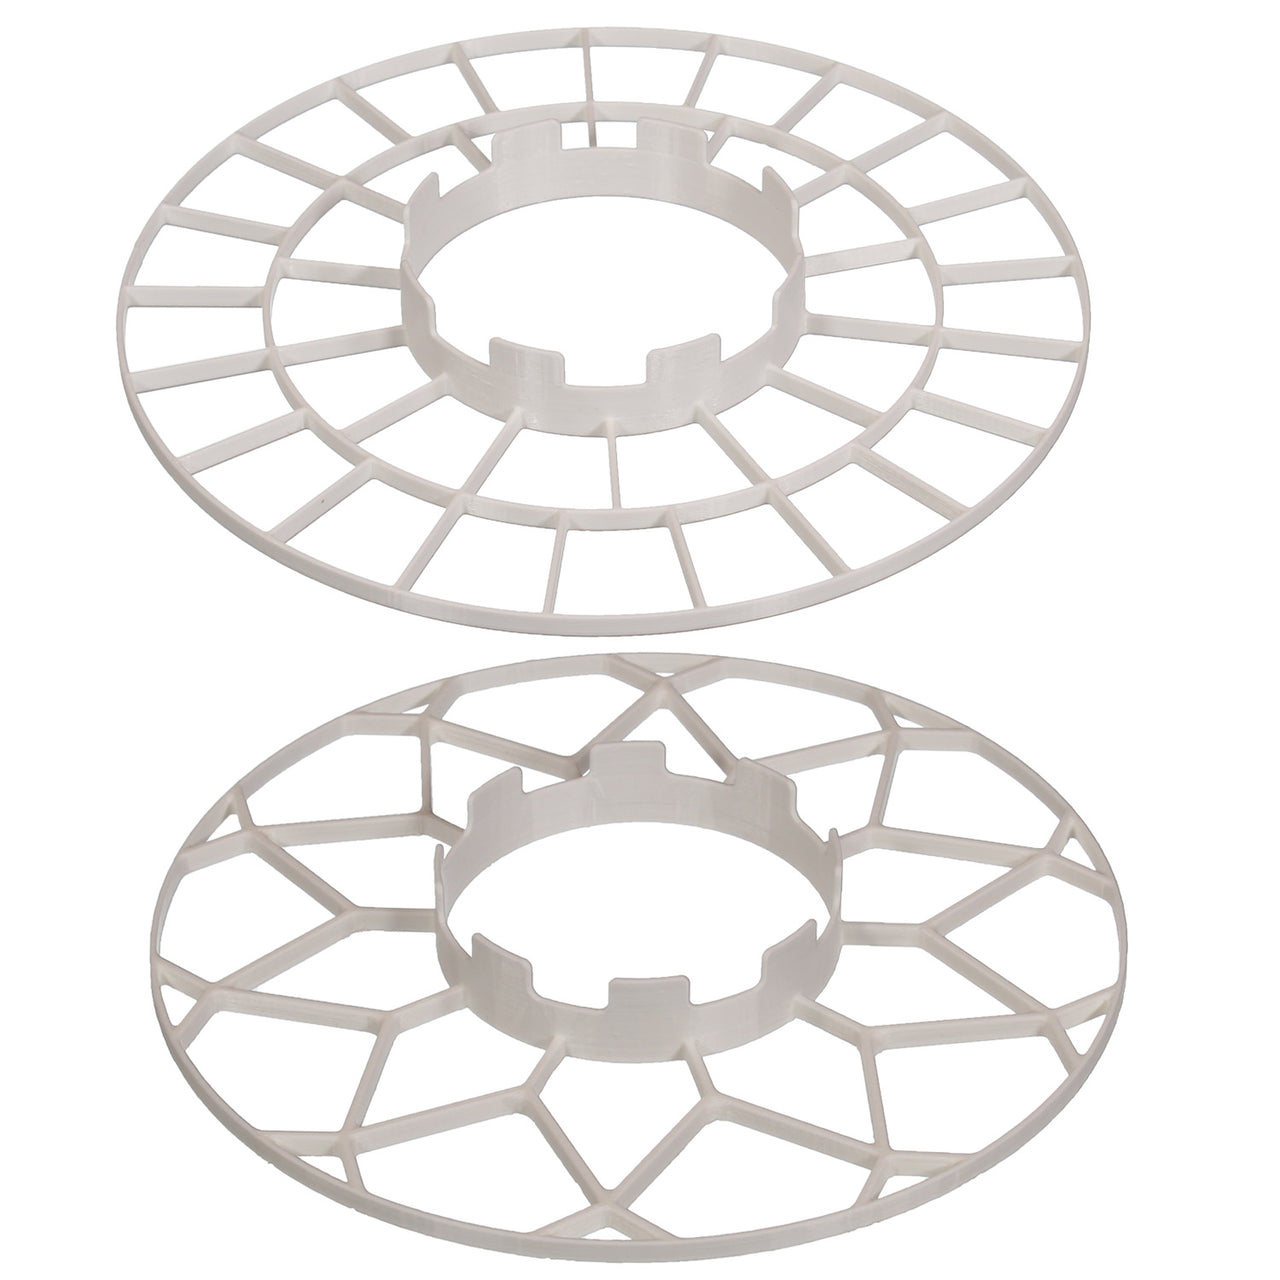
The Kebonnixs Incubator Egg Tray is built to give your incubator more flexibility. It fits perfectly with the Kebonnixs 12 Egg Incubator and allows you to hatch different egg sizes with ease. Whether you are hatching quail, small birds, or bantam chickens, these trays provide secure holding and stable placement. Made from durable plastic, the trays offer reliable use while keeping the incubation process organized and straightforward.
Product Description
This Kebonnixs Incubator Egg Tray is designed for poultry keepers who want efficiency and control. It gives you the option to expand egg capacity for smaller eggs, making incubation more versatile. Each tray serves as a strong incubator egg holder that positions eggs correctly for consistent results.
The trays are available in small and medium sizes to meet your incubation needs. Use this incubator egg tray to keep eggs secure during the entire process.
Product Features
Designed for Kebonnixs 12 Egg Incubator
Expands egg capacity for smaller eggs
Small tray holds up to 35 bird or quail eggs
Medium tray holds up to 20 bantam chicken eggs
Durable plastic construction for long-term use
Compact and easy-to-handle egg trays for the incubator
Simple to clean and maintain (not dishwasher safe)
Reliable tray incubator accessory for consistent hatching
Why Choose This Egg Tray?
The Kebonnixs Incubator Egg Tray offers flexibility and better control during incubation. Each tray functions as a sturdy incubator egg holder, accommodating eggs of various sizes. With reliable egg trays for incubator use, you can focus on achieving higher hatch success without worrying about egg placement.
Additional Information
Material: Durable plastic
Compatibility: Kebonnixs 12 Egg Incubator
Sizes: Small (35 quail/bird eggs), Medium (20 bantam eggs)
Care: Hand wash only, not dishwasher safe
Order Today
Buy your Kebonnixs Incubator Egg Tray from Incubator Warehouse now. Keep your eggs secure, increase capacity, and enjoy better incubation results.
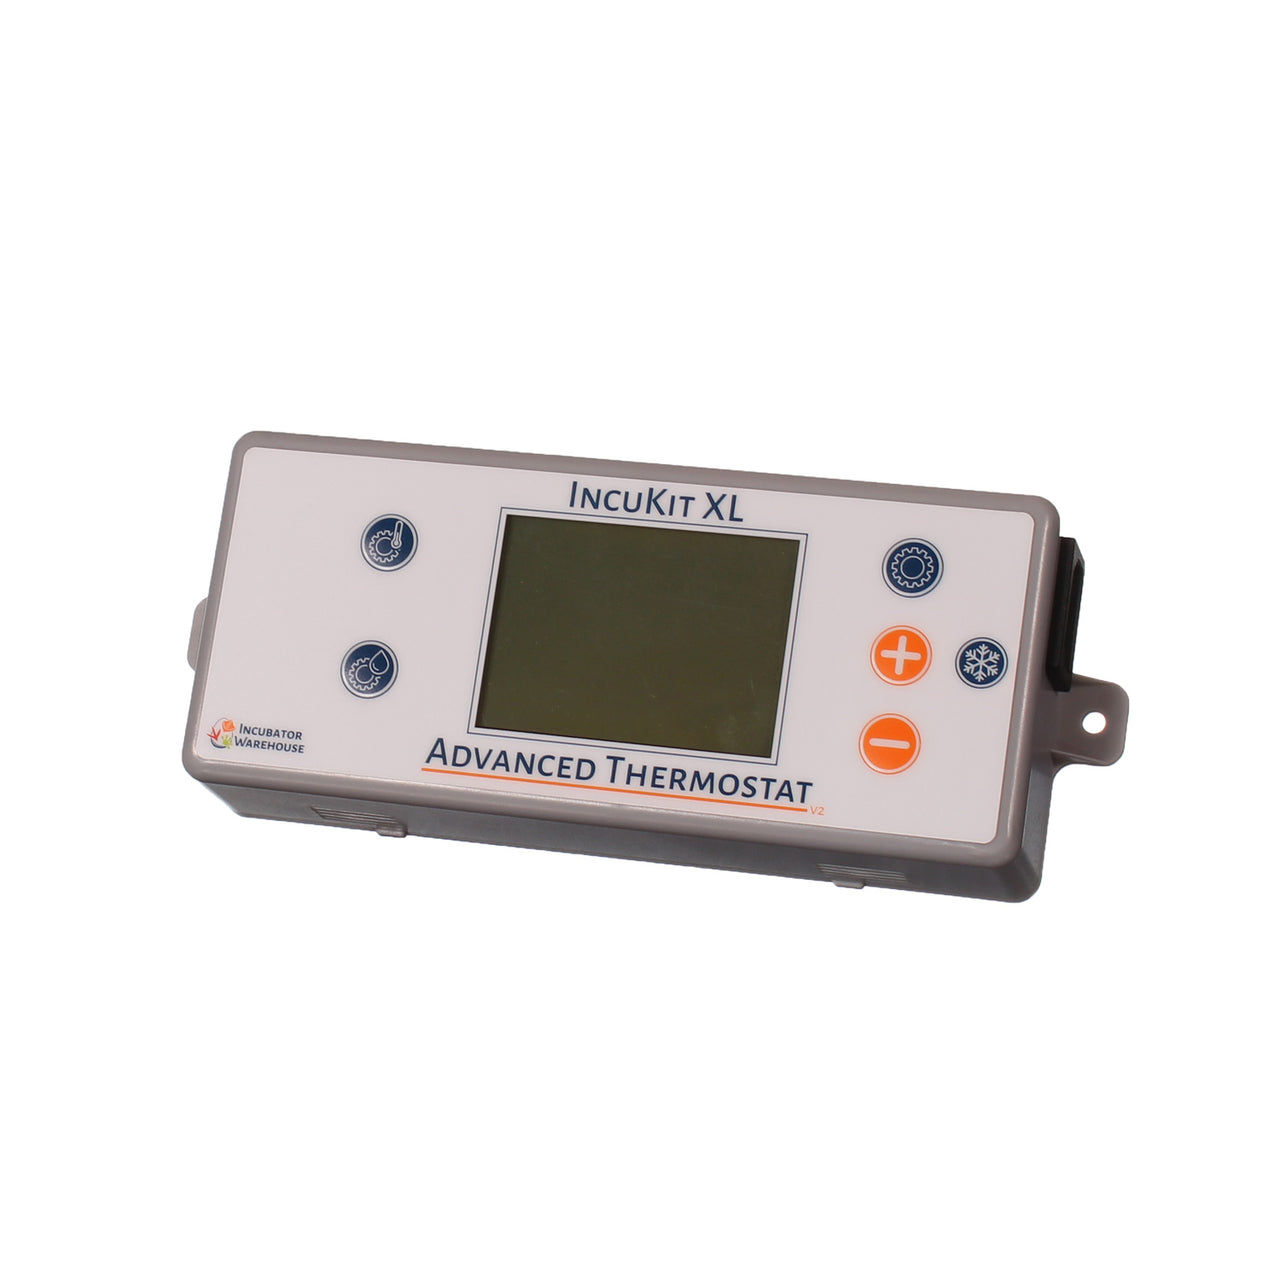

IncuStat™ Advanced for IncuKit XL
$129.99
IncuStat Advanced for IncuKit XL. This device lets you add a sophisticated control module to your cabinet (or larger-style) egg incubator. This is designed to control the temperature, air circulation and automatic turner motors in your incubator.
Key features- On/Off Thermostat- Comes pre-set to 100 degrees F (easily adjustable, if desired)- Electronically controlled - Digital display- Controls the heater, fan and egg turner motors (it is not required to use this module to control all accessories, if you desire not to)- Hatch Day Counter- Thermostat can be calibrated- 110/120v power input (Standard US Power)- Remote sensor for accurate temperature reading- Easily mounts onto your incubator- Maximum heater wattage: 300 watts total (see note below if you need more power)
NOTE: if your incubator needs more power than 300 watts, you have the option of using a heater that is always on in order to bump up the entire wattage inside the incubator. For example, if you think you will need about 350 watts for your incubator, you can put a 60-watt light bulb inside the incubator that is always on. Then when the heater that you are regulating with the thermostat is on, you will have enough power in your incubator. Feel free to contact us if you would like further clarification about this option.
What is the difference between a proportional thermostat and an on/off thermostat?
A non proportional (on/off) thermostat turns the heater on at full power when the temperature drops below the set point, and shuts it off completely once the target temperature is reached. This simple, tried and true approach works very well in most incubator set ups, especially when the incubator is well insulated. It's a great choice for DIY incubators because it's easy to set up, easy to adjust, and reliably keeps temperatures in a safe range for hatching. A proportional thermostat, by comparison, constantly adjusts the power to the heater depending on how close it is to the target temperature. While that can reduce temperature swings slightly, the added complexity often isn't needed.
Motor control:
This unit also features a built in motor control function, programmed to turn on for 13 seconds every 2 hours. This is ideal for automatic egg turning in many DIY incubator setups. Please note: This timing is pre-programmed and not adjustable.
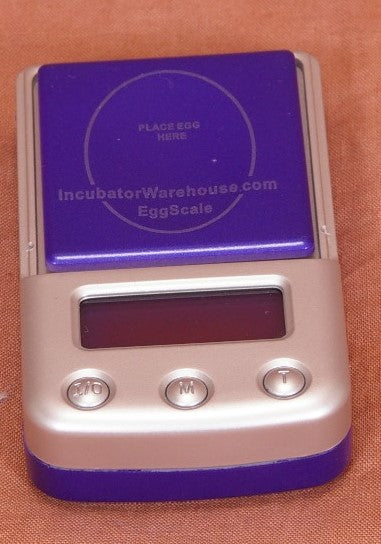
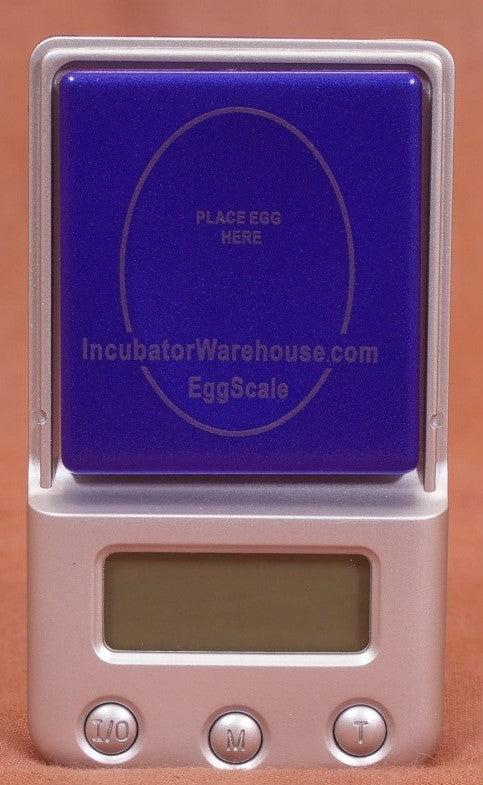
Digital Egg Scale for Egg Incubation, Sizing & Humidity Measurement
$20.99
Product Features:
Boost Hatch Rates: Precisely measure egg weight loss to maintain the right humidity during incubation.
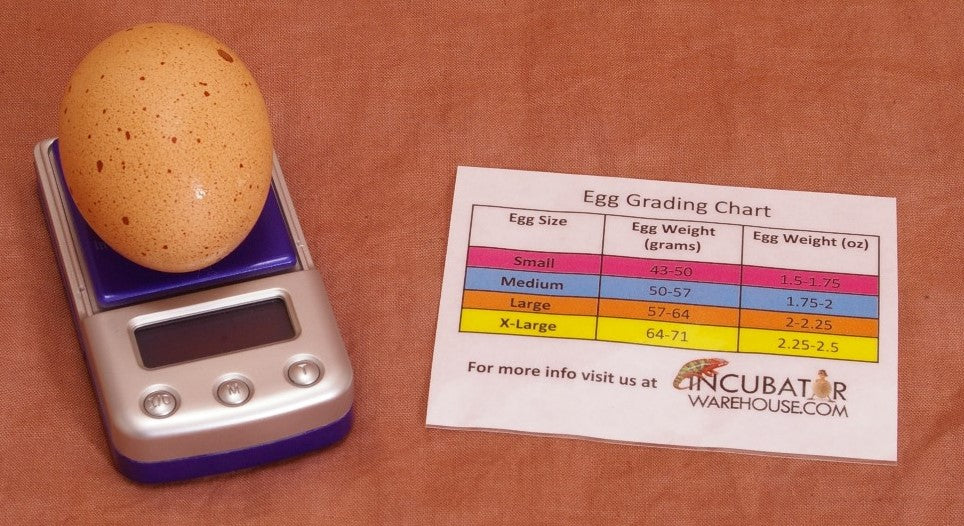
Profit from Sizing Eggs: Identify and size eggs for higher pricing using the included egg grading chart.
Compact and User-Friendly Design: The recessed egg tray prevents rolling, and the scale's sleek size makes it easy to store.
Universal Egg Compatibility: Weigh eggs of all sizes, from quail to goose eggs.
Multiple Measurement Units: Switch between grams, ounces, dwt, and gn for maximum flexibility.
Clear LCD Display: Read measurements easily on the blue backlit display, even in low-light conditions.
High Precision: 500g capacity with ±0.1g accuracy ensures flawless measurement every time.
Complete Package: Comes with batteries and step-by-step instructions for effortless setup and use.
Two-Year IncuCare Warranty.
Product Description:
Looking to improve your egg hatching success or make the most of your egg sales? This digital egg scale from Incubator Warehouse is designed to help you precisely monitor egg weight, making it easier to control humidity during incubation and grade your eggs for profit. With its compact design, easy-to-read display, and step-by-step instructions, this scale is a game-changer for anyone managing eggs – from small backyard flocks to larger operations.
One of the most accurate ways to control humidity in your incubator is by tracking the weight loss of your eggs during incubation. Why? Eggs naturally lose water as they incubate, which causes them to lose weight. This weight loss gives you direct insight into whether the humidity levels are too high or too low. By using this egg scale, you can measure that weight loss precisely and adjust the humidity to ensure your eggs are on track for successful hatching.
The scale even comes with simple step-by-step instructions to make this process easy, even if you're new to incubation. If you've ever struggled with maintaining the right environment for your eggs, this tool will take the pressure off.
Did you know that larger eggs, like jumbo sizes, can sell for significantly more than smaller ones? The ability to correctly size your eggs is key to maximizing your profits. With the included egg size chart, you'll be able to quickly and accurately grade your eggs, ensuring every carton you sell meets the standards for maximum value. Whether selling at a local farmers' market or to distributors, this scale ensures you're pricing your eggs appropriately.
This scale easily handles everything from tiny quail eggs to massive goose eggs. The recessed weighing tray keeps eggs from rolling around, so even delicate or oddly shaped eggs stay secure during measurement. Whether weighing a batch of small eggs or selling larger ones, this scale is built to accommodate various needs.
Let's talk about how easy this scale is to use. The compact design means it won't take up much space in your workspace, and it's lightweight enough to move around wherever you need it. The bright blue backlit LCD display makes it super easy to read the numbers, even in dim light. You can also switch between units of measurement (grams, ounces, grains, etc.) with just the push of a button. Plus, it's accurate to 0.1g, so you'll always get reliable results.
With a capacity of up to 500g, you'll have no trouble weighing eggs of any size. Batteries are included, so you can start using it right out of the box—no extra trips to the store. With its durable construction, this scale is built to stand up to regular use. And here's the kicker: it's covered by our Two-Year IncuCare Warranty, so you can buy with confidence, knowing you're getting a high-quality product that the company stands behind.
If you've been struggling with inconsistent hatch rates or unsure how to size your eggs properly, this scale is exactly what you need. It's simple, affordable, and packed with features that make a real difference. Whether you're incubating eggs or running a small-scale egg business, this tool will save you time, money, and stress.
Order the digital egg scale today and start managing your eggs with confidence. It's the small investment that delivers big results.

3255 - Deluxe Multi-Turn Electronic Thermostat with Plug
$119.99
The 3255 multi-turn thermostat is a key part for your GQF incubator. It helps keep the temperature steady and precise. This thermostat improves control over older single-turn models. Use it to replace wafer thermostats or older electronic controls. It fits well with GQF cabinet incubator parts.
Product Description:
This 3255 multi-turn thermostat offers precise temperature control, better than single-turn thermostats. One full turn changes the temperature by only 1.7°F. The thermostat works at 110 volts and supports up to 400 watts. It replaces older wafer thermostats and non-preset electronic thermostat models. Designed for use with GQF cabinet incubator parts, it fits perfectly. This unit is reliable and backed by a 2-year IncuCare warranty.
Product Details:
Multi-turn design for precise temperature control
One full turn changes the temperature by 1.7°F
Operates on a 110-volt power supply
Supports up to 400 watts maximum load
Fits GQF cabinet incubator parts
Replaces older 3225 and wafer thermostats
Easy plug-in installation for quick replacement
Features:
Accurate temperature adjustment with multi-turn design
Compatible with GQF incubator parts and cabinet incubator parts
Supports 110 volts and 400 watts maximum power
Replaces older 3225 and wafer thermostats
Easy plug-in setup for quick replacement
Comes with a 2-year IncuCare warranty
Technical Details:
Model Number: 3255
Voltage: 110 Volts
Maximum Wattage: 400 Watts
Temperature Change per Turn: 1.7°F
Replacement For: 3225, wafer thermostats, and non-preset electronic thermostats
Fits: GQF cabinet incubator parts
Warranty:
This 3255 multi-turn thermostat includes a 2-year IncuCare warranty. The warranty covers defects in materials and workmanship. If you face any issues, contact Incubator Warehouse for support and replacement.
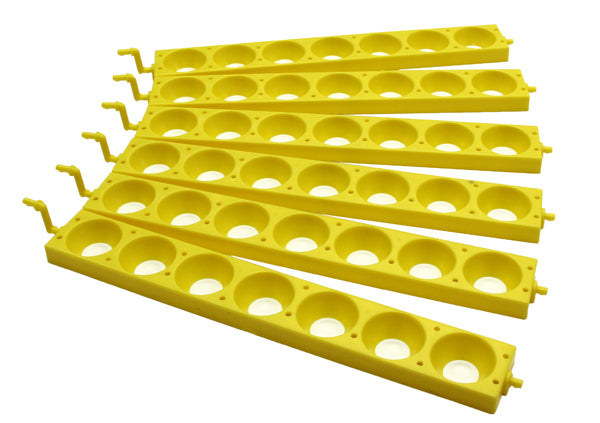

1696 - Pkg. 6 Plastic Universal Egg Rack for Hova-Bator Automatic Egg Turners
$22.99
Product Features:
Set of 6 Universal Egg Racks: Ideal for use with the HovaBator Automatic Egg Turner (sold separately).
Holds Various Egg Sizes: Fits up to 41 quail eggs with the turner installed.
Durable & Easy to Clean: Made from high-quality plastic for long-lasting use.
Fits All Hova-Bator Incubators: Works with different models.
2-Year IncuCare Warranty.
Product Description:
Are you looking for a reliable replacement or additional egg racks for your HovaBator automatic egg turner? This set of 6 plastic universal egg racks is the perfect solution. It fits easily into your HovaBator turner and keeps your eggs safe while they hatch. Made from high-quality plastic, these racks help eggs stay in the best condition. Whether you raise chickens for fun or as a business, these chicken racks make hatching easy and reliable.
A high-quality egg rack helps to keep eggs in the right position, maintain proper egg orientation, and create the best hatching conditions. These racks let eggs turn smoothly by mimicking natural incubation processes, helping more chicks hatch. Whether you're new to hatching or have years of experience, these racks make incubation easier and more efficient.
How to Use the HovaBator Universal Egg Racks
Clean & Prepare: Make sure the incubator and turner are clean.
Attach the Racks: Snap the 6 plastic racks into the HovaBator turner.
Place Eggs: Put eggs in the racks securely.
Start Incubation: Turn on the incubator; the turner will move the eggs automatically.
Monitor Conditions: Keep an eye on temperature and humidity.
Prepare for Hatching: Move eggs out of turner and into a hatching tray when it's time.
Important Notes:
Not compatible with Little Giant egg turners: These racks are specifically designed for HovaBator models.
Turner not included: This set includes only the six plastic egg racks (automatic turner sold separately).
Don't let broken or missing egg racks affect your incubation success. Purchase this set of 6 universal egg racks for your HovaBator automatic egg turner and keep your incubation process running smoothly.