


About this item
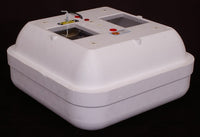
Looking for a dependable and budget-friendly way to hatch your own chicks? The Hova-Bator Thermal Air Incubator is an affordable egg incubator that’s perfect for beginners, hobbyists, and small farm owners. This manual egg incubator is easy to use and ideal for those looking for a starter incubator for hatching eggs at home or in small-scale operations.
Whether you're hatching chickens, ducks, or other poultry, this simple egg hatching incubator provides consistent results without complex technology.
Product Description
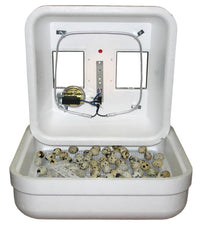
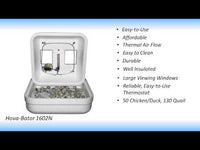
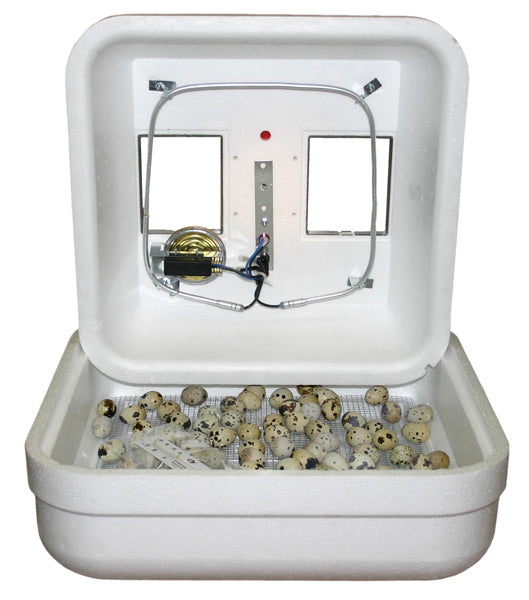
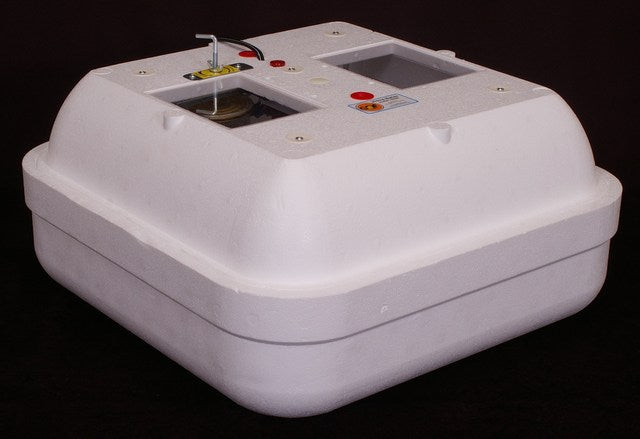
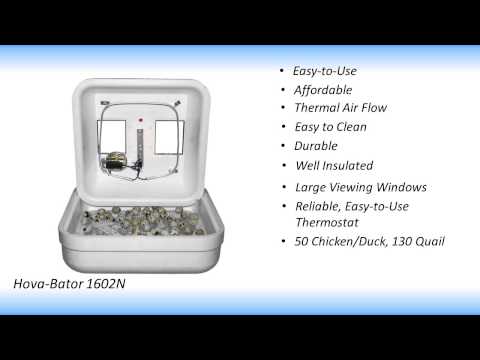
The Hova-Bator is often called the best incubator for chicken eggs in its class and for good reason. Designed with a thermal air flow system, it maintains a uniform temperature throughout the interior, creating an ideal environment for hatching eggs naturally. It works through still-air circulation, which is effective for low-volume, hands-on hatching.
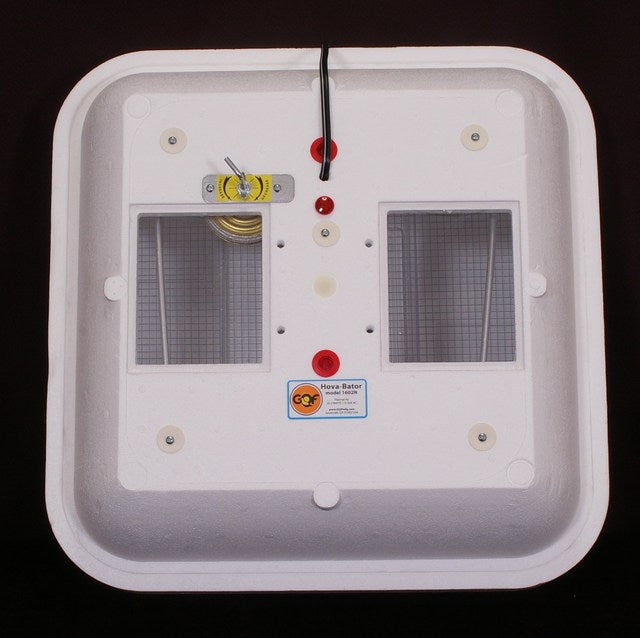
This reliable egg incubator for small farms includes a durable Styrofoam shell for excellent insulation, helping to regulate temperature and reduce power consumption. You can manually turn the eggs, allowing you to be fully involved in the incubation process great for learning or teaching.
Perfect for classrooms, homesteads, or small poultry enthusiasts, the Hova-Bator incubator balances simplicity, control, and reliability.
Product Measurement
- Dimensions: 18" x 18" x 7.5"
- Capacity: Holds up to 41 chicken eggs
- Weight: Approx. 3.5 lbs
-
Material: High-insulation Styrofoam with a clear plastic window
Technical Details
- Type: Manual egg incubator (no automatic turner)
- Power Supply: 110V AC
- Thermostat Type: Preset wafer-style
- Heating Method: Still-air thermal flow system
-
Ideal For: Chicken, duck, quail, and other small poultry eggs
Additional Information
- Transparent viewing window for easy observation
- Lightweight and portable design
- Excellent for educational use and small-scale poultry hatching
- Helps build a hands-on hatching experience
-
An optional turner and fan kit is available for upgrade
Warranty & Support
The Hova-Bator Thermal Air Incubator includes a 1-year limited warranty covering manufacturing defects. Need help getting started or troubleshooting? Our dedicated support team is here to guide you. Visit our support center for tips, FAQs, and product assistance.
QUESTIONS & ANSWERS
Ask a Question-
Can an incubator purchase be financed?
Unfortunately, we do not do any financing for any of our products. Credit cards will be your best bet if you are hoping to pay off an order.
-
My house is cool in winter. Can I put a blanket over the Incuview Incubator to insulate it?
This is an excellent question. If you are unable to keep the room temperature up in the room where the incubator is, you can definitely add some extra insulation. Insulation could be a blank, rag, Styrofoam, etc. As you insulate your incubator it is very important to keep in mind the need for ventilation. It is very easy to cut off air flow when adding insulation. However you choose to insulate make sure air can still freely flow in and out of your incubator.
-
How does humidity work in incubation and hatching? Do you need different amounts of humidity for incubation and hatching?
Proper temperature and humidity levels are very important for a successful incubation. If either one of these numbers are significantly off it can ruin an entire incubator full of eggs. In this answer I will go over 6 tips for more accurate manual humidity control while incubating. Make sure you have done your research and understand the basics of incubation, it is important to have some knowledge of what you are doing before you even think about firing up your incubator. 1. Making sure you have the proper tools is important to any successful incubation. To properly read your humidity levels you will want to use a hygrometer. This is a tool for measuring humidity levels and is a necessity for incubation. Accurately knowing your humidity levels will help to increase hatch rates. 2. Different species of eggs may require different humidity levels. It is very important to research your species and the humidity levels recommended. 3. Most incubators come with a built-in water reservoir in the base of the unit…many of these bases have several small reservoirs for holding water. We suggest starting with the smallest water reservoir, add enough water to fill it and then let your incubator run for about 30 minutes. After the unit has had time to warm up and stabilize check your readings. You may find that your readings are too low, if this is the case add water to the next reservoir and repeat the above process. If your readings are too high you can add a new dry sponge to the incubator to help absorb any excess moisture. 4. All reservoirs filled and still low on humidity? Add a shallow/wide container of water to the incubator or, if there is not enough room a clean wet sponge will do the trick. Remember its surface area not depth that affects humidity production. 5. Need less humidity but you only have water in the smallest reservoir? To cut down on the exposed surface area of the water and reduce humidity levels add some pieces of styrofoam to the reservoir. 6. Several different models of incubators require you to remove the lid to add more water to the reservoirs. This can cause dramatic fluctuations in temperature and humidity. By attaching a 12 inch length of aquarium airline hose to the end of a clean condiment style squeeze bottle you can fill the reservoirs via the vent hole on the top of the incubator.
-
Does it turn eggs?
This listing is for the incubator only and does not include an egg turner. To see all options that include an egg turner click here.
Product Instructions & Documents