Product Features:
Precise Humidity Regulation: Automatically controls humidity for ideal conditions.
Digital Programmable Hygrostat: Customizable settings for consistent performance.
Instant Humidity Delivery: Ensures optimal air moisture levels immediately.
Enhanced Air Circulation: Provides fresh, clean air for eggs.
Convenient 1-Liter Capacity: Designed for distilled water; lasts up to a week in tabletop incubators.
Effortless Installation: Quick and easy setup.
Expandable Reach: Tubing extends up to 30 inches for versatile use.
Broad Compatibility: Works seamlessly with most incubators.
Trusted Durability: Backed by a two-year IncuCare Warranty.
Product Description:
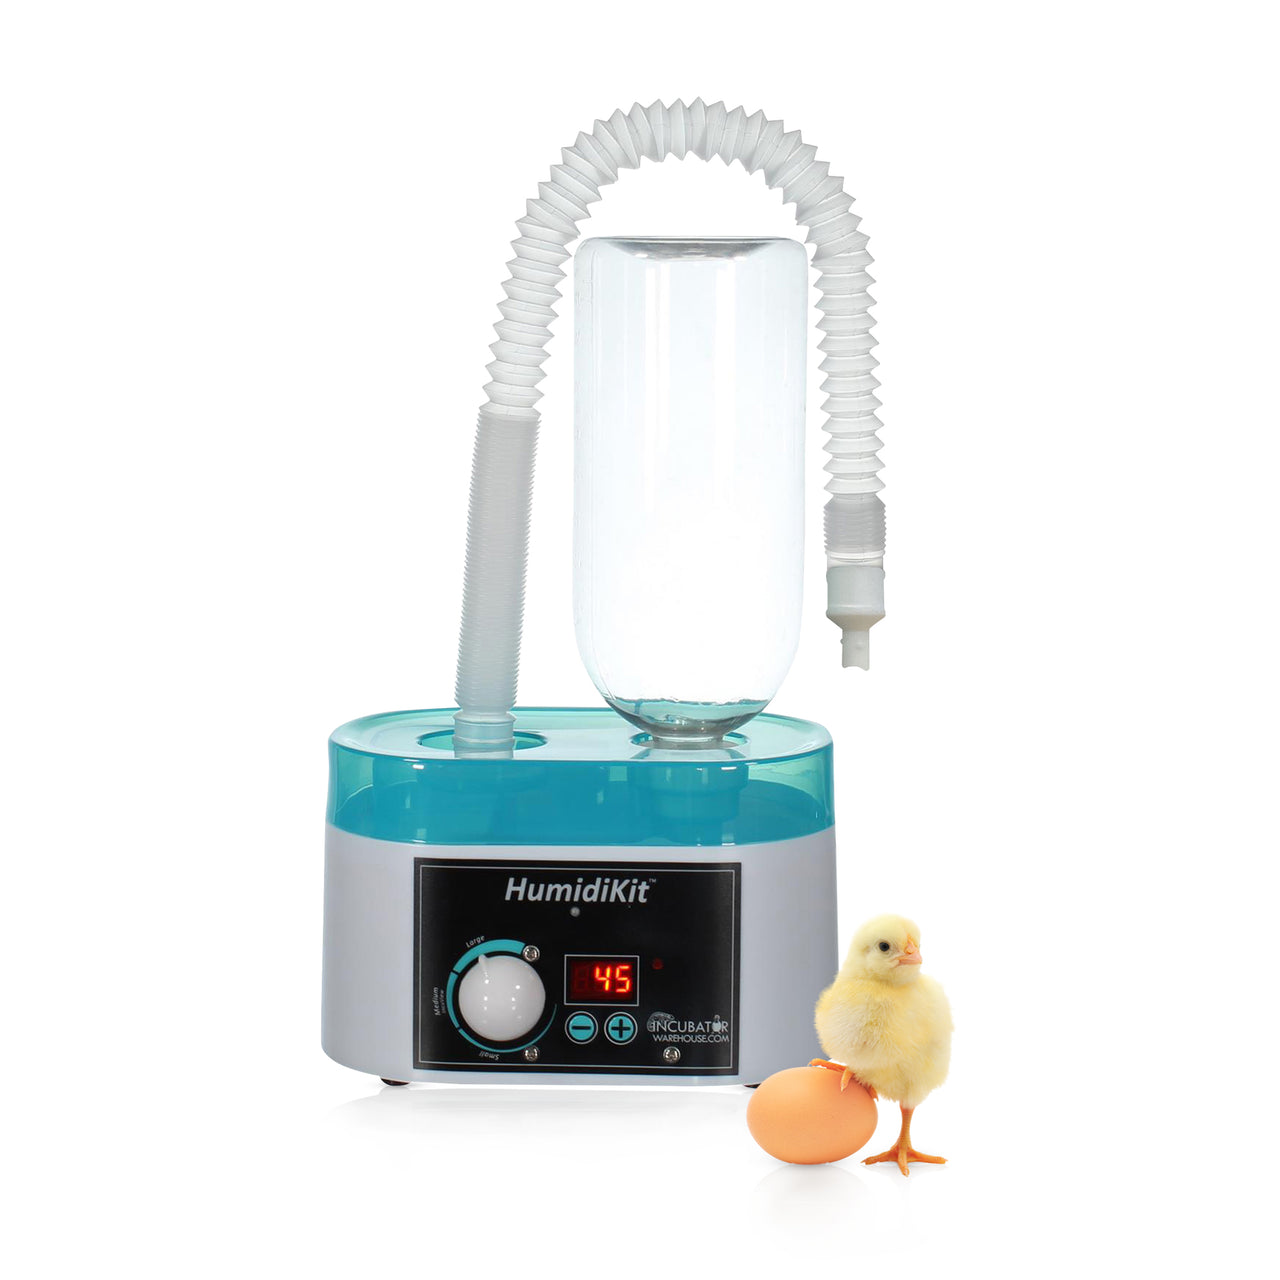
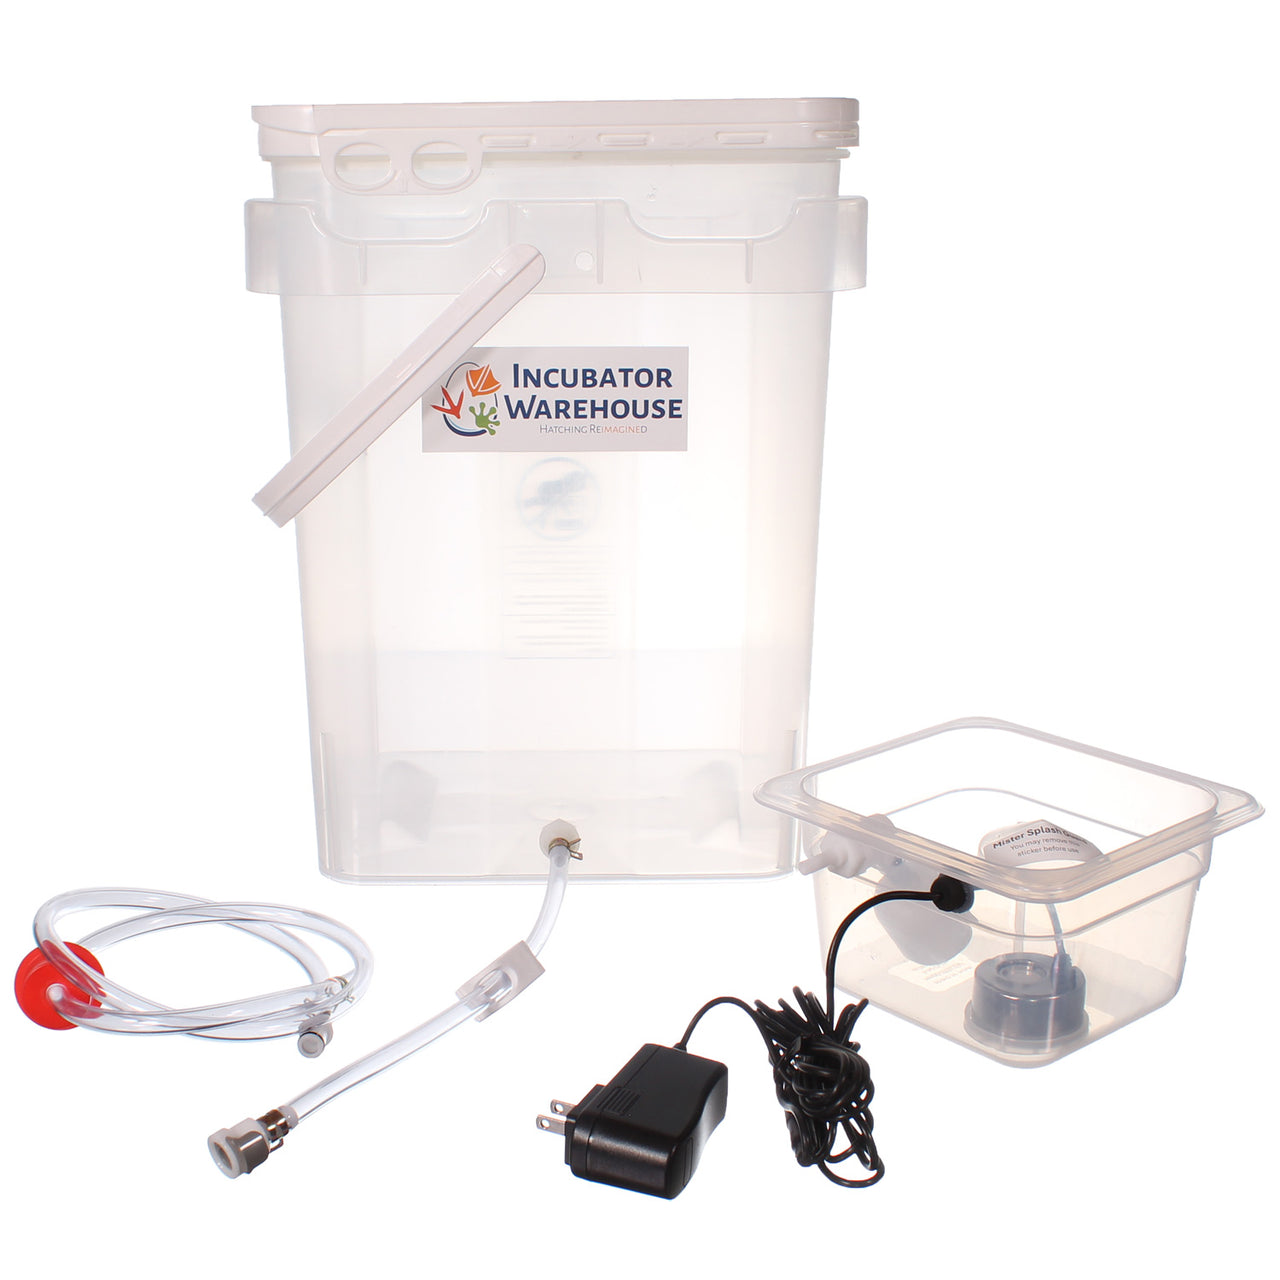
Managing the right humidity in your incubator is crucial for successful egg hatching. The HumidiKit™ is an advanced automatic humidity control system specifically designed for egg incubators. Equipped with a programmable digital hygrostat, this system ensures accurate humidity control and allows you to adjust settings to achieve the perfect environment for your eggs, improving your hatch rates.
With its 1-liter capacity, the HumidiKit™ delivers instant humidity while circulating fresh air inside the incubator, ensuring optimal conditions. In tabletop incubators, this system typically requires a weekly refill, making it a low-maintenance solution. Installation is easy and seamless with expandable tubing that connects to any ½” vent hole for flexible placement.
The HumidiKit™ offers the perfect combination of convenience and precision, ensuring your eggs receive the best possible environment. Its automatic humidity control eliminates the need for constant monitoring, while the digital hygrostat makes it easy to set the ideal humidity levels. With weekly refills and easy installation, this system is a low-maintenance solution for anyone serious about egg incubation.
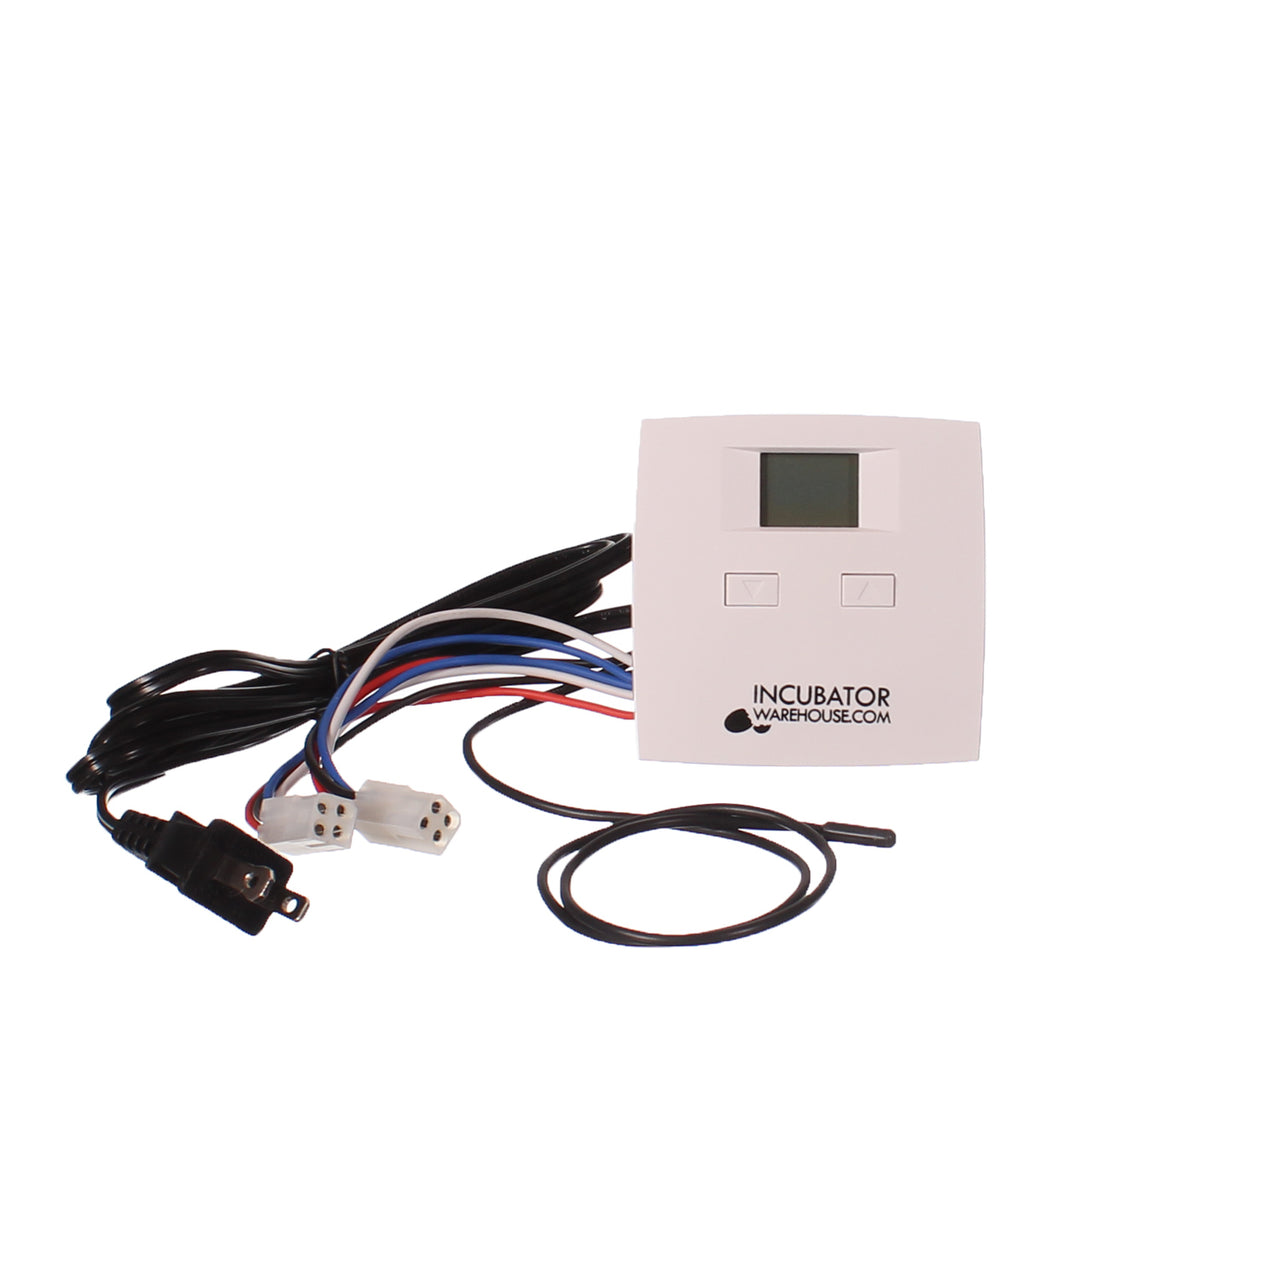
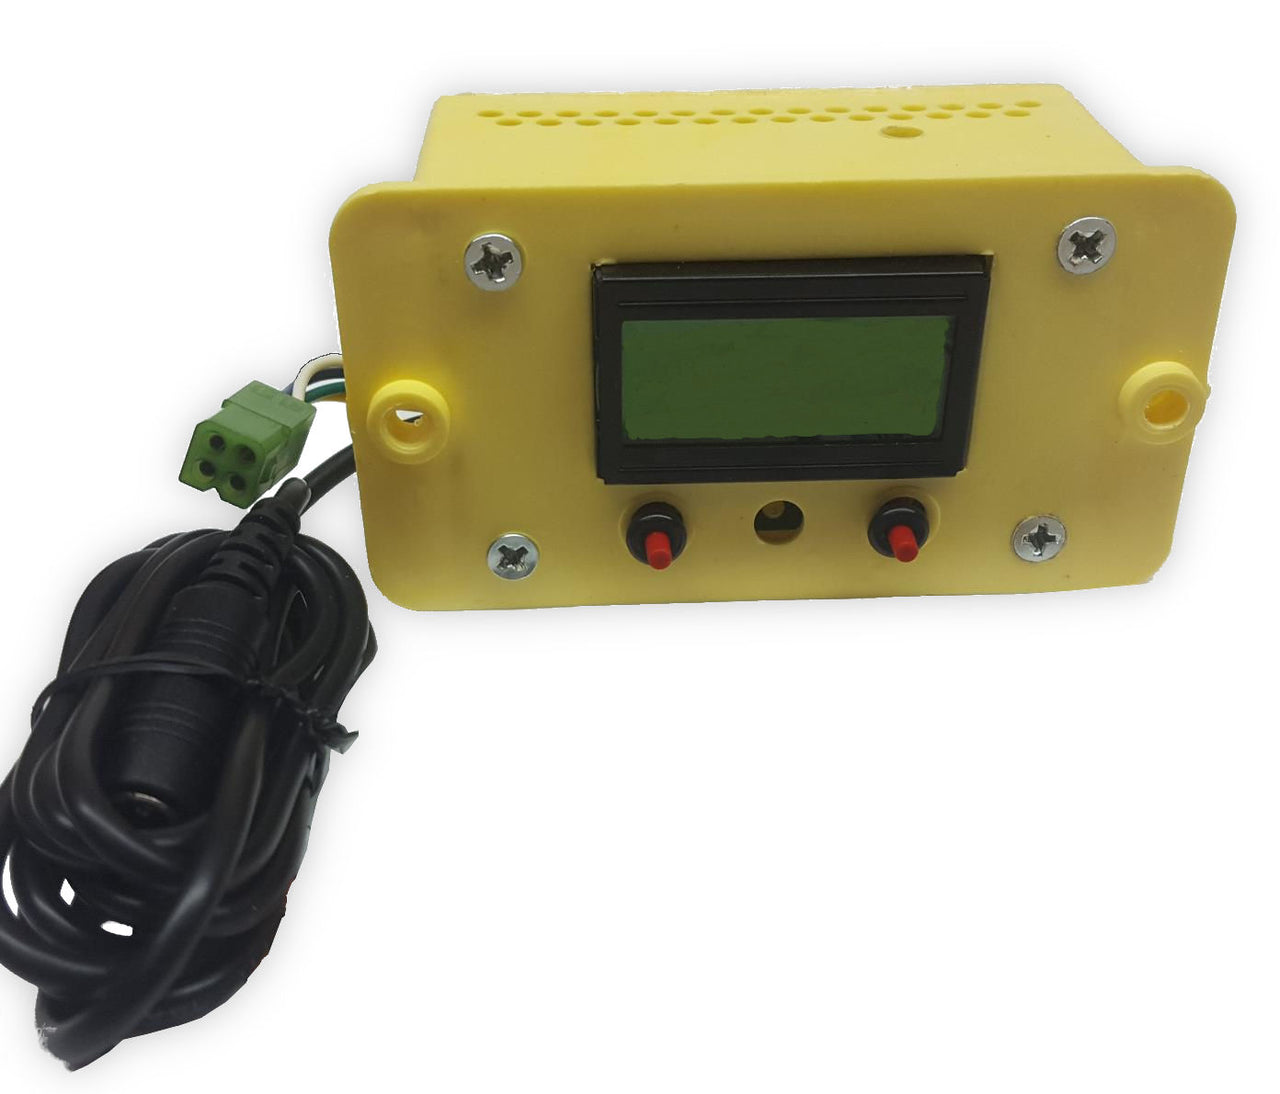
The Digital Electronic Egg Incubator Thermostat (110V) is a high-precision temperature controller designed to deliver perfect temperature management in any chicken incubator or home hatching machine. As a key incubator part, this smart controller transforms your incubation system into a reliable egg hatcher, helping you achieve consistent, repeatable hatch results.
Product Description
Managing temperature is the most critical factor in successful egg incubation. This digital thermostat provides accurate, real-time monitoring and automatic control of heating elements in your incubation system. Whether you're running a DIY egg hatcher, retrofitting a hatching machine, or upgrading to 110 V heat control, this thermostat controller offers user-friendly setup, stable performance, and improved hatch rates.
Product Information
Model: 110 V Digital Egg Incubator Thermostat
Compatibility: Chicken incubators, egg hatchers, brooder kits
Function: Electronic control of temperature and heating systems
Ideal For: Beginner to pro-level poultry keepers
Purpose: Enable precise heat regulation during incubation
Technical Details
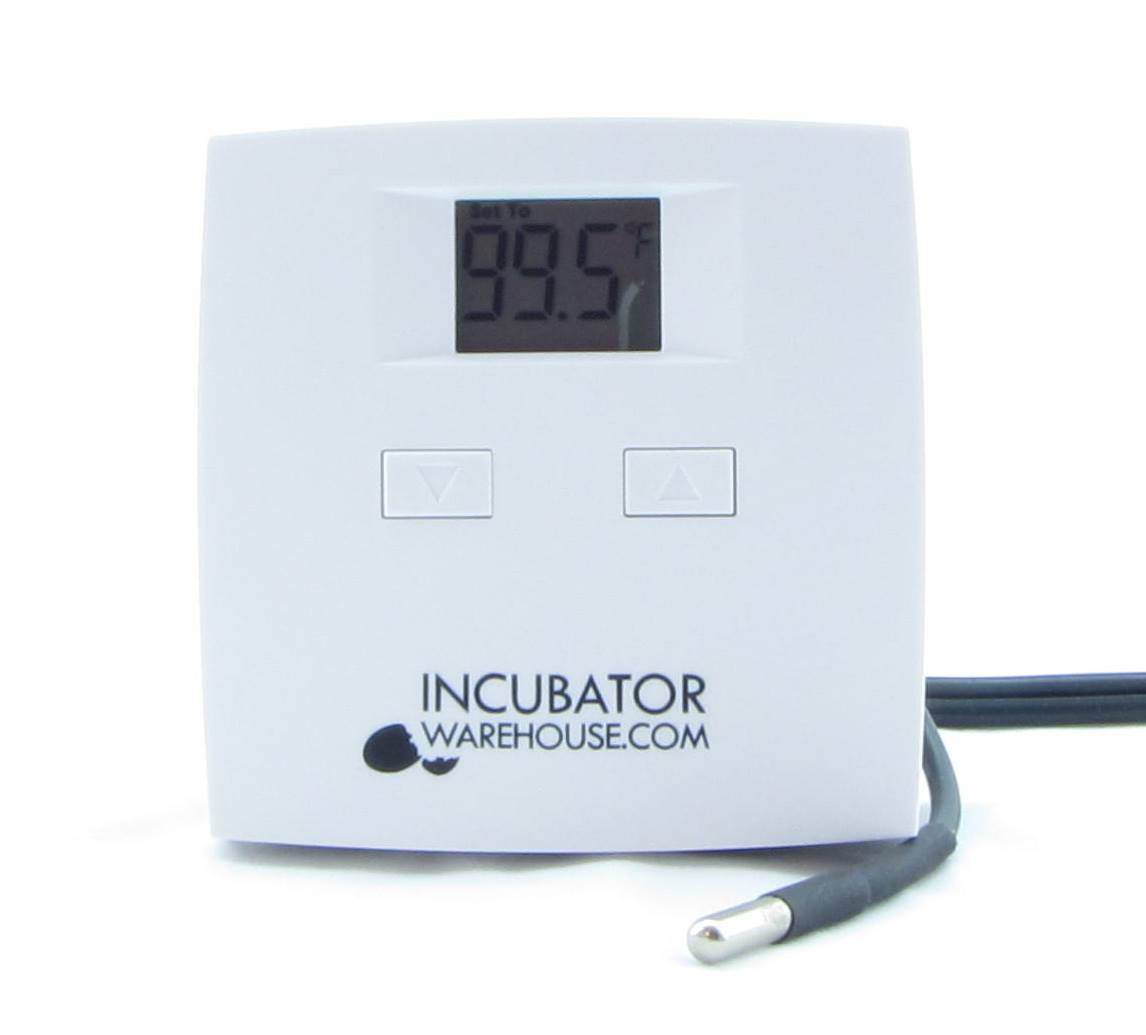
Display: Backlit LCD for easy reading of internal temps
Accuracy: ±0.1 °F temperature control
Control Output: High-current relay for heat load
Sensor: Remote probe for centralized temperature reading
Power Source: 110 V AC compatible with standard outlets
Additional Information
Optimizes hatching rates across all egg types chicken, quail, duck
Ideal for DIY incubation system builders and upgrade projects
Compatible with most incubator parts and existing incubators
Compact design saves space inside cabinets or hatching chambers
On-screen alarm alerts you to any temperature irregularities
Warranty & Support
Covered by our 1-Year Quality Guarantee with full technical support from Incubator Warehouse. We’re committed to helping you set up, troubleshoot, and maintain your incubator thermostat for years of reliable performance.
Why Choose This Thermostat?
Delivers perfect temperature stability for optimized hatching
Easy digital setup with clear display and remote sensing
Versatile electronic thermostat fits many hatching systems
Boosts your overall egg hatching success
Upgrade your incubation system now, add this Digital Thermostat for dependable heat control and dramatically improved hatch rates!
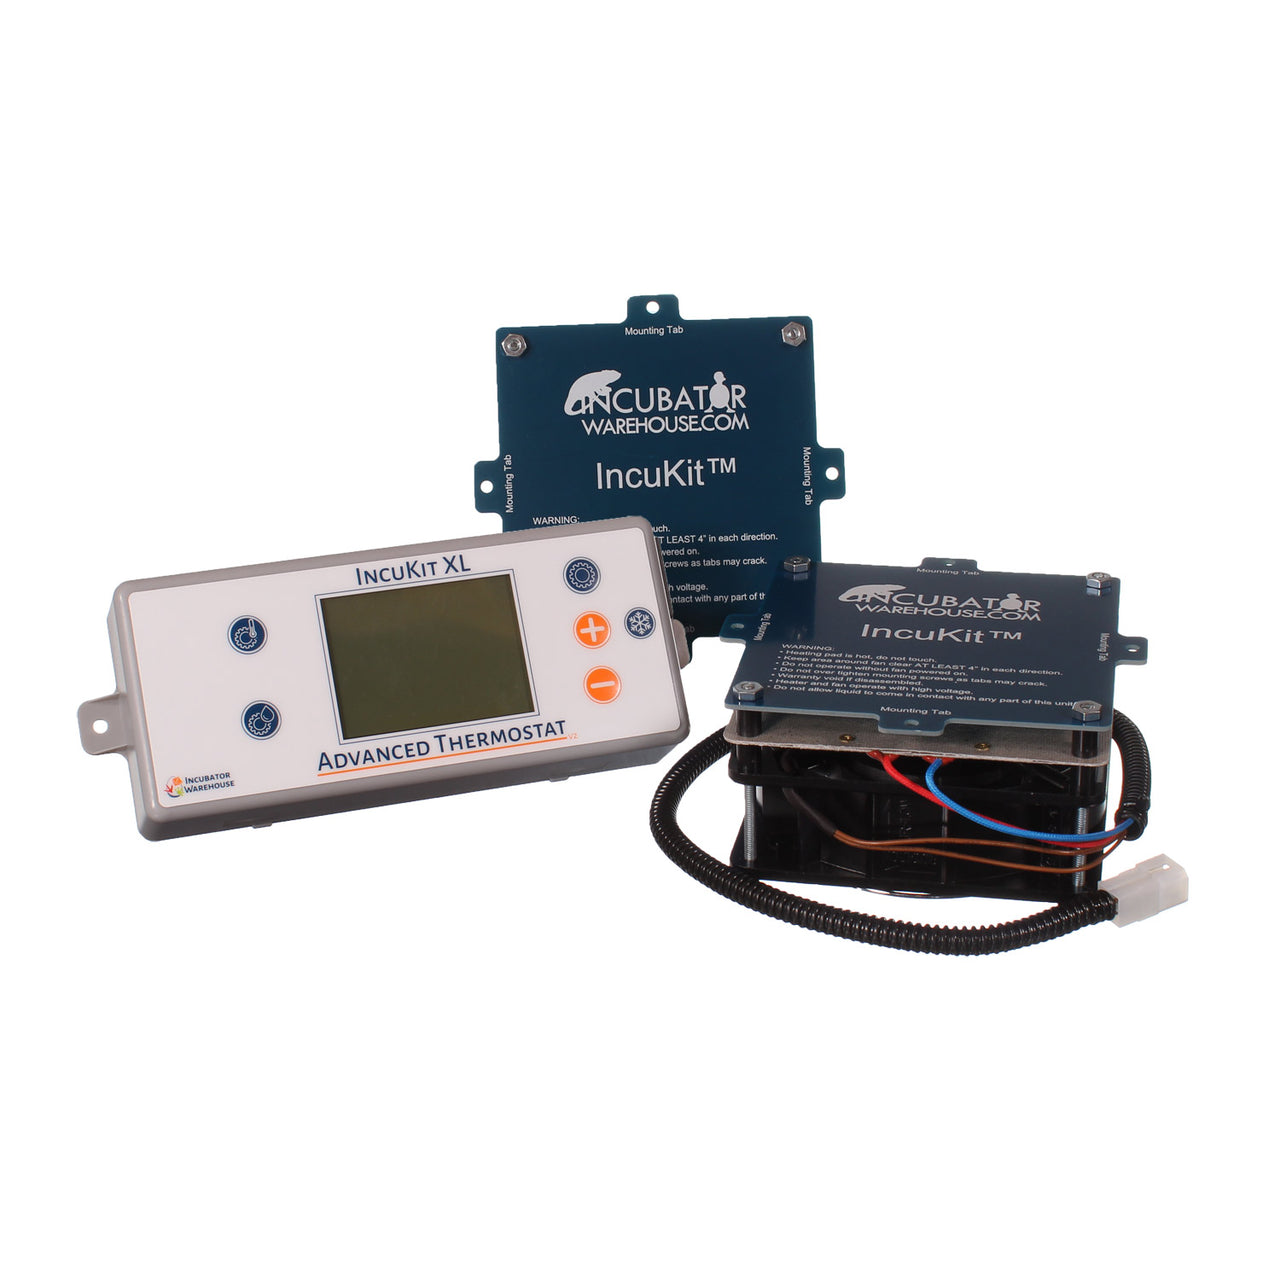
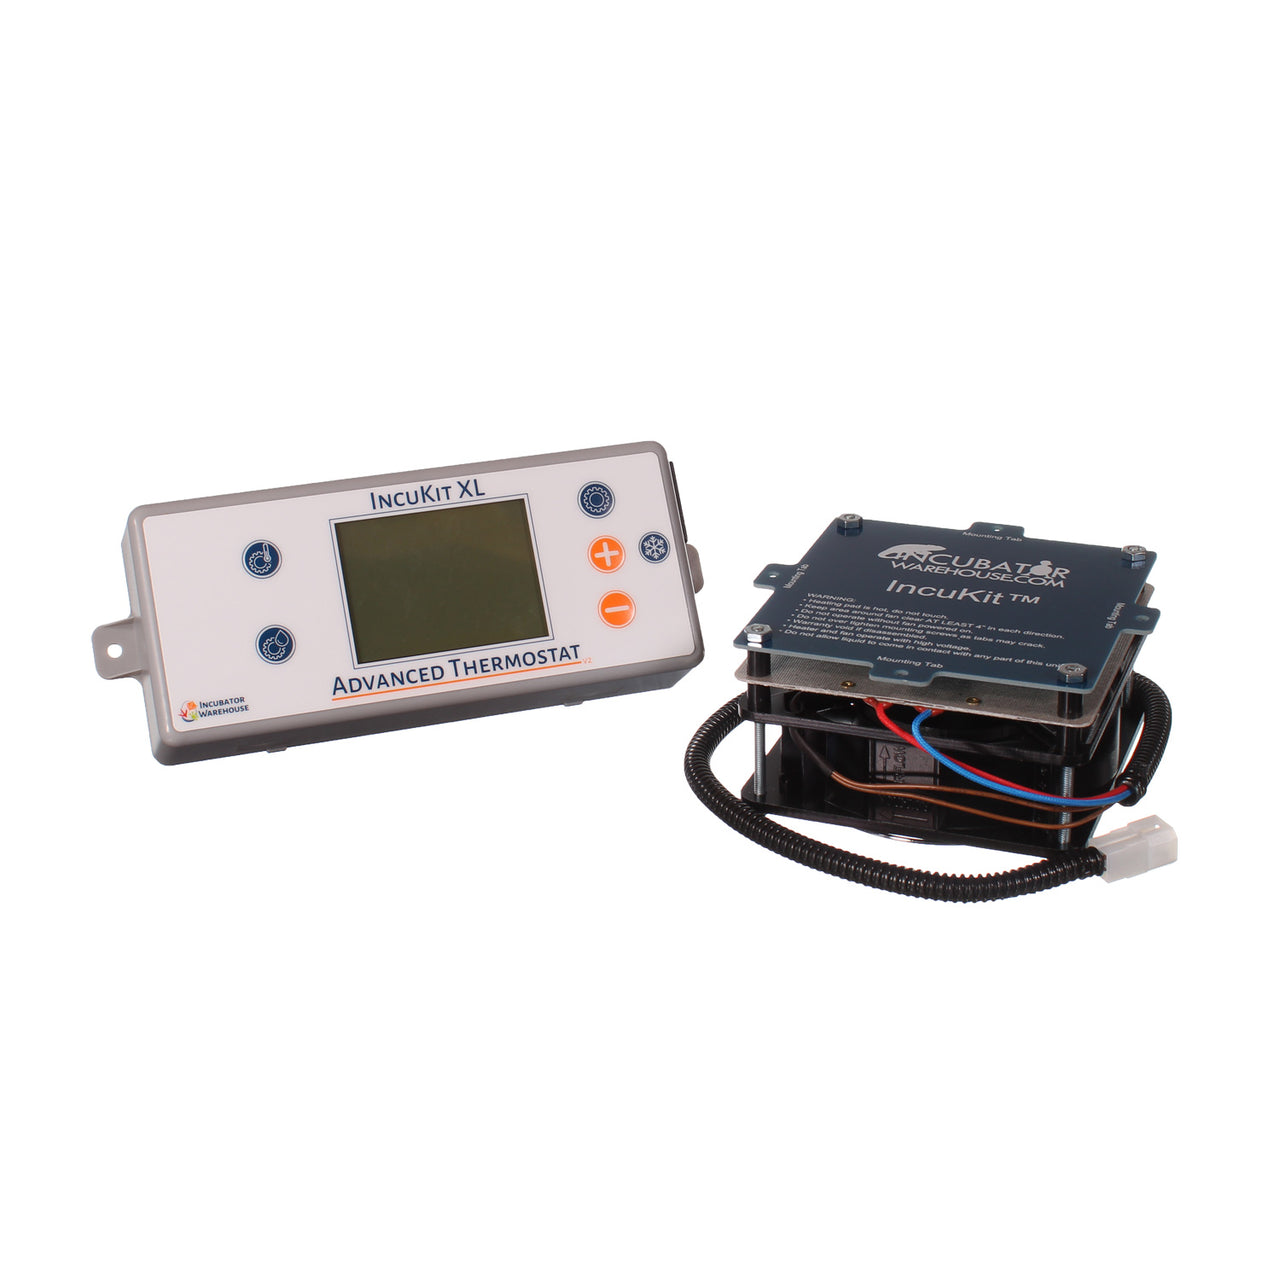
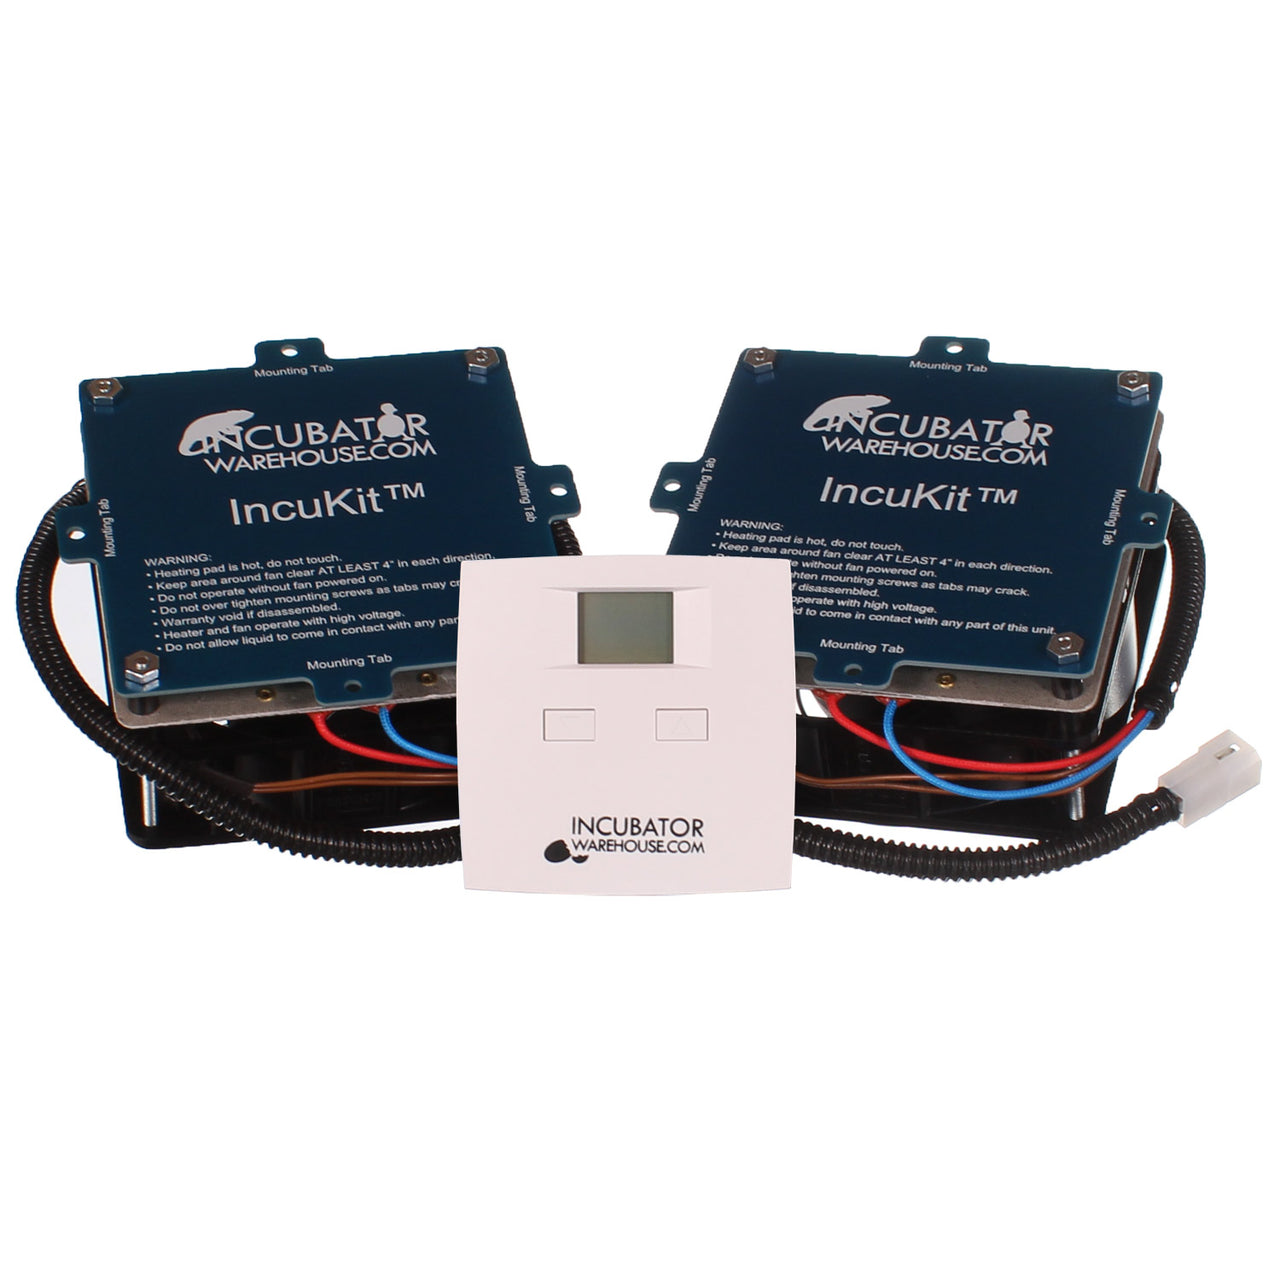
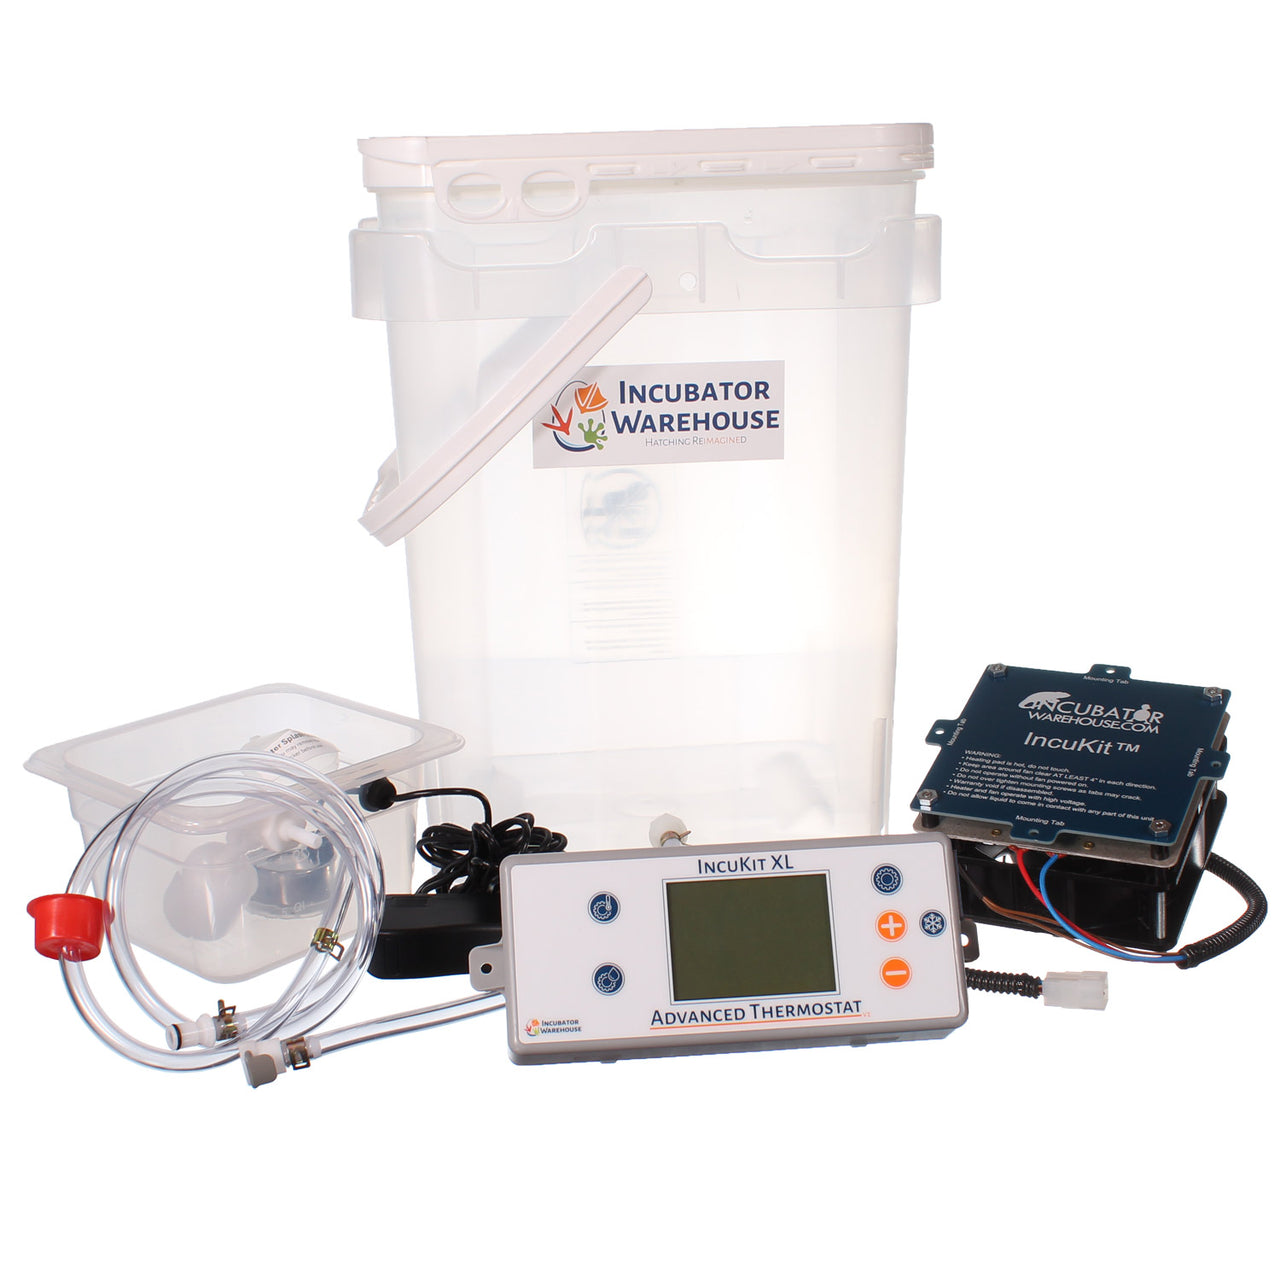
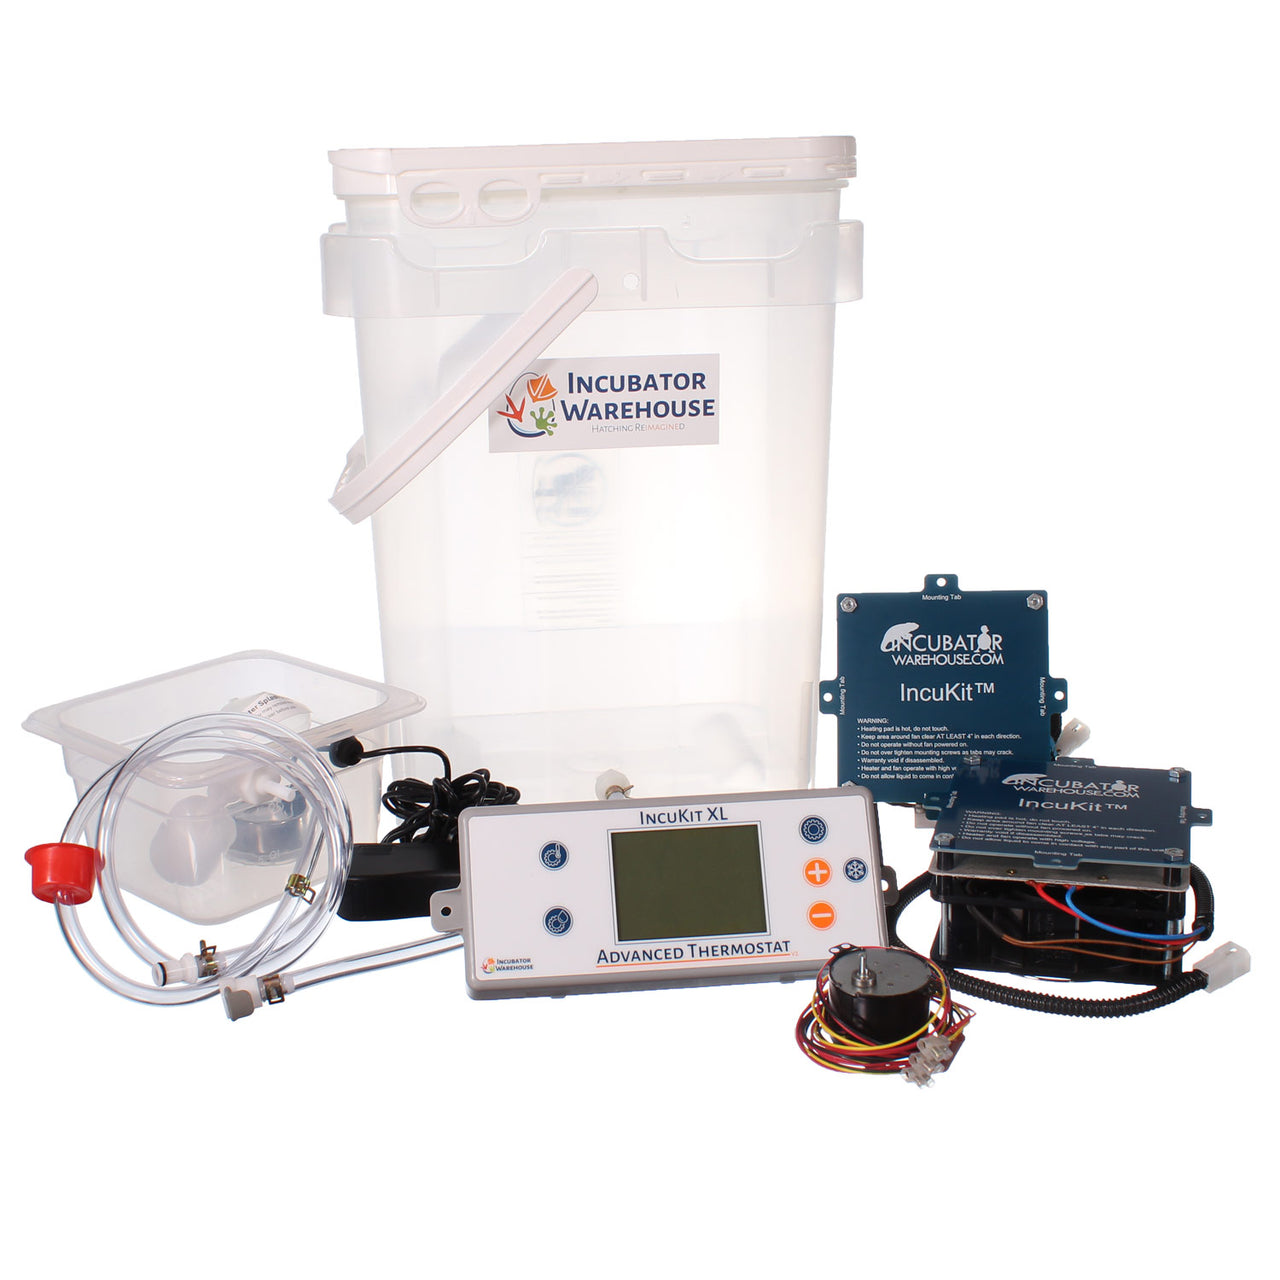
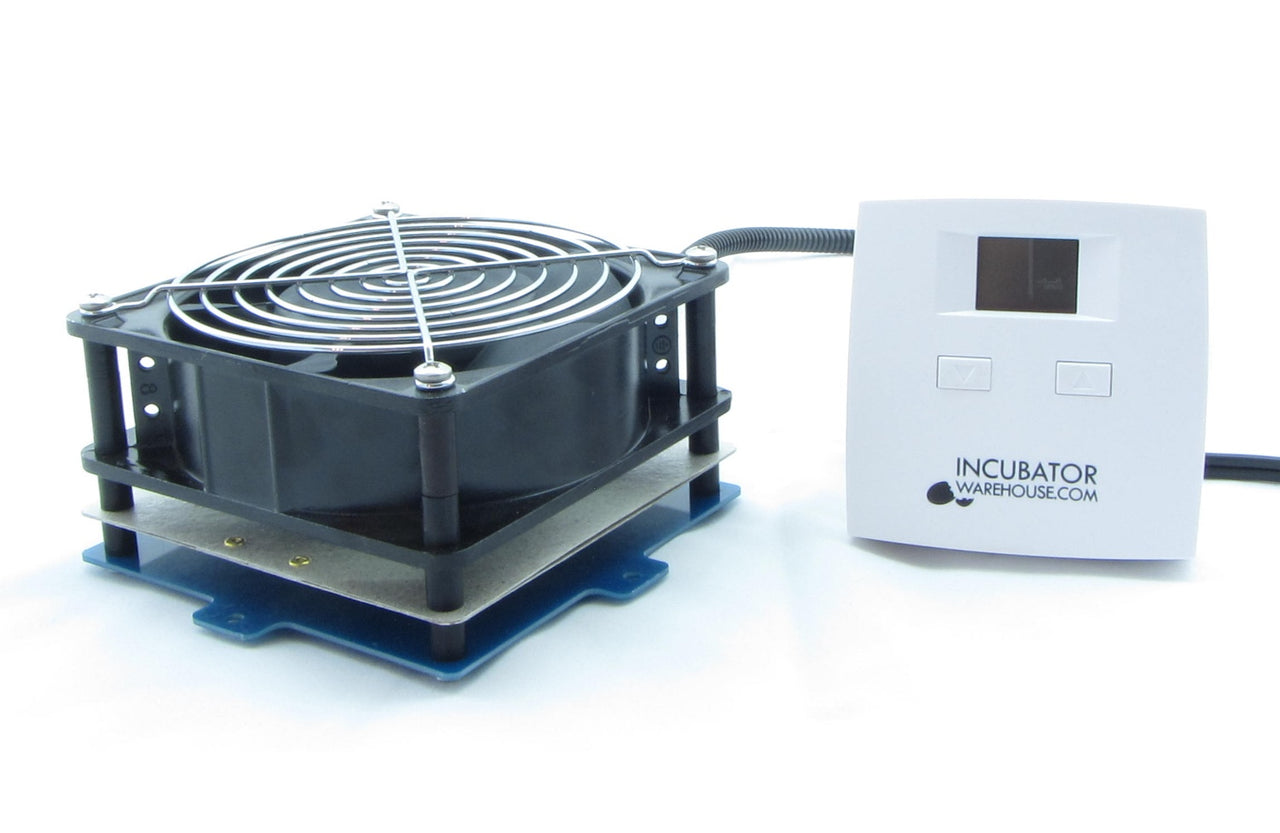
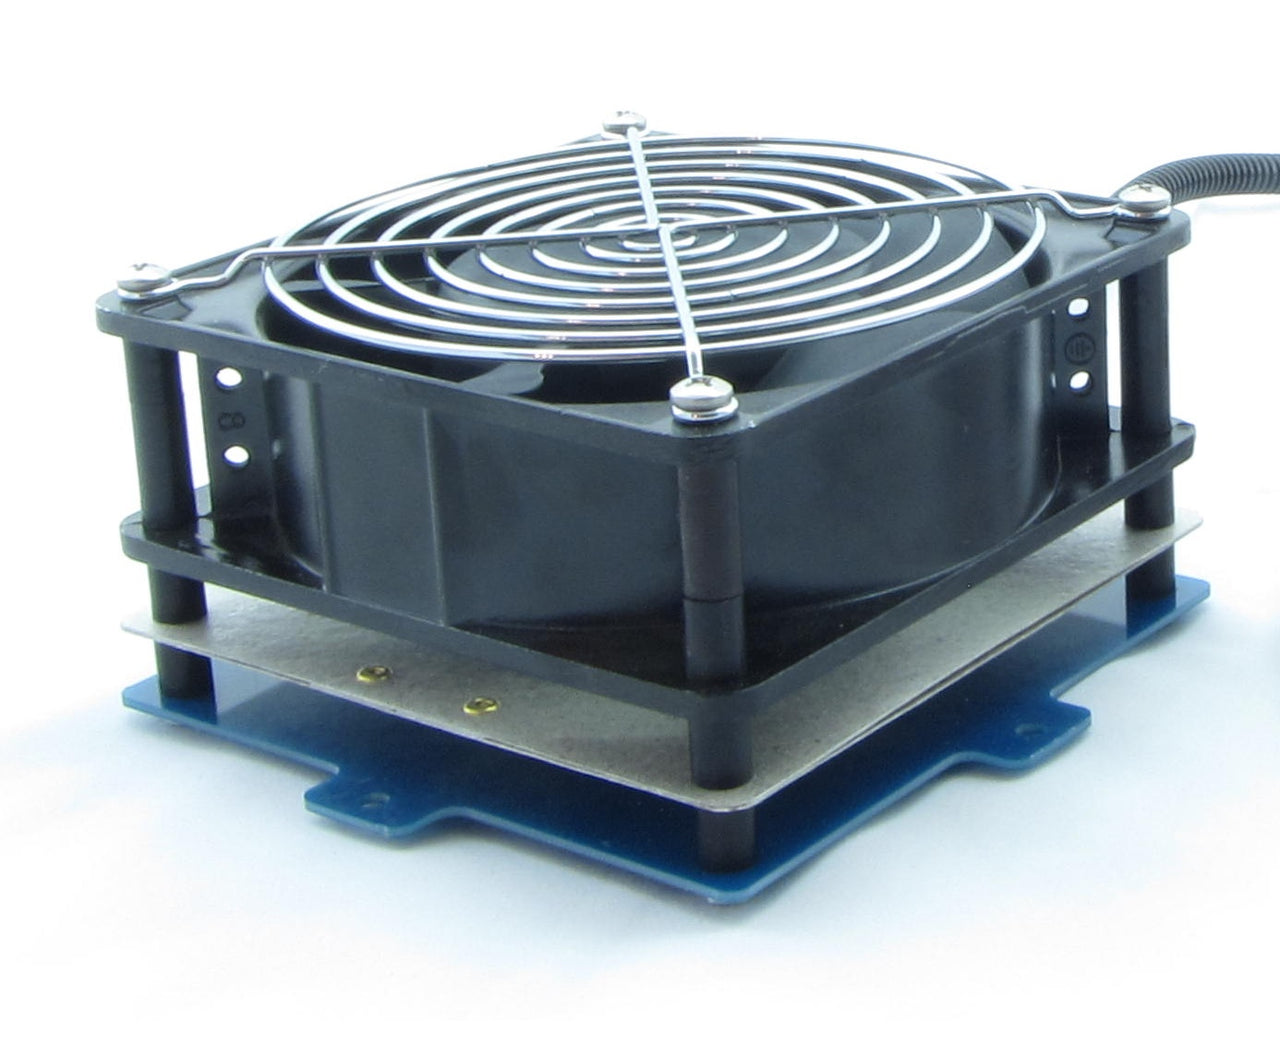
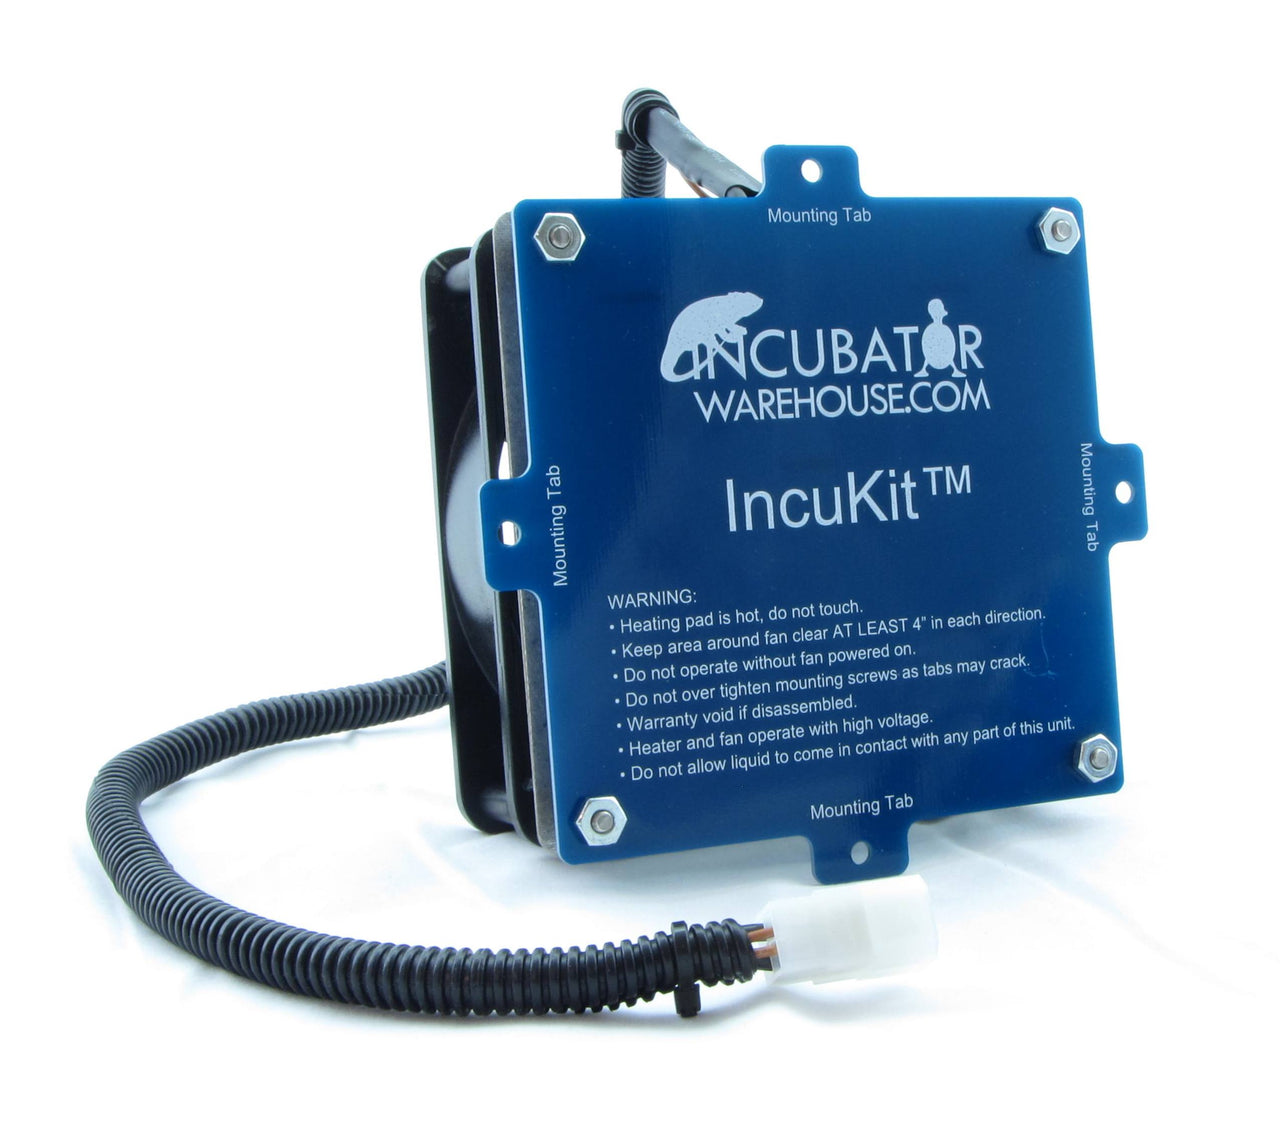
Transform your DIY incubator into a powerful, professional-grade hatcher with the IncuKit XL, featuring a recirculating fan. Designed for those building custom egg incubators, this all-in-one incubator kit combines a precise thermostat, high-efficiency heater fan, and a recirculating air system for uniform climate control. Whether you're incubating chicken, quail, reptile, or duck eggs, this kit ensures ideal conditions for better hatch rates.
Product Description
The IncuKit™ XL (with Recirculating Fan) is the ultimate solution for poultry keepers, hobbyists, and farmers looking to upgrade their DIY incubator. Built to work in incubators up to 120 quail eggs or 60 chicken eggs, it’s compatible with various box-style setups.
This unit features a powerful heater fan, a digital thermostat with an LCD, and a recirculating fan system to evenly distribute warm air—perfect for chicken incubators, reptile incubators, or as a brooder heater after hatching. It’s also ideal for anyone who wants complete climate control without having to build electronics from scratch.
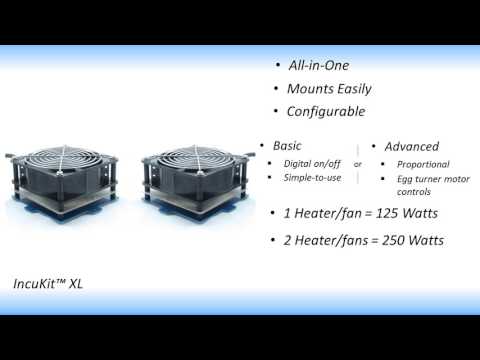
All-in-one Egg Incubator Control Unit
For Mid-Size & Cabinet Incubators
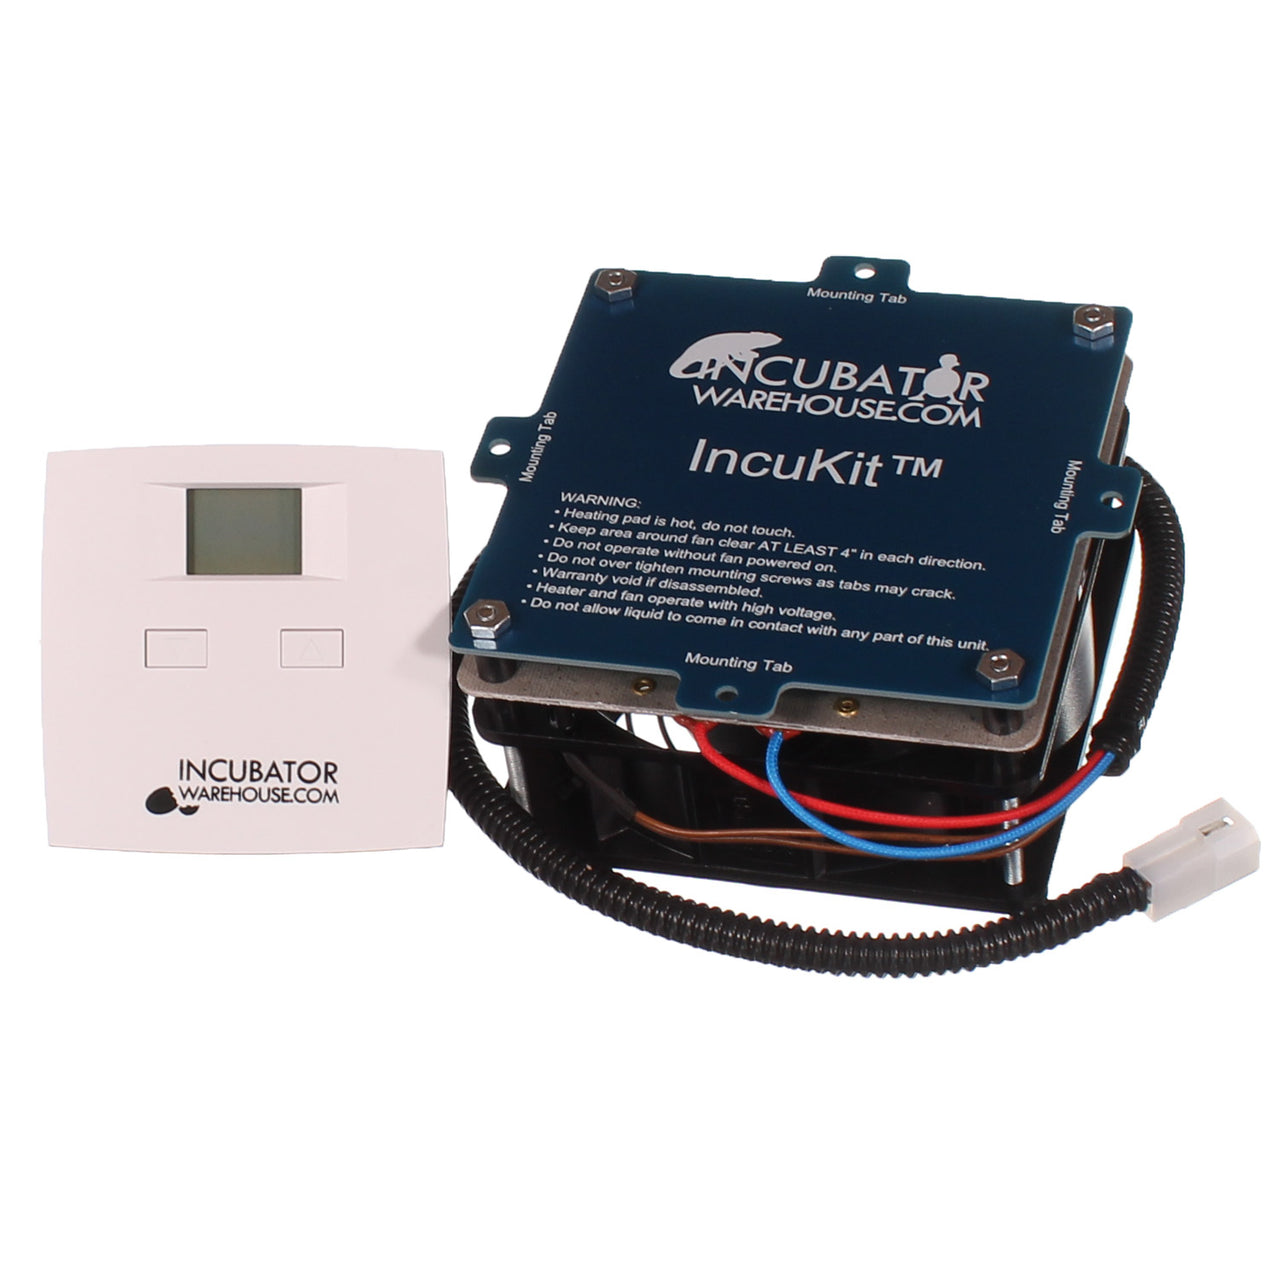
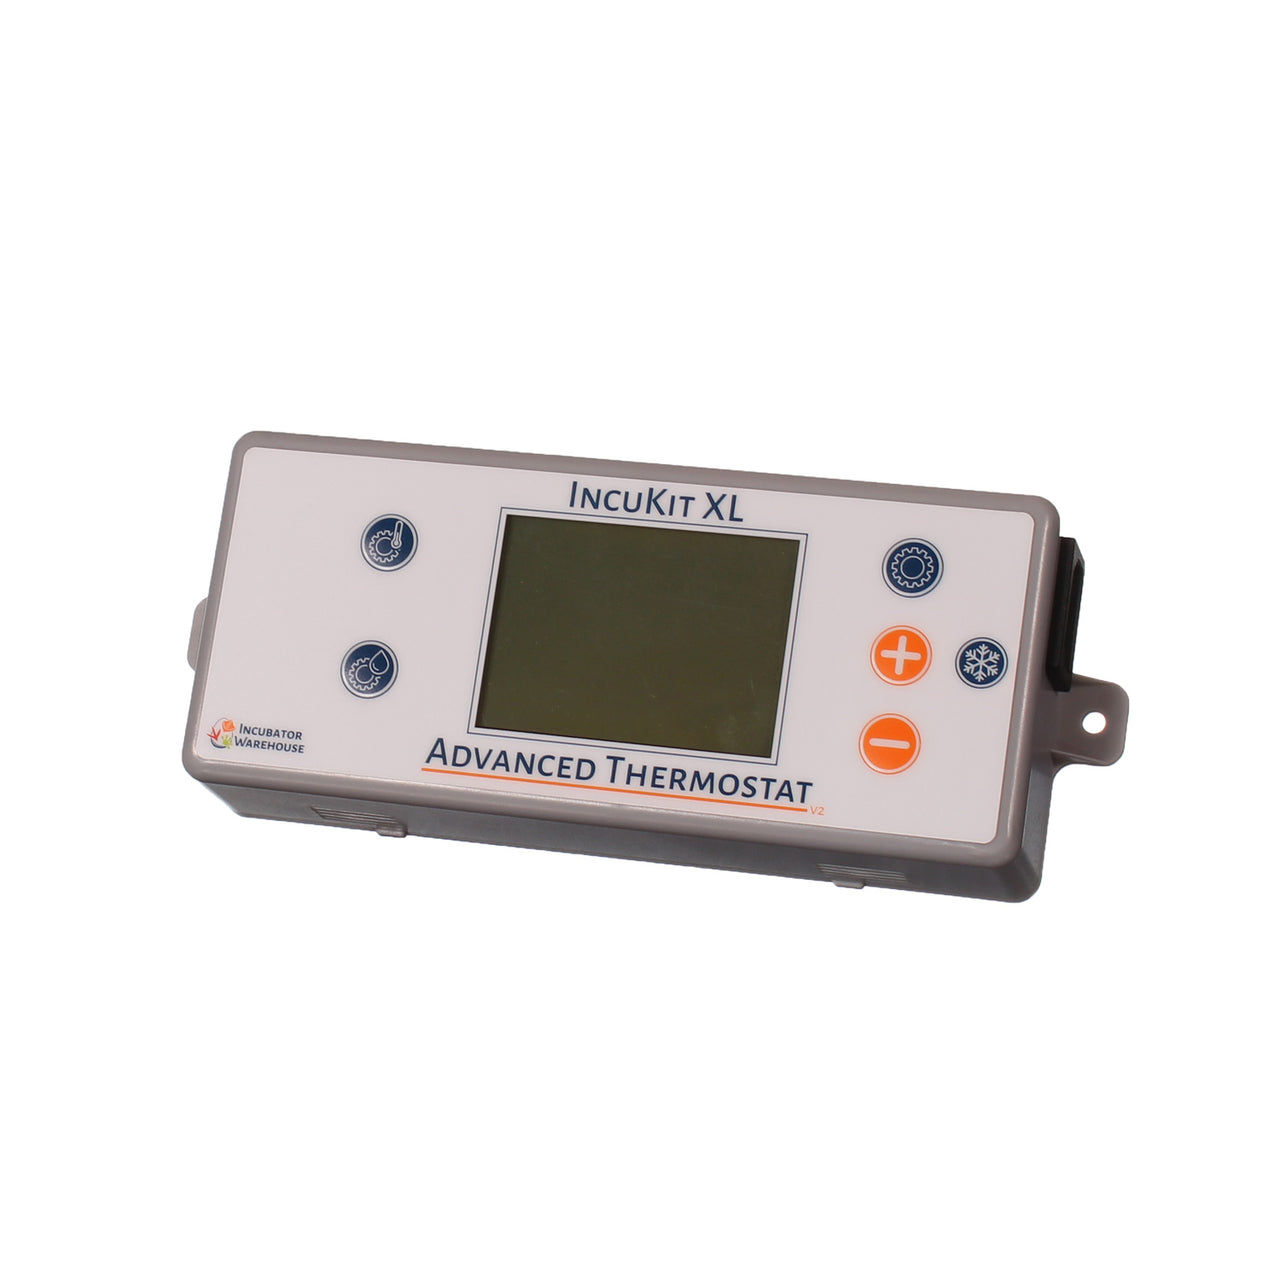
Choose Basic or Advanced thermostat module
Digital electronic pre-set (99.5 F) thermostat
Option to use 1 or 2 heater and fan modules (125 watts or 250 watts)
Integrated heaters with safety thermal switch included
Large high output axial fan with safety guard
Mounting hardware & operating instructions included
Incubator Warehouse's 2 Year IncuCare Warranty!
For the IncuKit XL for reptile incubators click here
Voltage requirement: 110/120VAC Click here to see the 220V International Version.
Product Information
Brand: Incubator Warehouse
Product Name: IncuKit™ XL with Recirculating Fan
Use Case: Egg Incubator, Brooder Heater, Farm Equipment, Reptile Incubator
Capacity: Up to 120 quail eggs or 60 chicken eggs
Application: Suitable for custom or replacement incubator parts
Technical Details
Power Input: 110V AC
Heating Element: 220-watt resistive heater
Thermostat Range: 80–104°F
Display: Digital LED with real-time temperature reading
Fan System: Built-in recirculating fan for even heat distribution
Sensor: High-accuracy probe for tight temperature regulation
Additional Information
This egg incubator kit is a game-changer for hobby breeders and small farm operators. It supports better hatch rates through reliable temperature regulation. Easy to install and maintain, it helps eliminate hotspots—making it ideal for building or upgrading poultry incubators and reptile setups.
Warranty & Support
All IncuKit™ systems come with a 2-year warranty and expert USA-based support. Need help with installation? Our customer service team is happy to walk you through it.
Product Features:
Precise Temperature Control: Fine-tune your incubator's temperature with a knob-controlled adjustment for better hatch rates.
Wide Temperature Range: Adjustable from 80°F to 105°F, making it ideal for incubating chicken, duck, quail, and even reptile eggs.
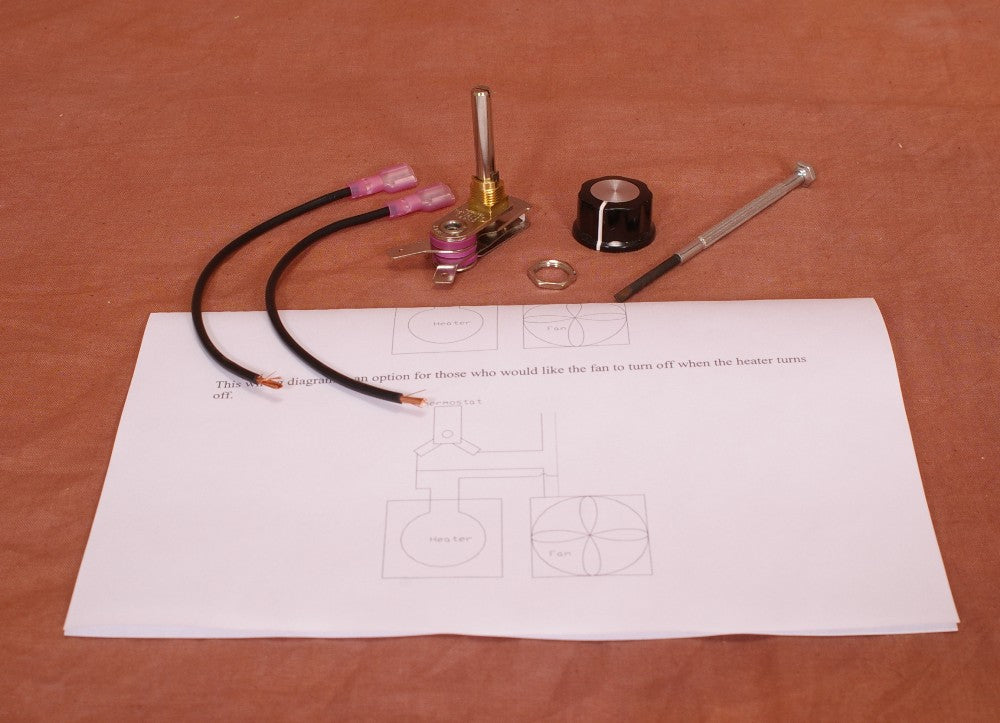
Easy DIY Installation: Comes with all necessary components and a wiring diagram, making it a straightforward setup even for first-time users.
AC & DC Compatibility: Works seamlessly with AC and DC power sources, offering versatility for different incubator setups.
15A Rating for Reliable Performance: Handles up to 1800W of power, ensuring stable and consistent temperature control.
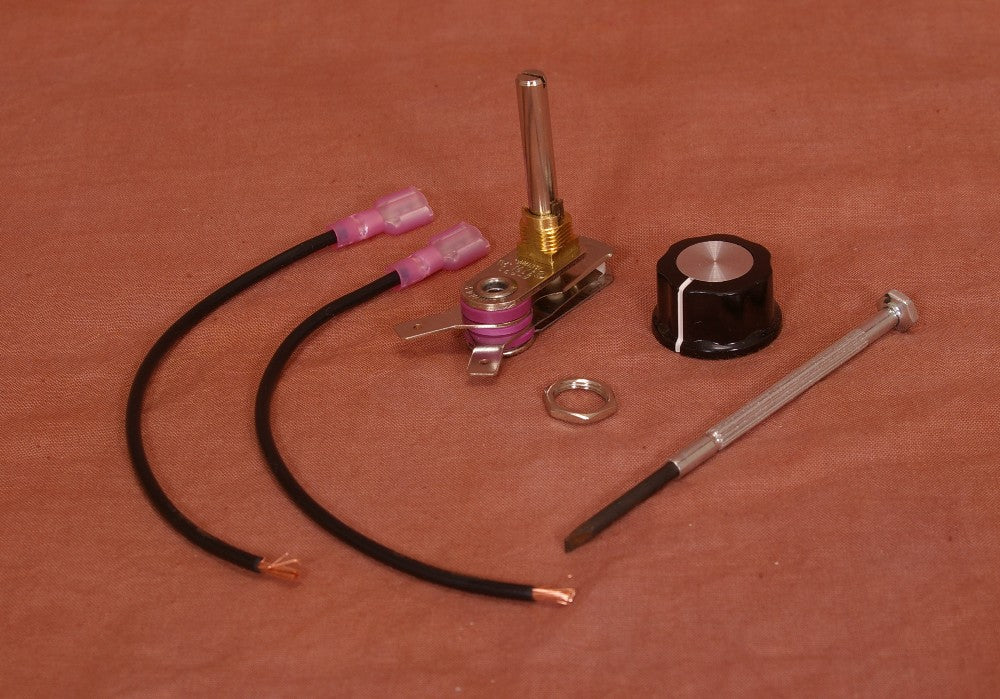
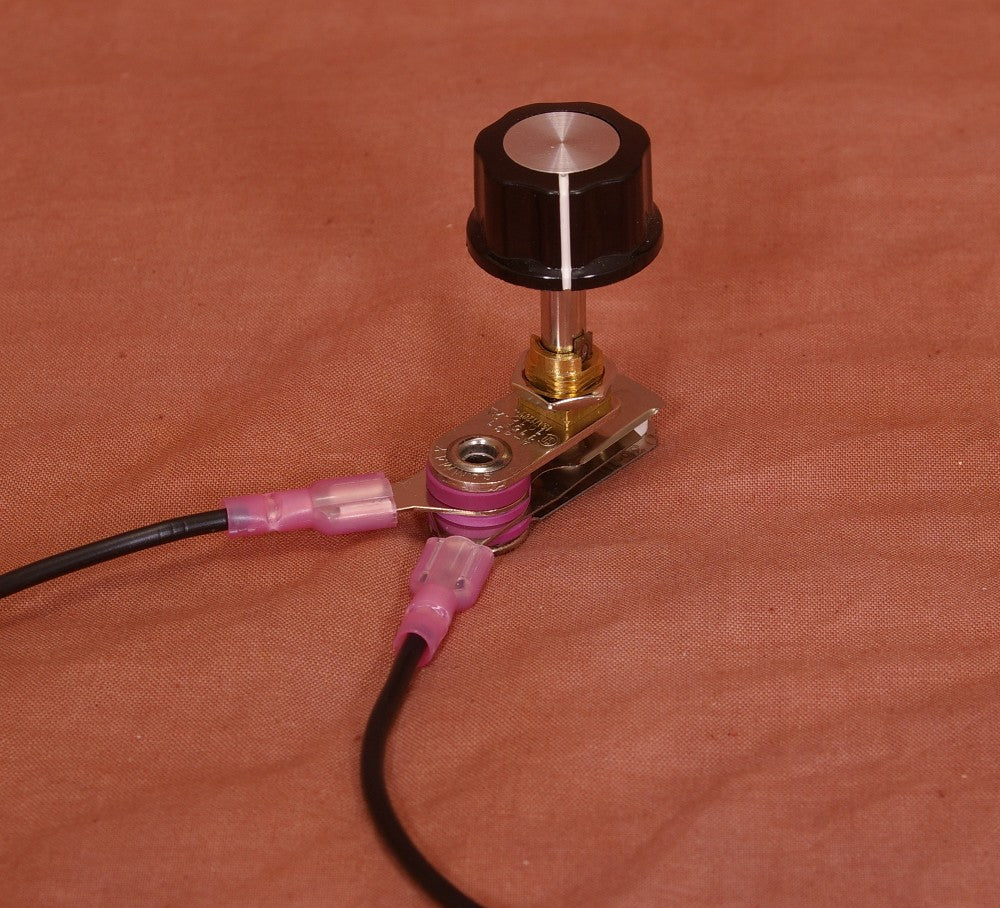
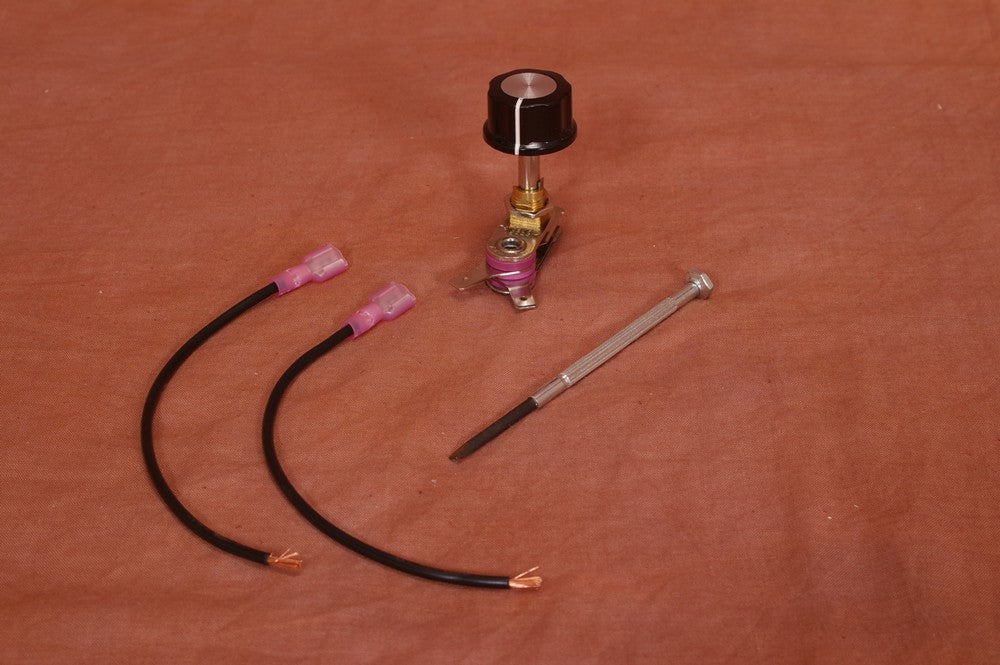
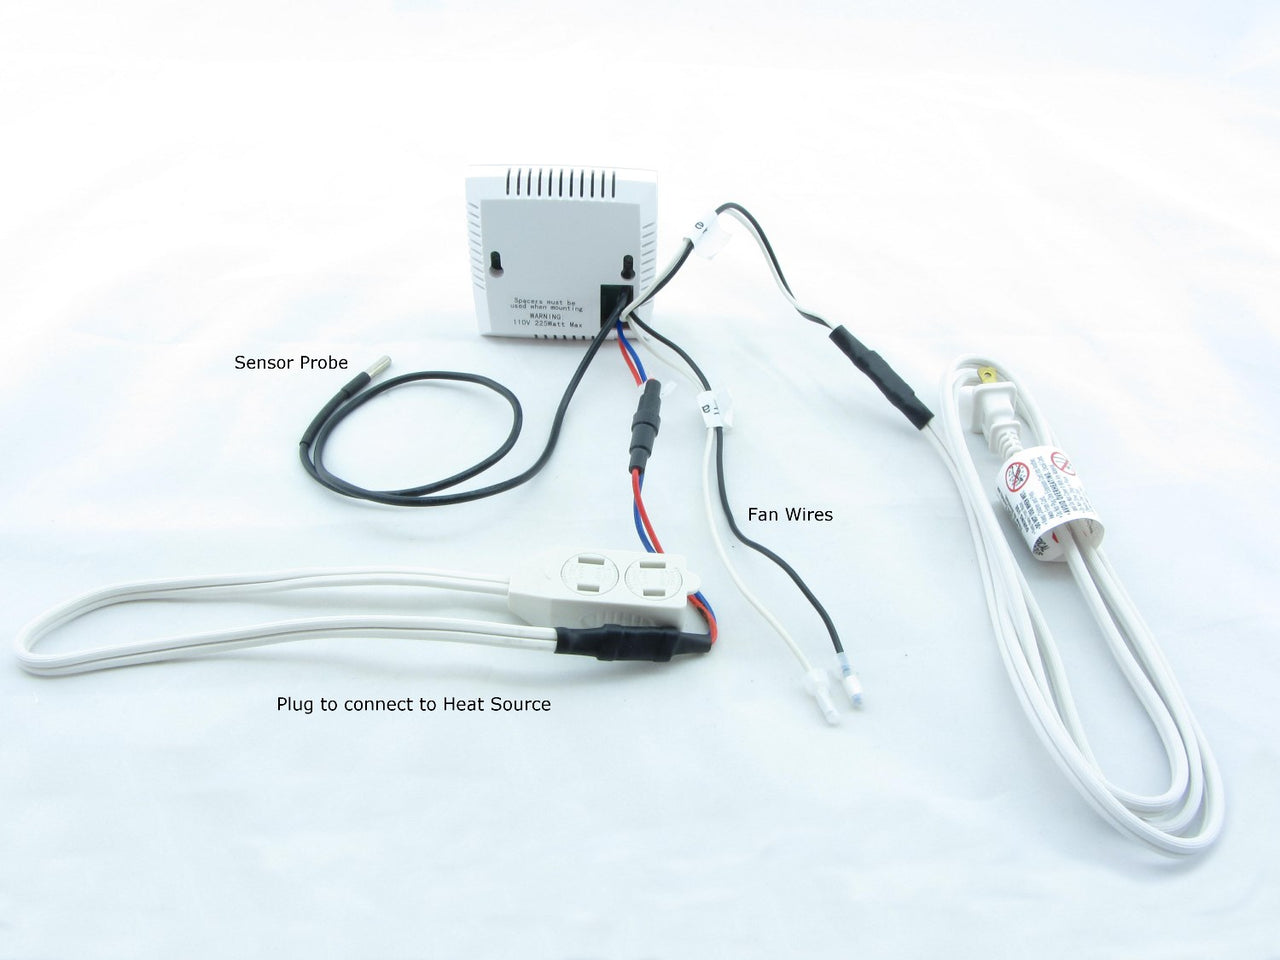
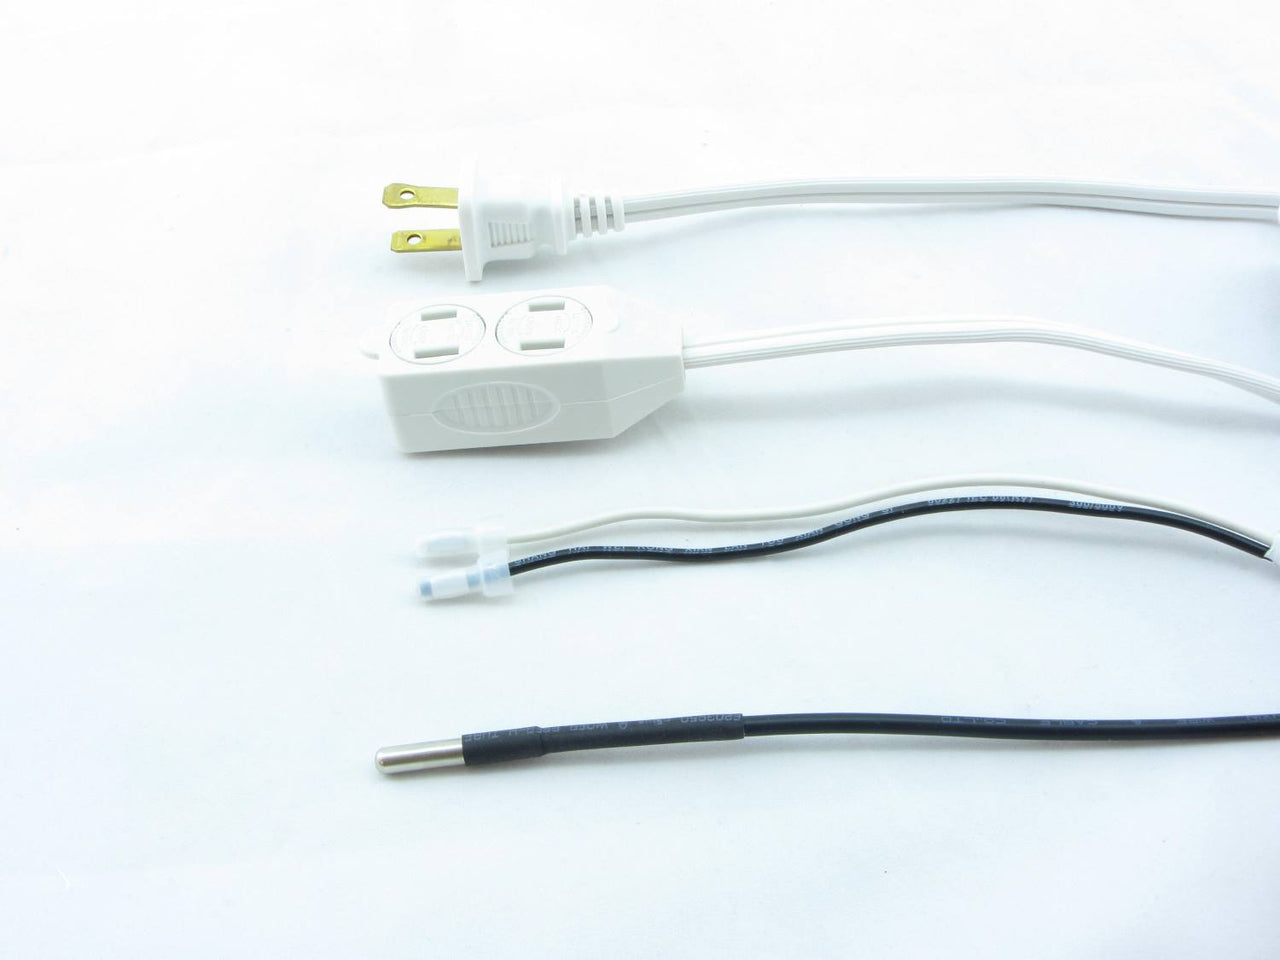
Complete Installation Kit: Includes all essential components: thermostat, control knob, set screw, lead wires with insulated connectors, mounting screw nut, and a mini screwdriver for effortless setup.
Perfect for Homemade & Commercial Incubators: This kit is universally compatible whether you're building a DIY incubator or upgrading a store-bought model.
Includes 2-Year IncuCare Warranty.
Product Description:
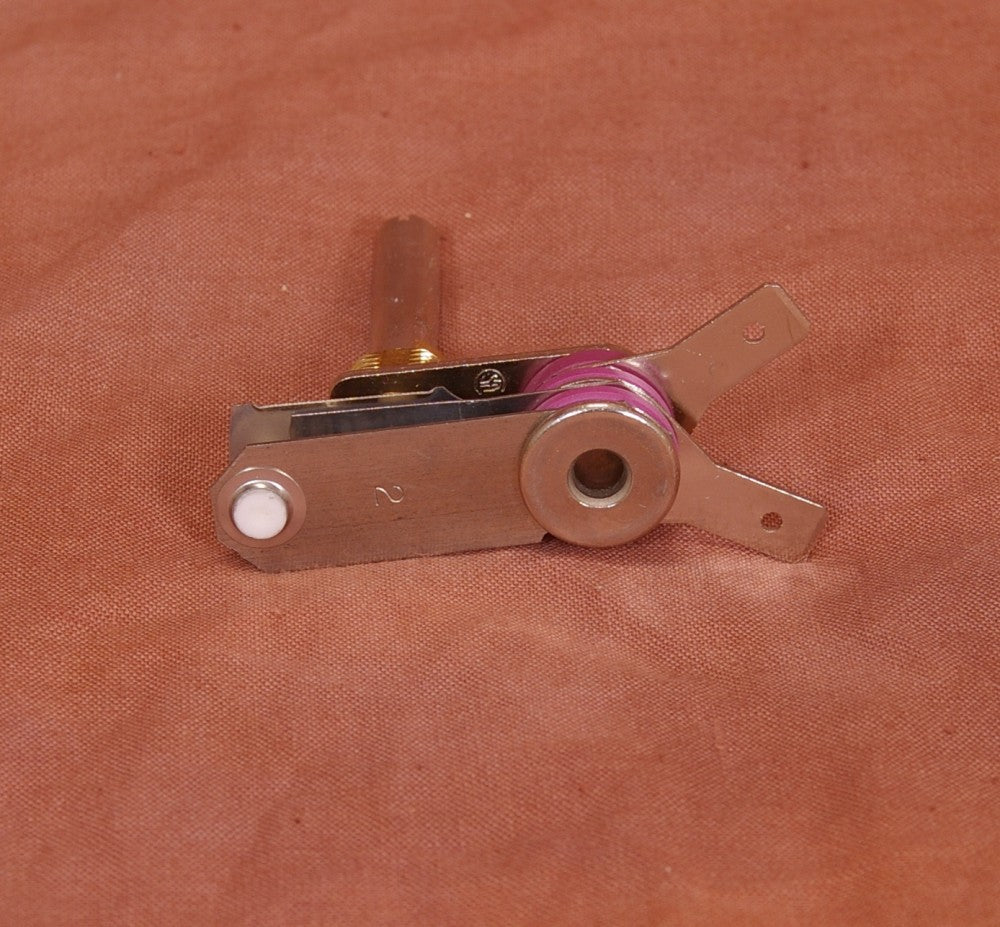
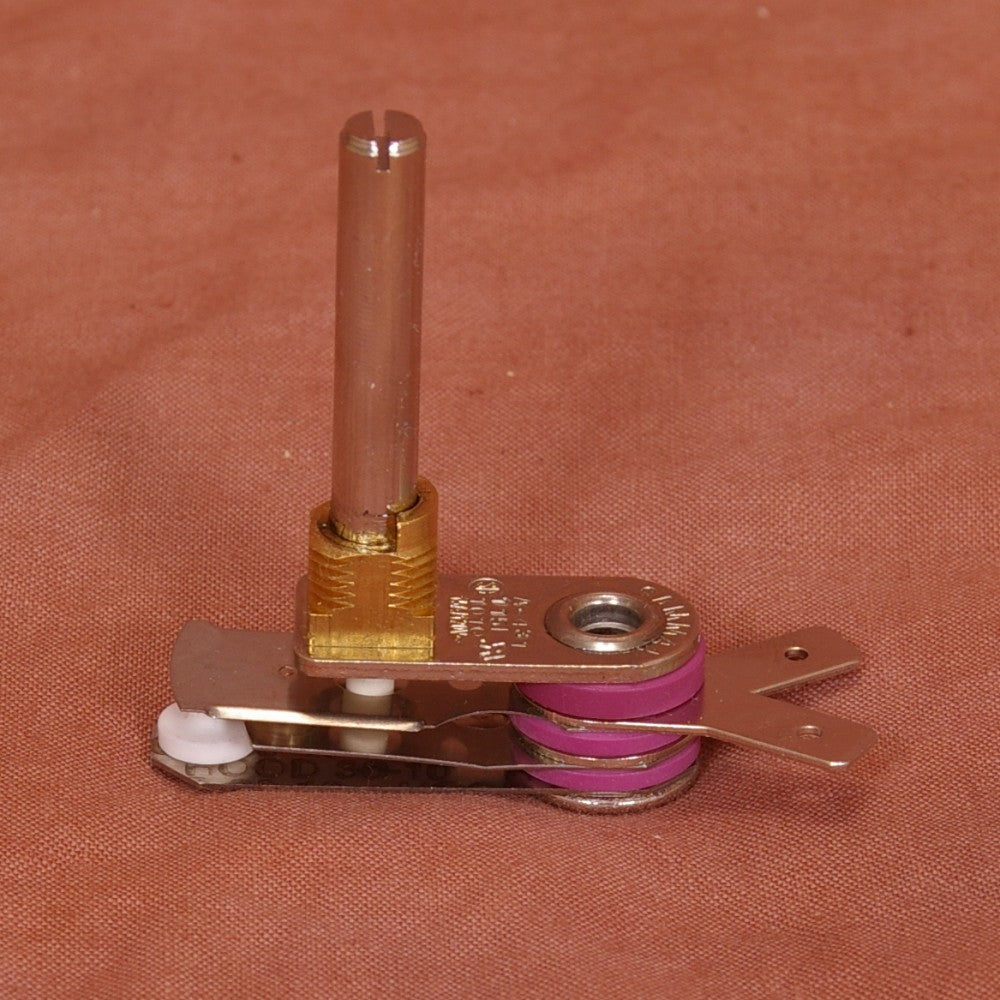
Maintaining the perfect temperature is key to hatching eggs successfully. This bi-metal egg incubator thermostat kit is a high-quality mechanical thermostat designed to provide accurate and reliable temperature control for incubators. Whether you're a backyard poultry farmer or a professional breeder, this kit ensures a stable environment for your eggs, improving hatch rates and reducing temperature fluctuations.
Unlike digital thermostats, which can sometimes experience sensor malfunctions, a bi-metal thermostat relies on thermal expansion, making it a reliable, fail-safe option. The thermostat automatically regulates the heat source by expanding and contracting its metal components in response to temperature changes. This allows for precise temperature maintenance, ensuring your eggs remain in the optimal hatching range.
What's Included in the Kit?
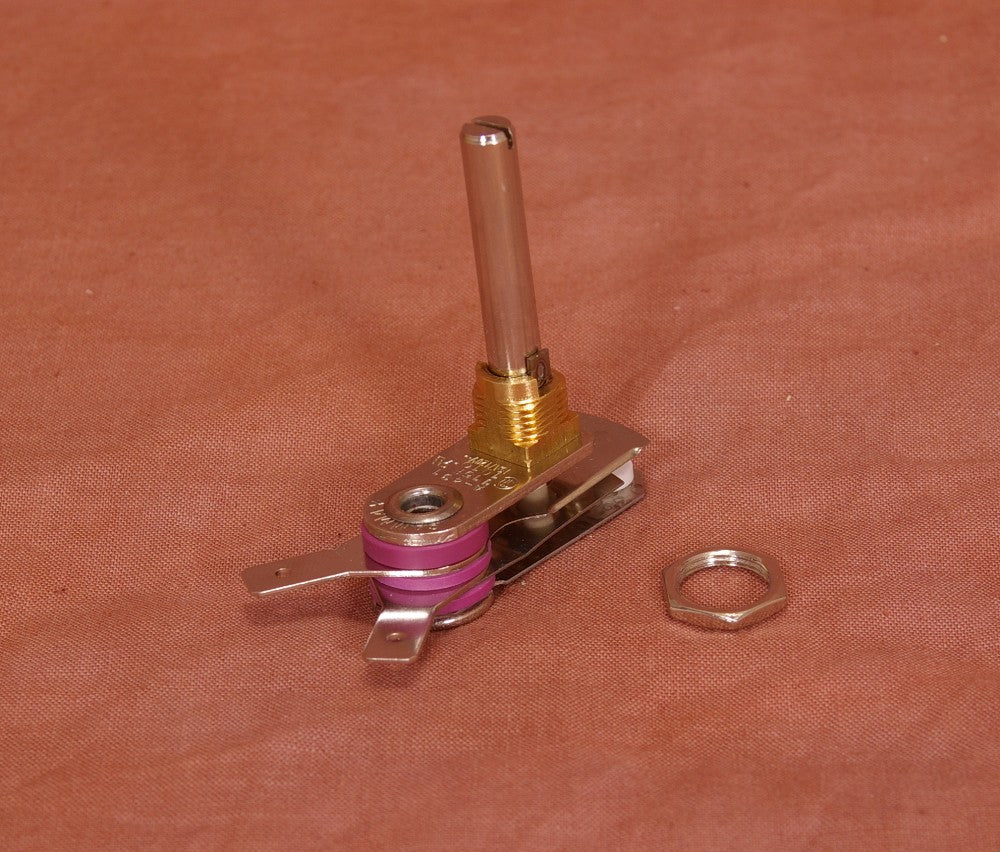
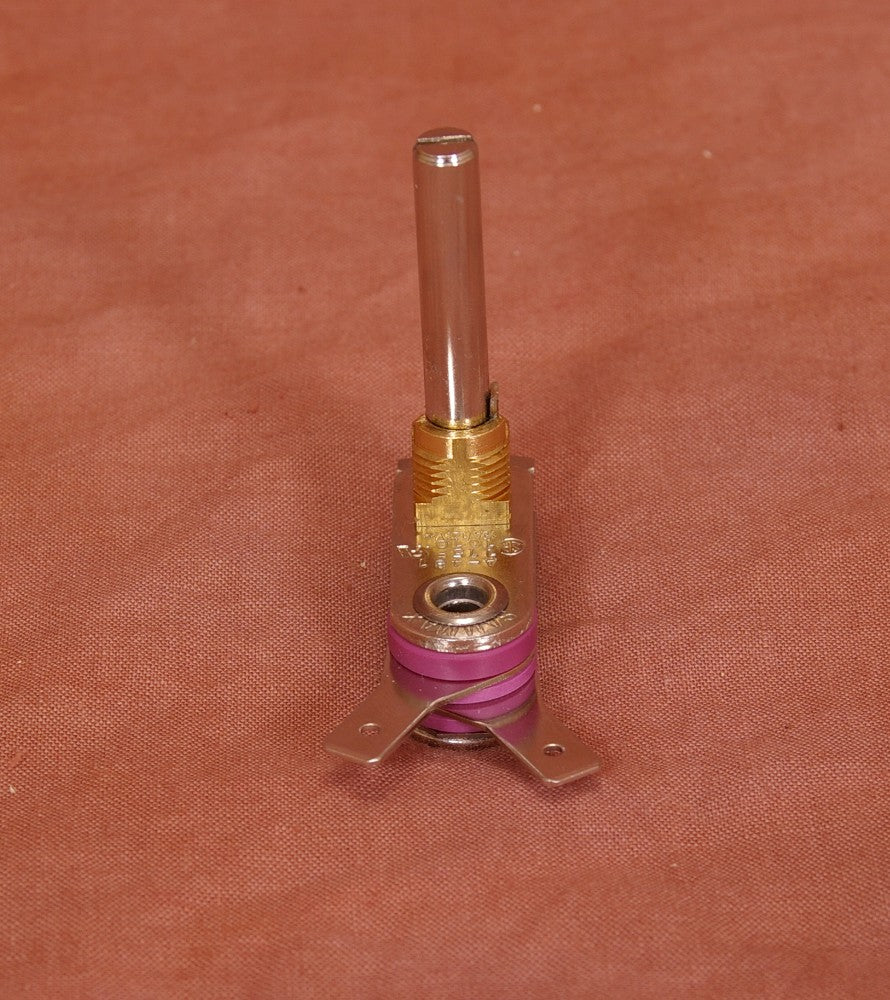
Thermostat Unit: Long 1.5" shaft designed to fit through thick styrofoam incubator walls.
Control Knob with Set Screw: Allows for easy and precise temperature adjustments.
Mini Screwdriver & Nut: Ensures the thermostat is securely fastened to your incubator.
Lead Wires with Insulated Connectors: Ensures safe, efficient electrical connections.
Wiring Diagram: Helps integrate the thermostat with a fan and heater, ensuring even heat distribution.
This Sammax-style thermostat is engineered to maintain an accurate temperature range between 80-105°F (27 and 40°C), ensuring optimal egg incubation conditions. The bi-metal mechanism provides reliable temperature stability, reducing the risk of overheating or underheating your eggs. This helps create the best conditions for a higher hatch rate.
This mechanical incubator thermostat is designed to function with both AC and DC power sources, making it a versatile choice for various incubator setups. Whether you're using a 120V AC home power supply or a DC-powered system in an off-grid setting, this thermostat adapts to your needs.
Technical Specifications
Brand: Incubator Warehouse
Material: Metal
Control Type: Knob
Temperature Range: 80°F - 105°F
Power Handling: 15A (up to 1800W)
Compatible Power Sources: AC or DC
Shaft Length: 1.5 inches
Weight: 8 ounces (0.5 lbs)
With a 15-amp rating, this thermostat can easily handle heating elements up to 1800 watts. It works for both small DIY and large commercial incubators. Its robust power capacity ensures efficient heating control without the risk of overload.
Step-by-Step Installation Guide
Mount the Thermostat: Insert the 1.5-inch shaft through your incubator's wall and secure it with the included mounting screw nut.
Connect the Lead Wires: Follow the included wiring diagram to attach the provided insulated lead wires to your incubator's heater and fan.
Install the Control Knob: Secure the control knob onto the thermostat shaft using the included set screw.
Power On & Adjust: Turn the control knob to set the desired temperature within the 80-105°F range.
Monitor & Fine-Tune: Use a thermometer or digital hygrometer to double-check temperature accuracy and adjust if needed.
Pro Tip: If you're using a fan-assisted incubator, place the thermostat near the airflow to ensure even heat distribution across all eggs.
Important Note: This thermostat is an electrically powered device, so safety precautions are essential.
Always disconnect power before handling electrical connections.
Use a protective screen to prevent direct contact with heated elements or exposed wires.
Secure all connections to prevent electrical failures or temperature inconsistencies.
Keep incubators in a stable environment to avoid extreme temperature fluctuations.
By following these safety guidelines, you can ensure a smooth and successful incubation process with zero risks.
Order now & take control of your incubator's temperature.
This is a Brand New Sammax style thermostat that works GREAT in an incubator!
Included with purchase: * Thermostat with a temperature range of 80-115 F (Long 1.5" shaft can go through thick styrofoam walls) * Screw nut that screws onto the thermostat shaft to help attach to a surface or panel * 15A rating * Can be used with either AC or DC applications * Comes with a wiring diagram for wiring in a fan and a heaterCaution: this is an electrically powered device that you will be mounting in your incubator yourself. As with any thermostat like this, you should be sure to put a protecting screen of some kind around this to ensure the hot wires/metal is not touched. You must use a great deal of common sense when dealing with electrical devices. Electricity is wonderful but can be very dangerous. Use caution, common sense and if in doubt, ASK AN EXPERT!!!
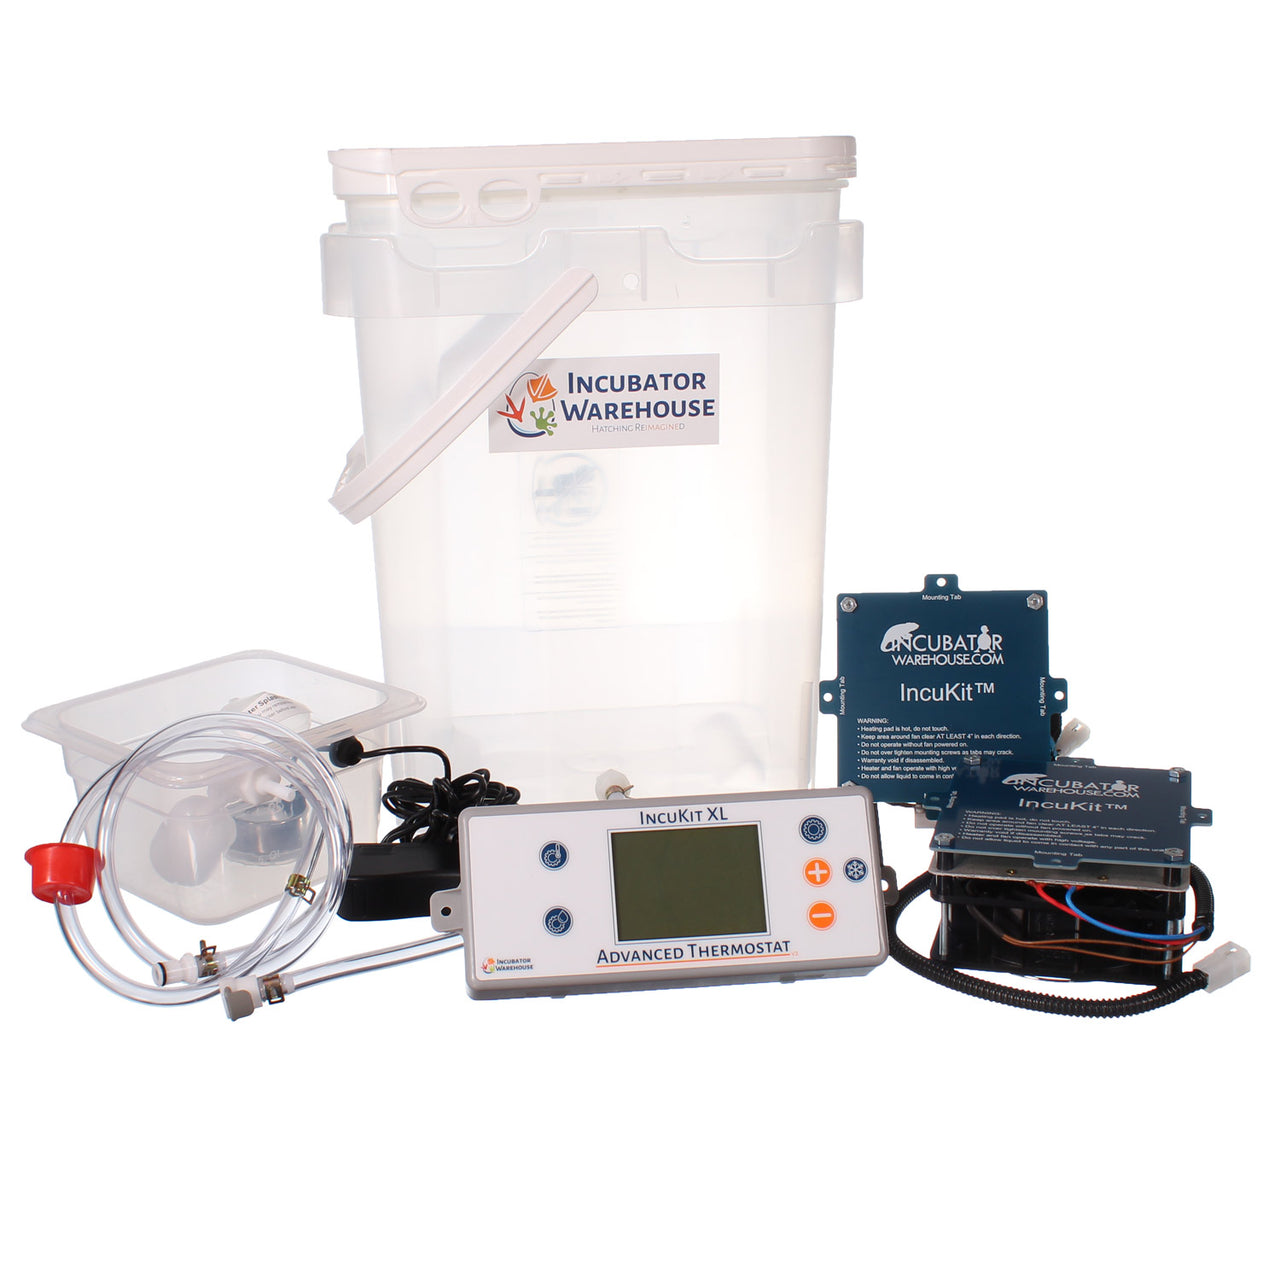
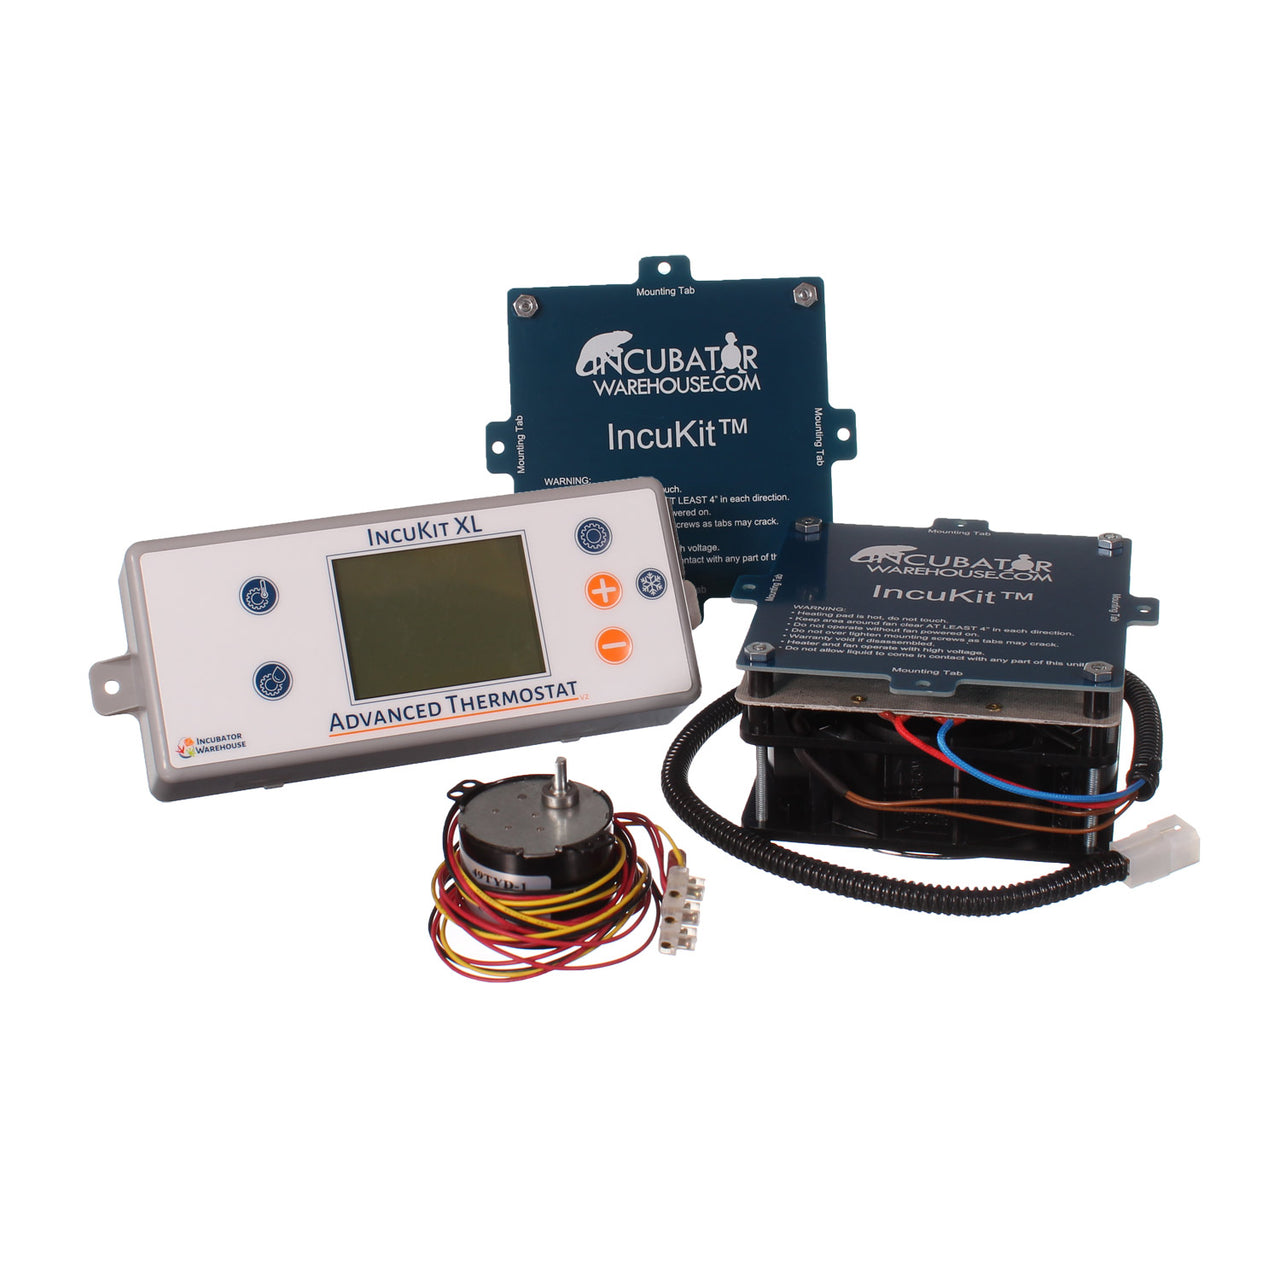
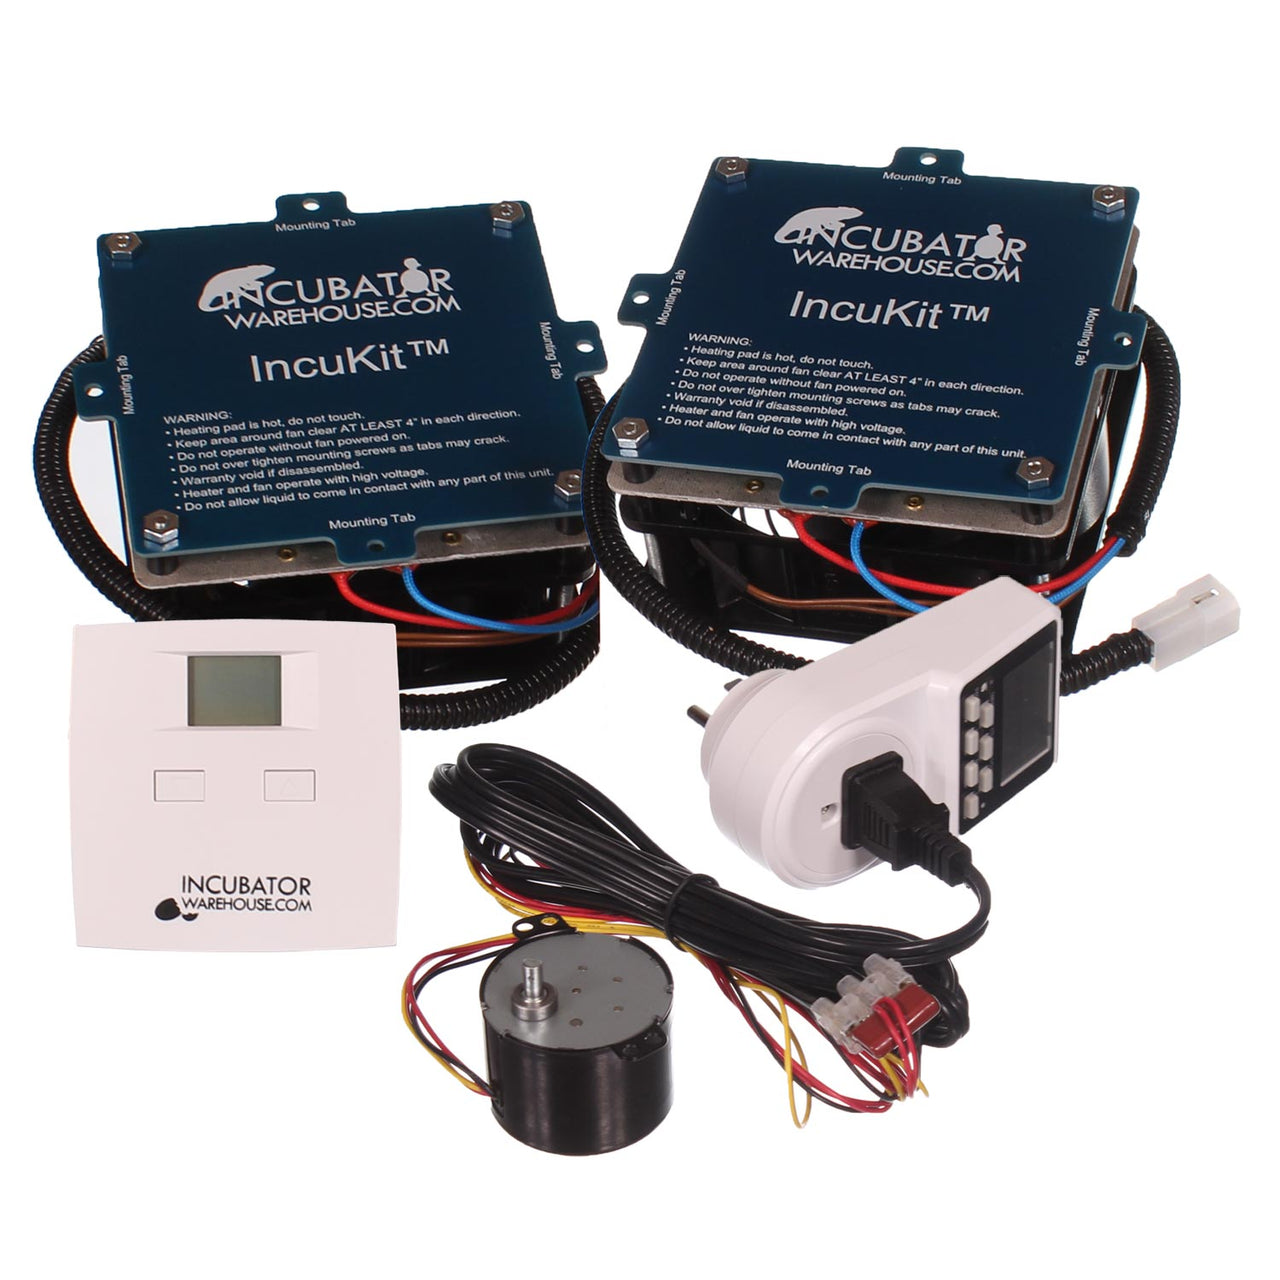
Transform your DIY incubator into a powerful, professional-grade hatcher with the IncuKit™ XL with Recirculating Fan. Designed for those building custom egg incubators, this all-in-one incubator kit combines a precise thermostat, high-efficiency heater fan, and a recirculating air system for uniform climate control. Whether you're incubating chicken, quail, reptile, or duck eggs, this kit ensures ideal conditions for better hatch rates.
Product Description
The IncuKit™ XL (with Recirculating Fan) is the ultimate solution for poultry keepers, hobbyists, and farmers looking to upgrade their DIY incubator. Built to work in incubators up to 120 quail eggs or 60 chicken eggs, it’s compatible with various box-style setups.
This unit includes a powerful heater fan, digital thermostat with LCD display, and a recirculating fan system to evenly distribute warm air—perfect for chicken incubators, reptile incubators, or even as a brooder heater post-hatch. It’s also ideal for anyone who wants full climate control without building electronics from scratch.
Product Information
Brand: Incubator Warehouse
Product Name: IncuKit™ XL with Recirculating Fan
Use Case: Egg Incubator, Brooder Heater, Farm Equipment, Reptile Incubator
Capacity: Up to 120 quail eggs or 60 chicken eggs
Application: Suitable for custom or replacement incubator parts
Technical Details
Power Input: 110V AC
Heating Element: 220-watt resistive heater
Thermostat Range: 60–104°F
Display: Digital LED with real-time temperature reading
Fan System: Built-in recirculating fan for even heat distribution
Sensor: High-accuracy probe for tight temperature regulation
Additional Information
This egg incubator kit is a game-changer for hobby breeders and small farm operators. It supports better hatch rates through reliable temperature regulation. Easy to install and maintain, it helps eliminate hotspots—ideal for building or upgrading poultry incubators and reptile setups.
Warranty & Support
All IncuKit™ systems come with a 1-year warranty and expert USA-based support. Need help with installation or customization? Our customer service team is happy to walk you through it.
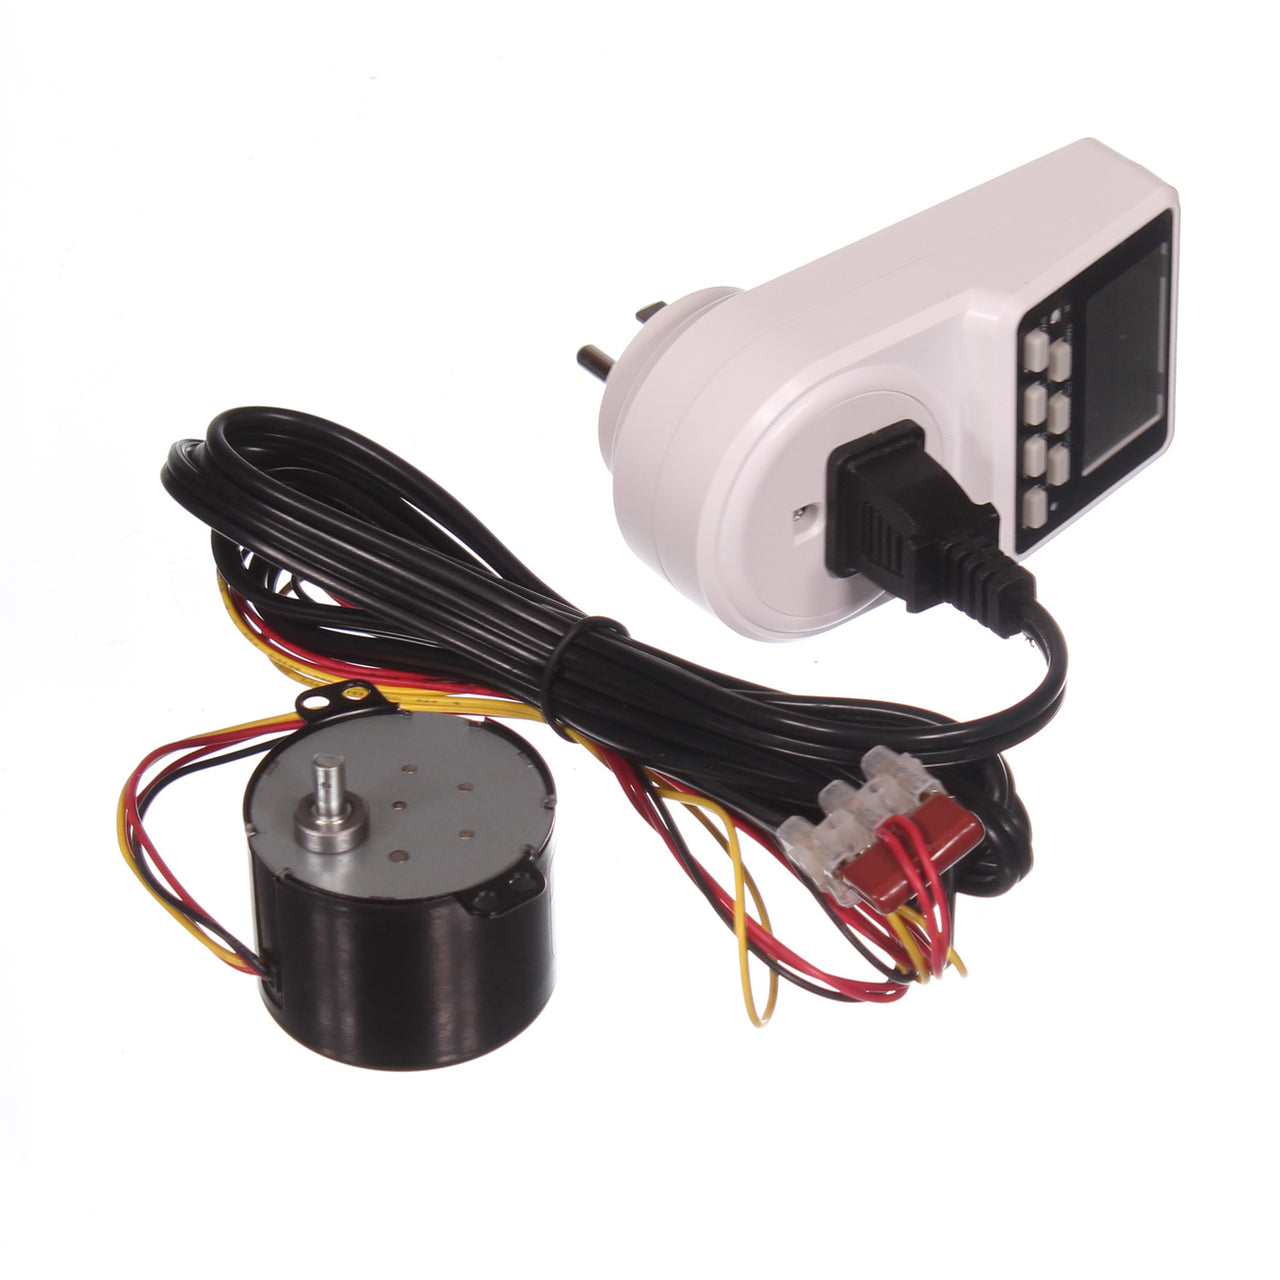
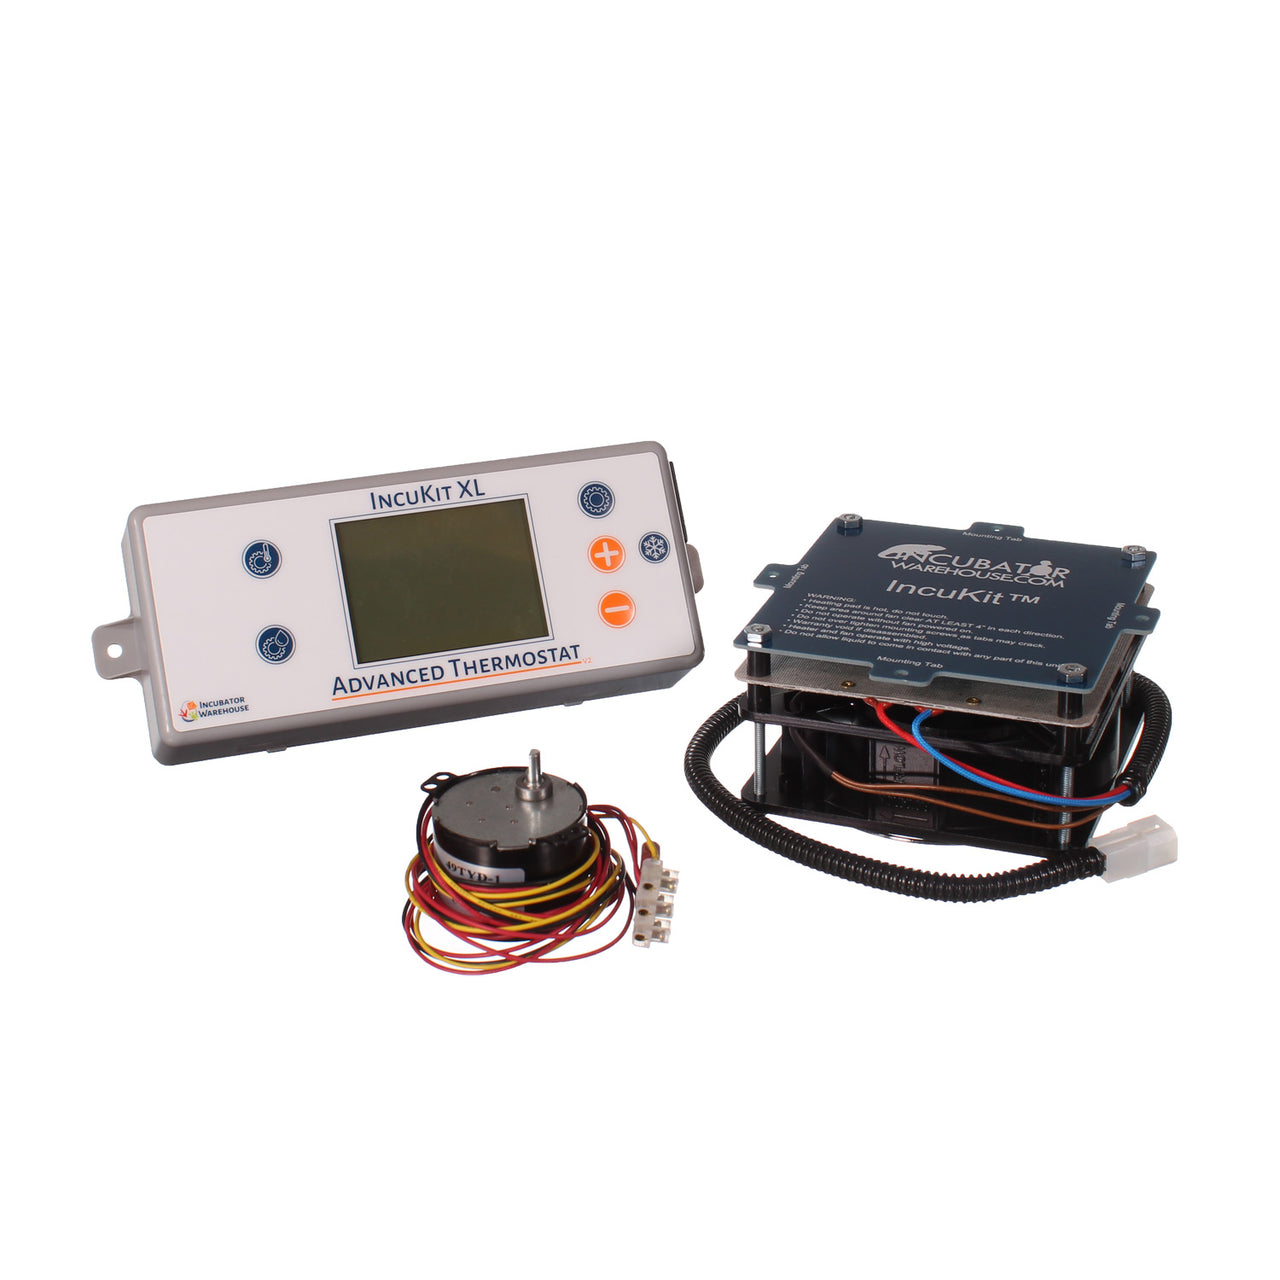
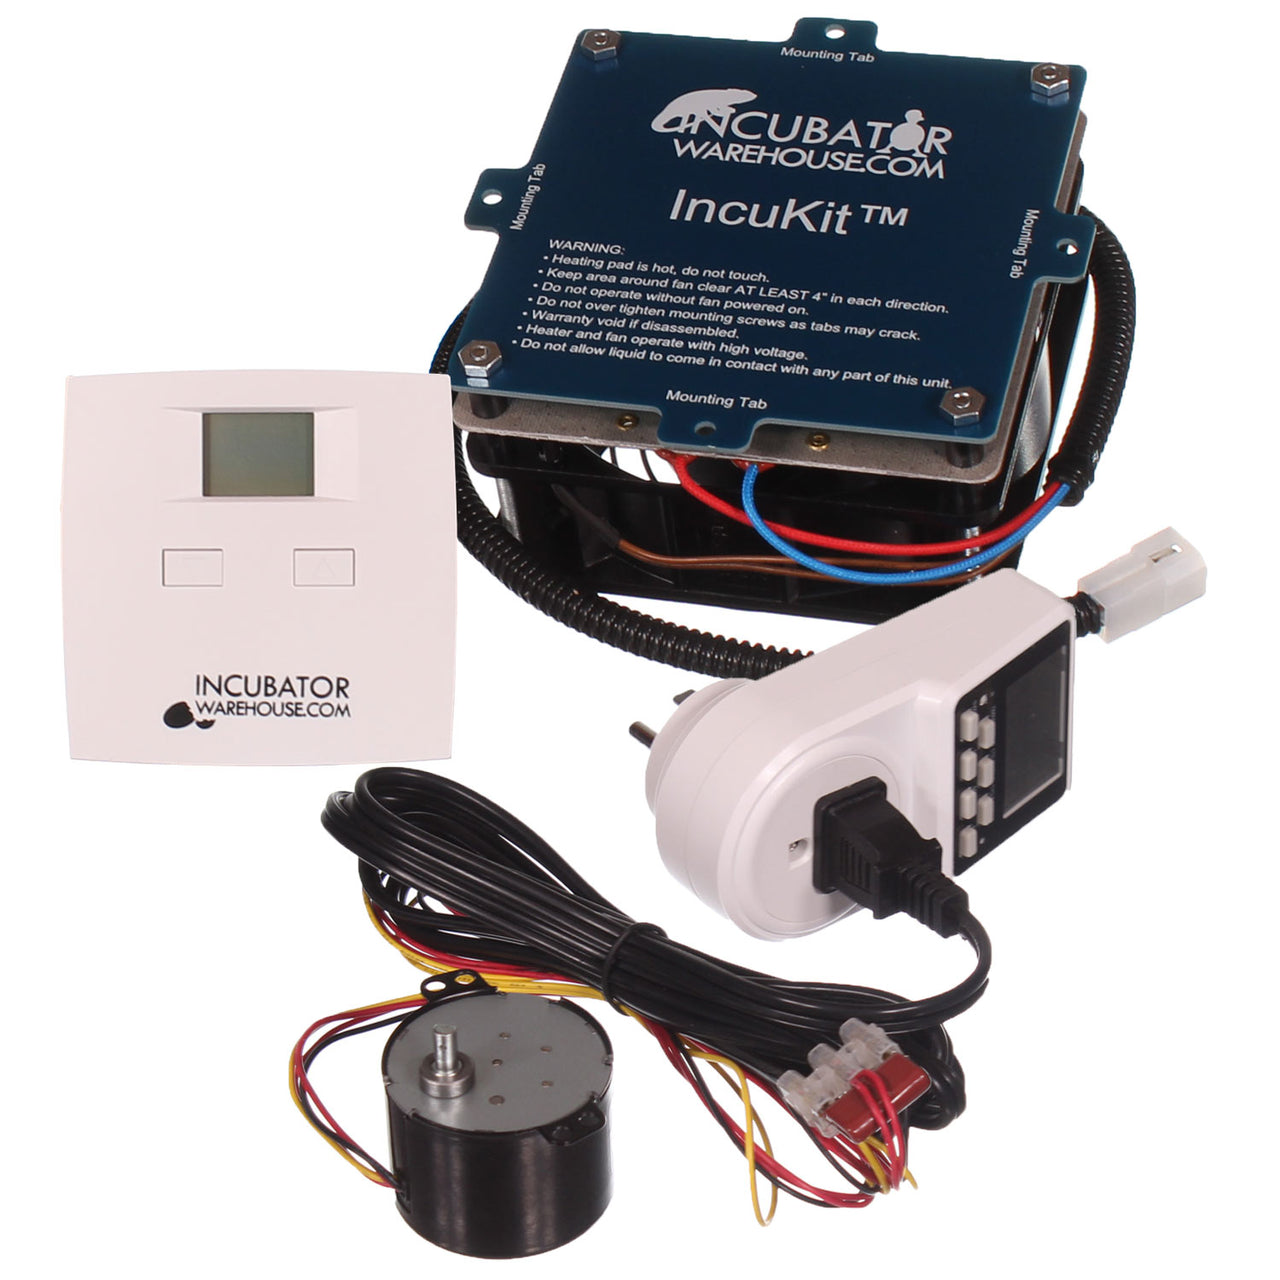
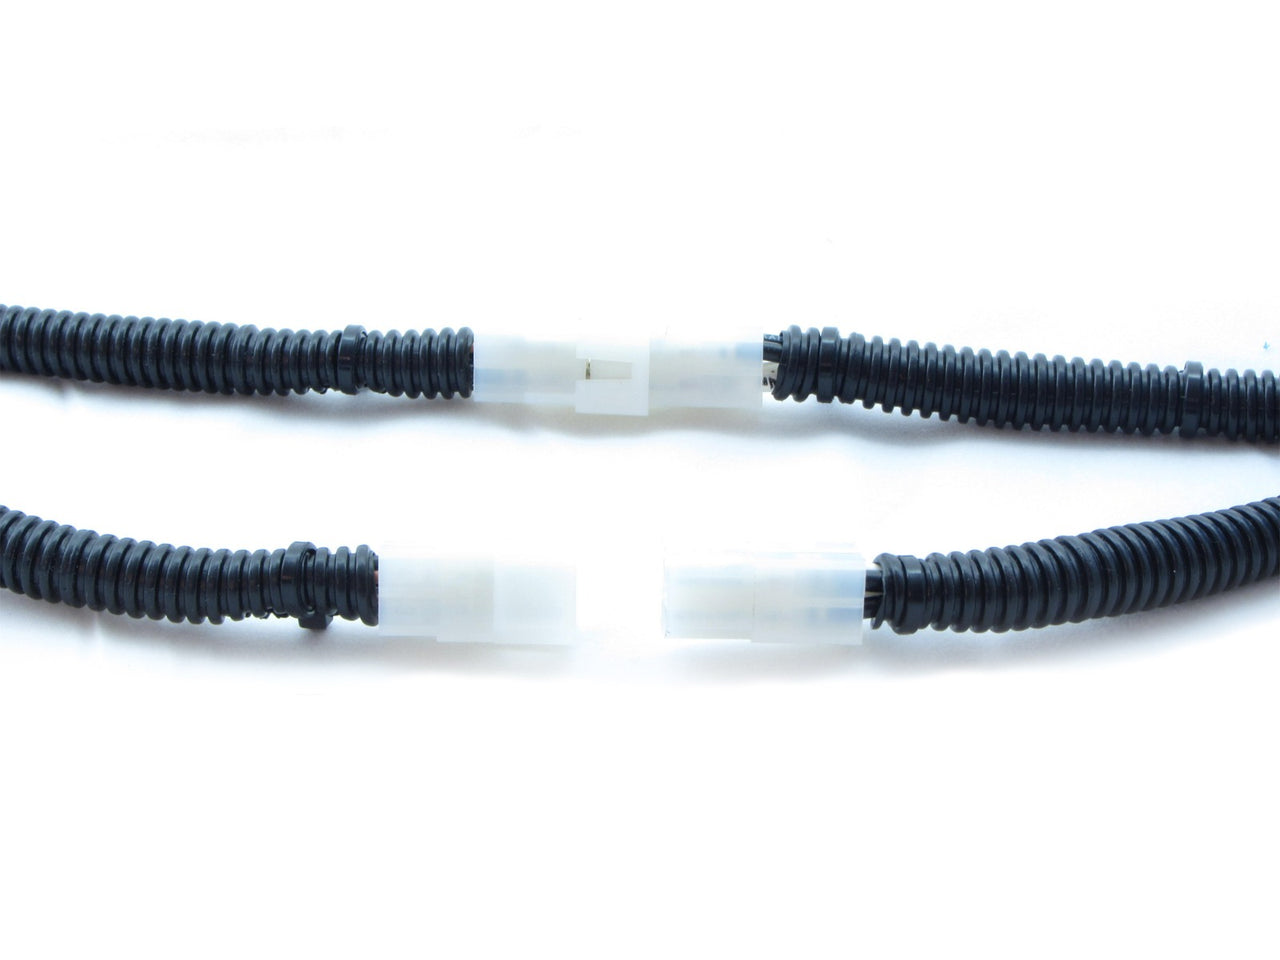
IncuStat Advanced for IncuKit XL. This device lets you add a sophisticated control module to your cabinet (or larger-style) egg incubator. This is designed to control the temperature, air circulation and automatic turner motors in your incubator.
Key features- On/Off Thermostat- Comes pre-set to 100 degrees F (easily adjustable, if desired)- Electronically controlled - Digital display- Controls the heater, fan and egg turner motors (it is not required to use this module to control all accessories, if you desire not to)- Hatch Day Counter- Thermostat can be calibrated- 110/120v power input (Standard US Power)- Remote sensor for accurate temperature reading- Easily mounts onto your incubator- Maximum heater wattage: 300 watts total (see note below if you need more power)
NOTE: if your incubator needs more power than 300 watts, you have the option of using a heater that is always on in order to bump up the entire wattage inside the incubator. For example, if you think you will need about 350 watts for your incubator, you can put a 60-watt light bulb inside the incubator that is always on. Then when the heater that you are regulating with the thermostat is on, you will have enough power in your incubator. Feel free to contact us if you would like further clarification about this option.
What is the difference between a proportional thermostat and an on/off thermostat?
A non proportional (on/off) thermostat turns the heater on at full power when the temperature drops below the set point, and shuts it off completely once the target temperature is reached. This simple, tried and true approach works very well in most incubator set ups, especially when the incubator is well insulated. It's a great choice for DIY incubators because it's easy to set up, easy to adjust, and reliably keeps temperatures in a safe range for hatching. A proportional thermostat, by comparison, constantly adjusts the power to the heater depending on how close it is to the target temperature. While that can reduce temperature swings slightly, the added complexity often isn't needed.
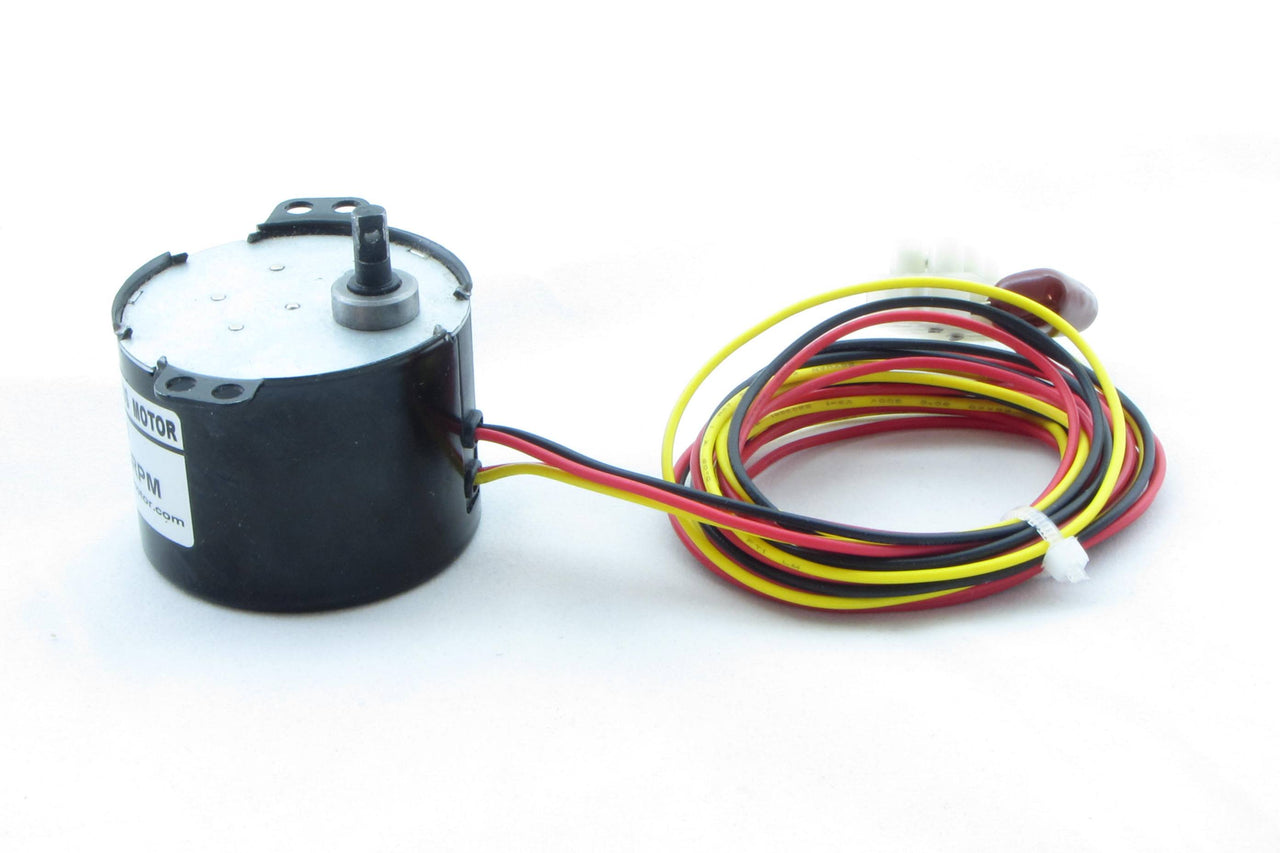
Motor control:
This unit also features a built in motor control function, programmed to turn on for 13 seconds every 2 hours. This is ideal for automatic egg turning in many DIY incubator setups. Please note: This timing is pre-programmed and not adjustable.
Product Features:
Precision Temperature Control: Maintain consistent heat levels between 75°F and 120°F, ideal for delicate egg incubation.
Heavy-Duty 22 Amp Rating: Built for reliability and consistent performance in desktop or cabinet incubators.
Universal Fit: Perfect replacement for Hova-Bator incubators or DIY egg incubator builds.
Surge Protection Built-In: Integrated surge guard protects your incubator's electrical system.
Easy Adjustment Knob: Fine-tune temperatures quickly with the simple twist of a dial.
Long-Lasting Durability: Engineered with quality materials that withstand long-term use.
110V AC Only: Compatible with standard US electrical outlets.
Includes 2-Year IncuCare Warranty.
Product Description:
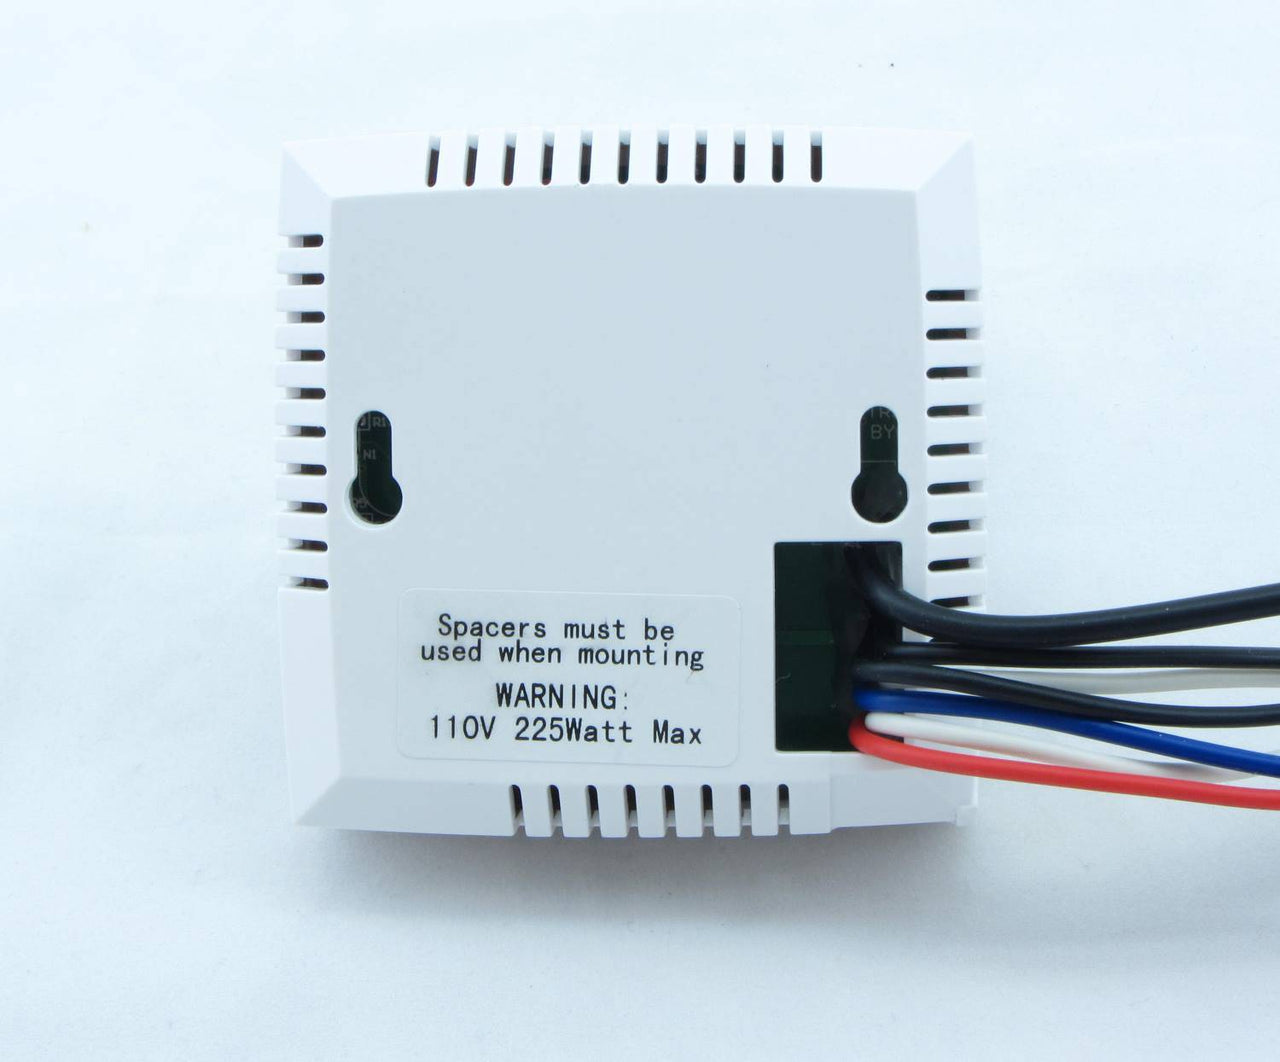
Looking to restore perfect temperature control in your Hova-Bator egg incubator? The Replacement Wafer Thermostat for Hova-Bator Egg Incubators (Model 3122) provides precise regulation and long-lasting performance to support your hatching success. Whether you're replacing a worn-out unit or building a DIY incubator, this high-quality thermostat has you covered.
Designed for both desktop and cabinet-style incubators, this thermostat is rated at 22 Amps, ensuring consistent performance over long hatching cycles. With easy adjustability between 75°F and 120°F, it accommodates a wide range of incubation needs even accounting for shifting room temperatures.
The simple wafer-based design makes it a favorite among breeders who value durability, dependability, and ease of use. Plus, the integrated surge guard adds an extra layer of protection for your setup. And don't forget — it's backed by our industry-leading 2-Year IncuCare Warranty so that you can buy with confidence.
Why Choose a Wafer Thermostat?
Great question! A wafer thermostat uses old-school mechanical tech to control temperature. The thermostat's wafer technology provides a mechanical solution free of digital complexities — ideal for off-grid use, remote farm locations, or anyone seeking a fail-proof, analog thermostat.
It's a tried-and-true system used by poultry keepers for decades, because it works. From chicken and quail to exotic birds and reptiles, you get unmatched consistency during every hatch.
Use Case Examples
Replacing a faulty thermostat in your Hova-Bator
Building a homemade incubator for small-scale egg hatching
Maintaining stable temperatures for reptile egg incubation
Enhancing reliability in rural or backup incubator setups
Technical Specs:
Thermostat Type: Wafer
Voltage: 110V AC
Amp Rating: 22 Amps
Temperature Range: 75°F – 120°F
Compatibility: Hova-Bator & DIY incubators
Assembly Includes: Wafer, Bracket, Adjustment Mechanism
Customer Support and Warranty
We stand behind every product with our IncuCare 2-Year Warranty. If your thermostat doesn't perform, we'll replace it. Need help? Our USA-based support team is always here for your incubation success.
Don't risk your hatch - upgrade your incubator with a thermostat you can trust!
Click Add to Cart now and experience precise control and lasting durability for your egg incubation setup
Product Features:
Designed for Little Giant Incubators: Compatible with 9300, 10300, and 11300 models.
Digital LCD Display: Easily check the current temperature and humidity levels.
Precise Temperature Control: Ensures a stable environment for better hatch rates.
Includes a Brand-New Sensor Set: Improves accuracy and reliability.
User-Friendly Design: Simple button controls make adjustments quick and easy.
Reliable Performance: Built to handle continuous incubation cycles.
Product Description:
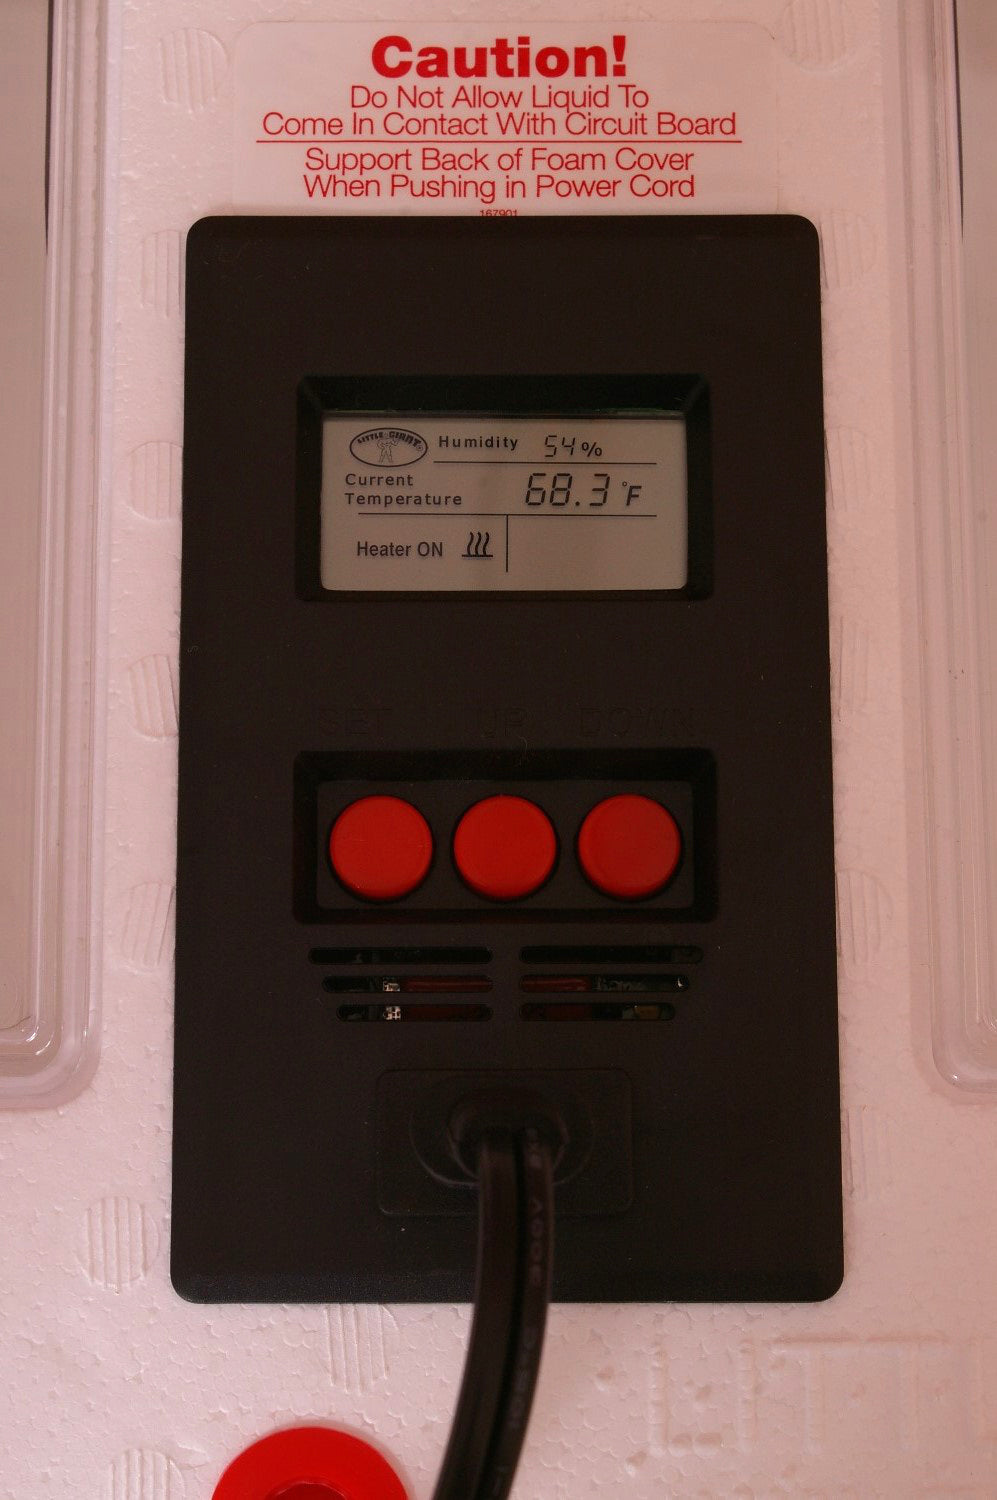
If your Little Giant 9300, 10300, or 11300 incubator isn't keeping a steady temperature or humidity, it might be time for a new thermostat controller and sensor. This replacement unit brings your incubator back to top performance, ensuring a stable environment for your eggs. With a digital LCD display, easy controls, and accurate temperature and humidity readings, this is the perfect fix for an incubator that's not working quite right.
A working thermostat is the heart of your incubator. If it fails or starts giving inaccurate readings, your eggs could be at risk. This digital electronic thermostat is designed to provide precise temperature and humidity control, so you don't have to worry about fluctuations affecting your hatch rates.
The easy-to-read LCD screen displays both current temperature and humidity, letting you monitor conditions at a glance. It also includes a new set of sensors to get the most accurate readings possible. Whether you're hatching chickens, ducks, quail, or reptiles, this controller helps create the perfect conditions for success.
Replacing your Little Giant incubator thermostat controller is quick and simple; no special tools or technical skills are required. The included sensor set ensures your incubator is operating at peak accuracy. Simply connect the unit, adjust the settings to your desired incubation temperature, and monitor the real-time data on the LCD screen. The intuitive interface makes it easy to fine-tune conditions as needed.
Maintaining a consistent environment is critical if you're serious about hatching eggs, whether they're from chickens, ducks, quail, or even reptiles. A faulty thermostat can ruin an entire hatch, but you can incubate confidently with this replacement controller and sensor.
Don't let an outdated or malfunctioning controller affect your hatching success. Order this Little Giant digital thermostat controller and sensor combo today and keep your incubator working like new.
Product Features:
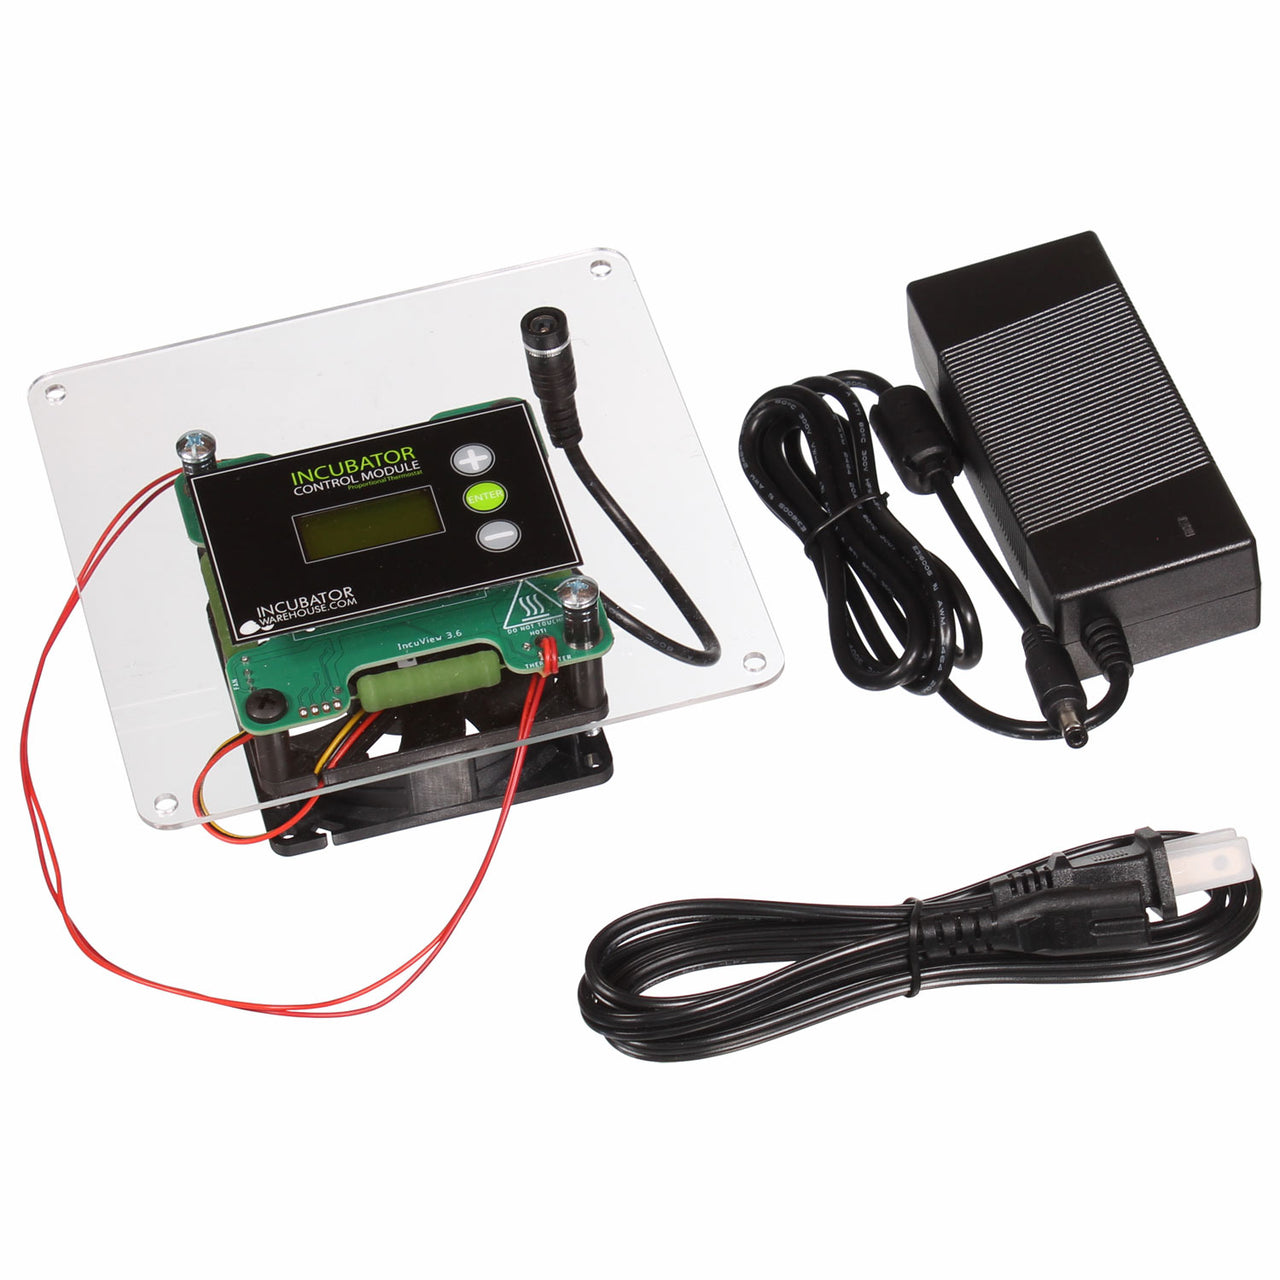
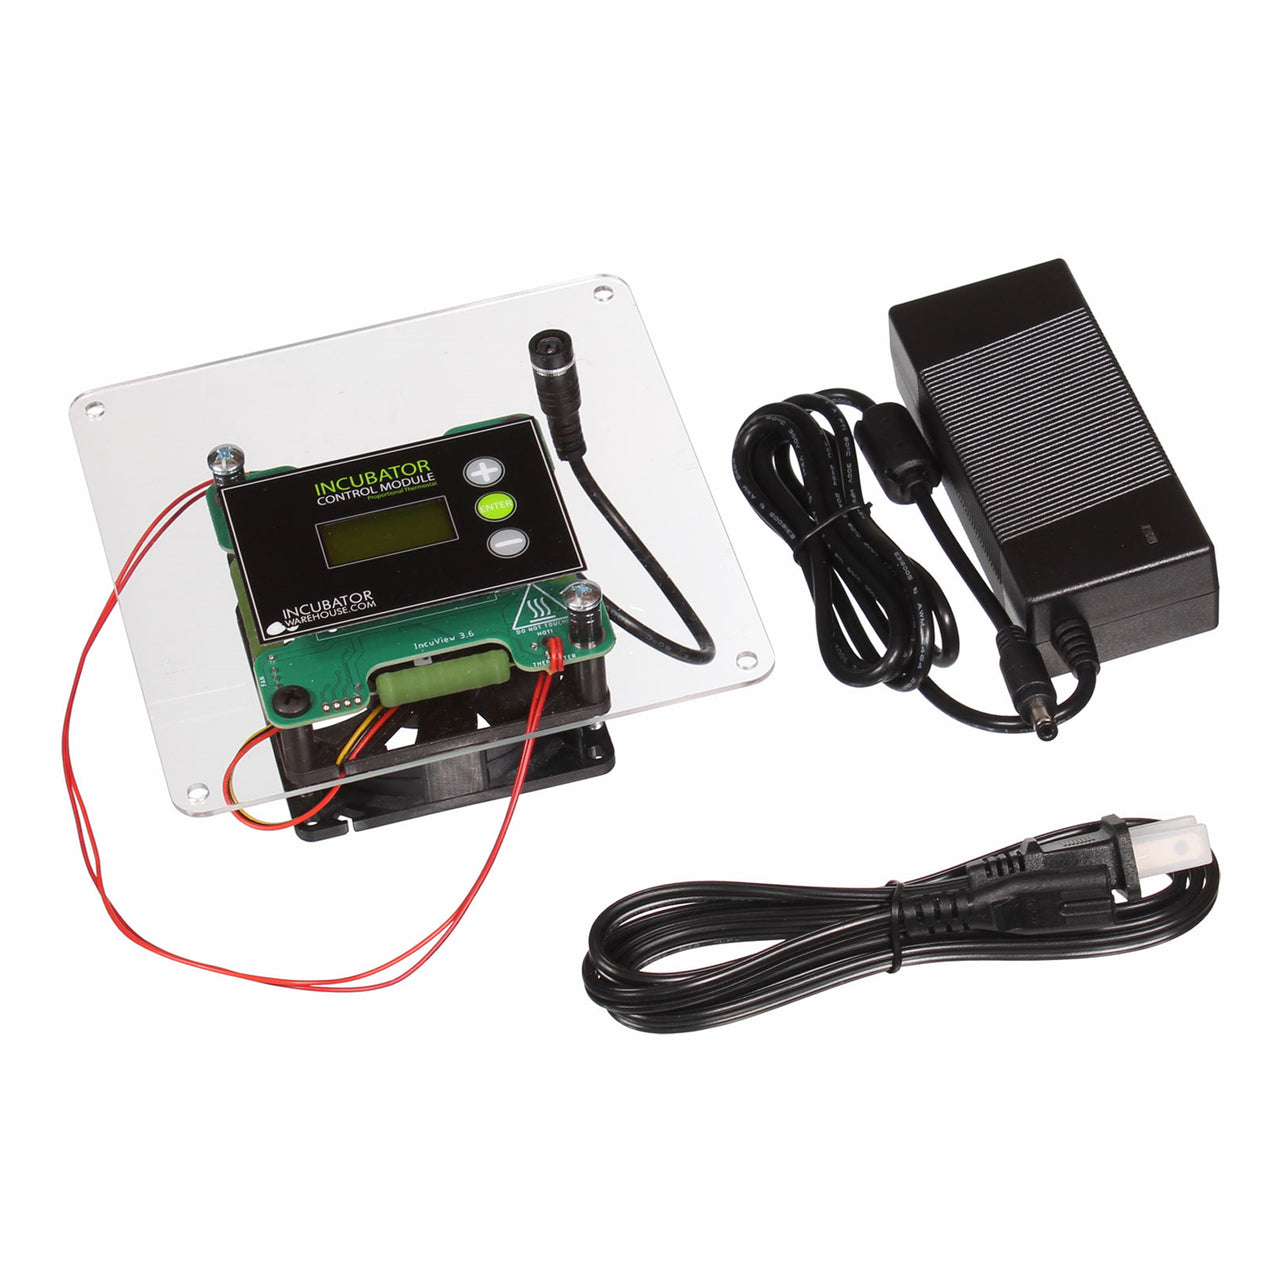
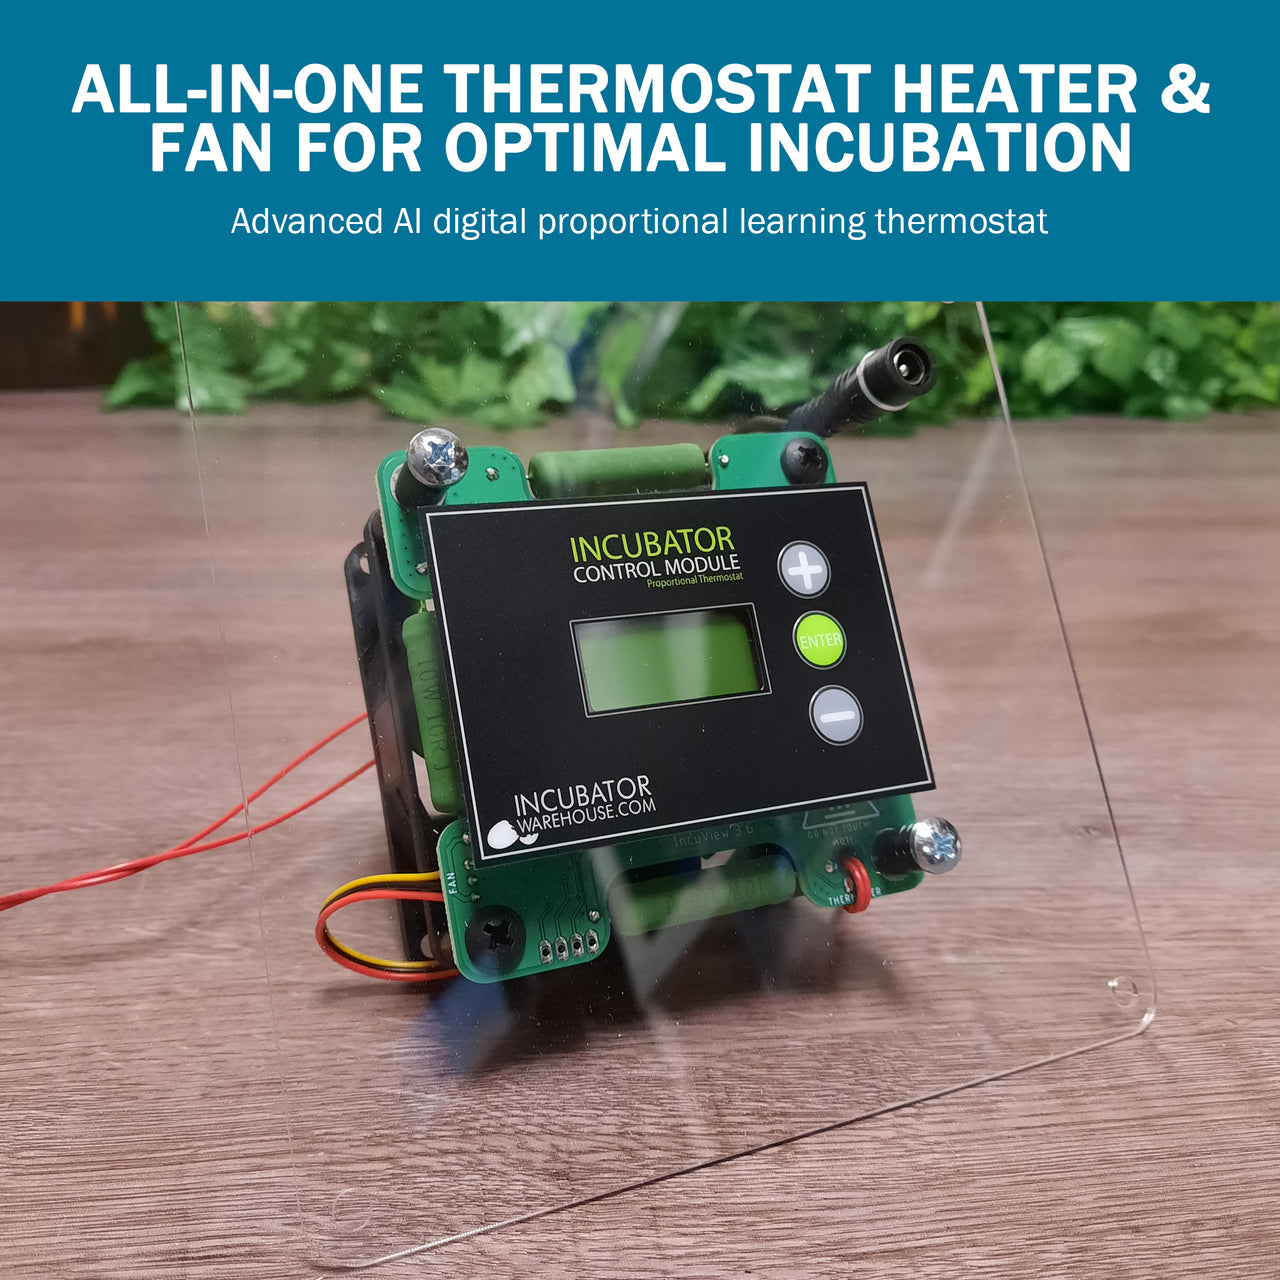
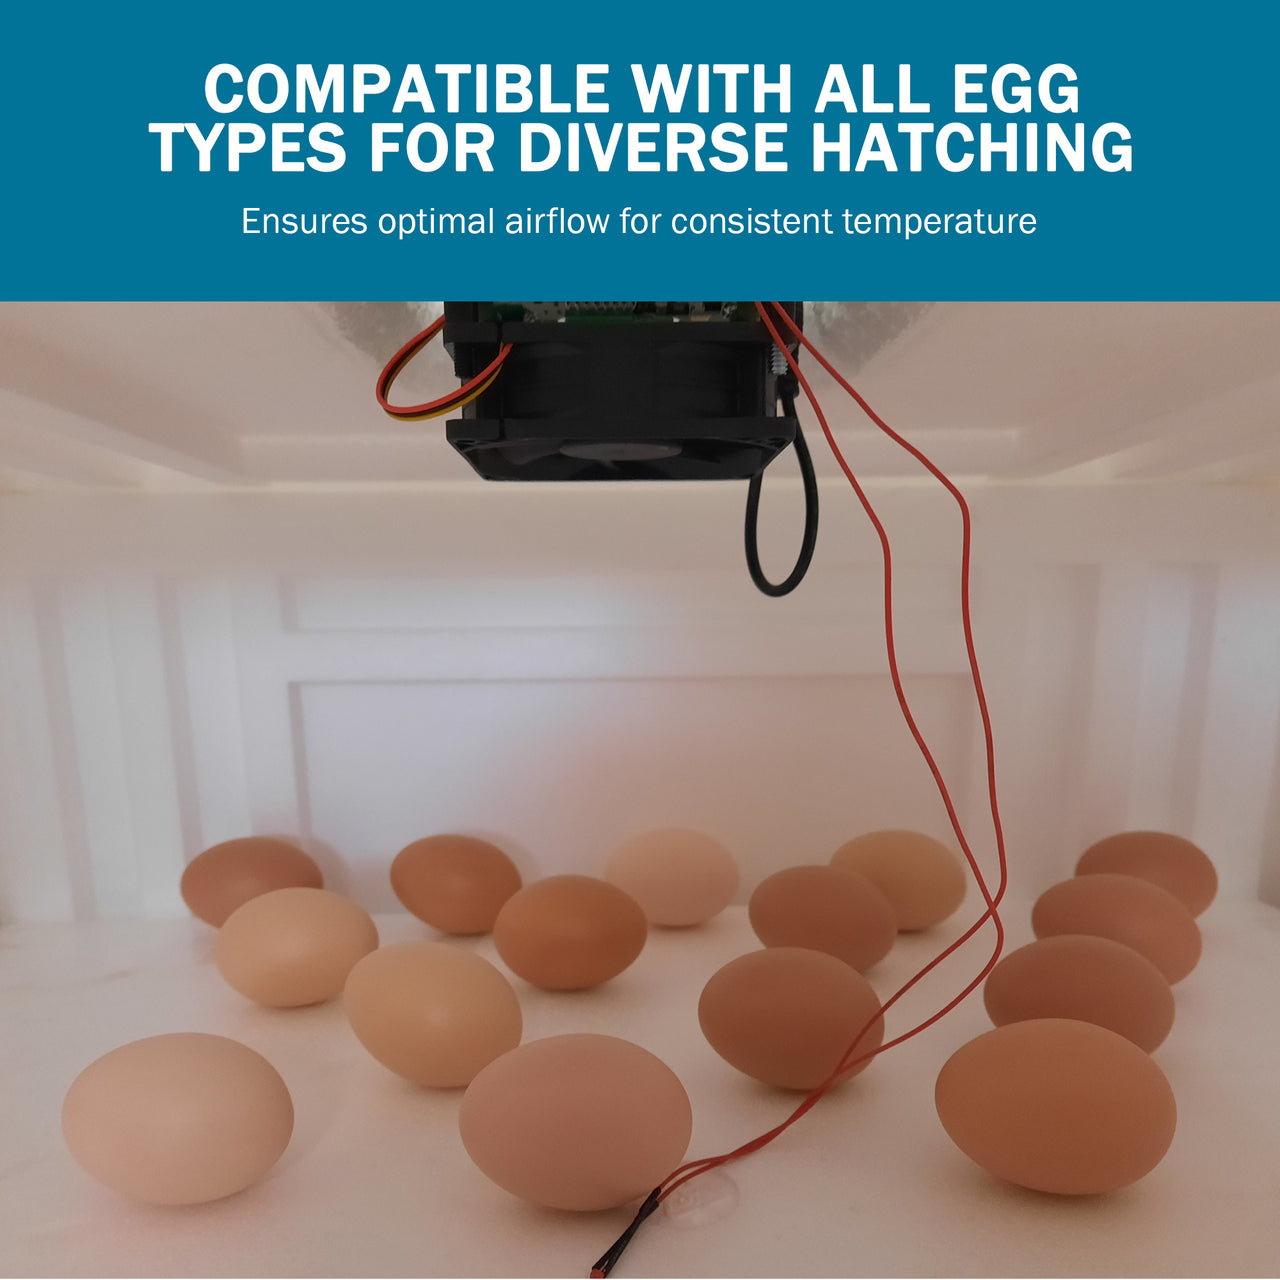
All-in-One System: The thermostat, heater, and fan are seamlessly integrated into one sleek, compact module, eliminating the need for multiple components.
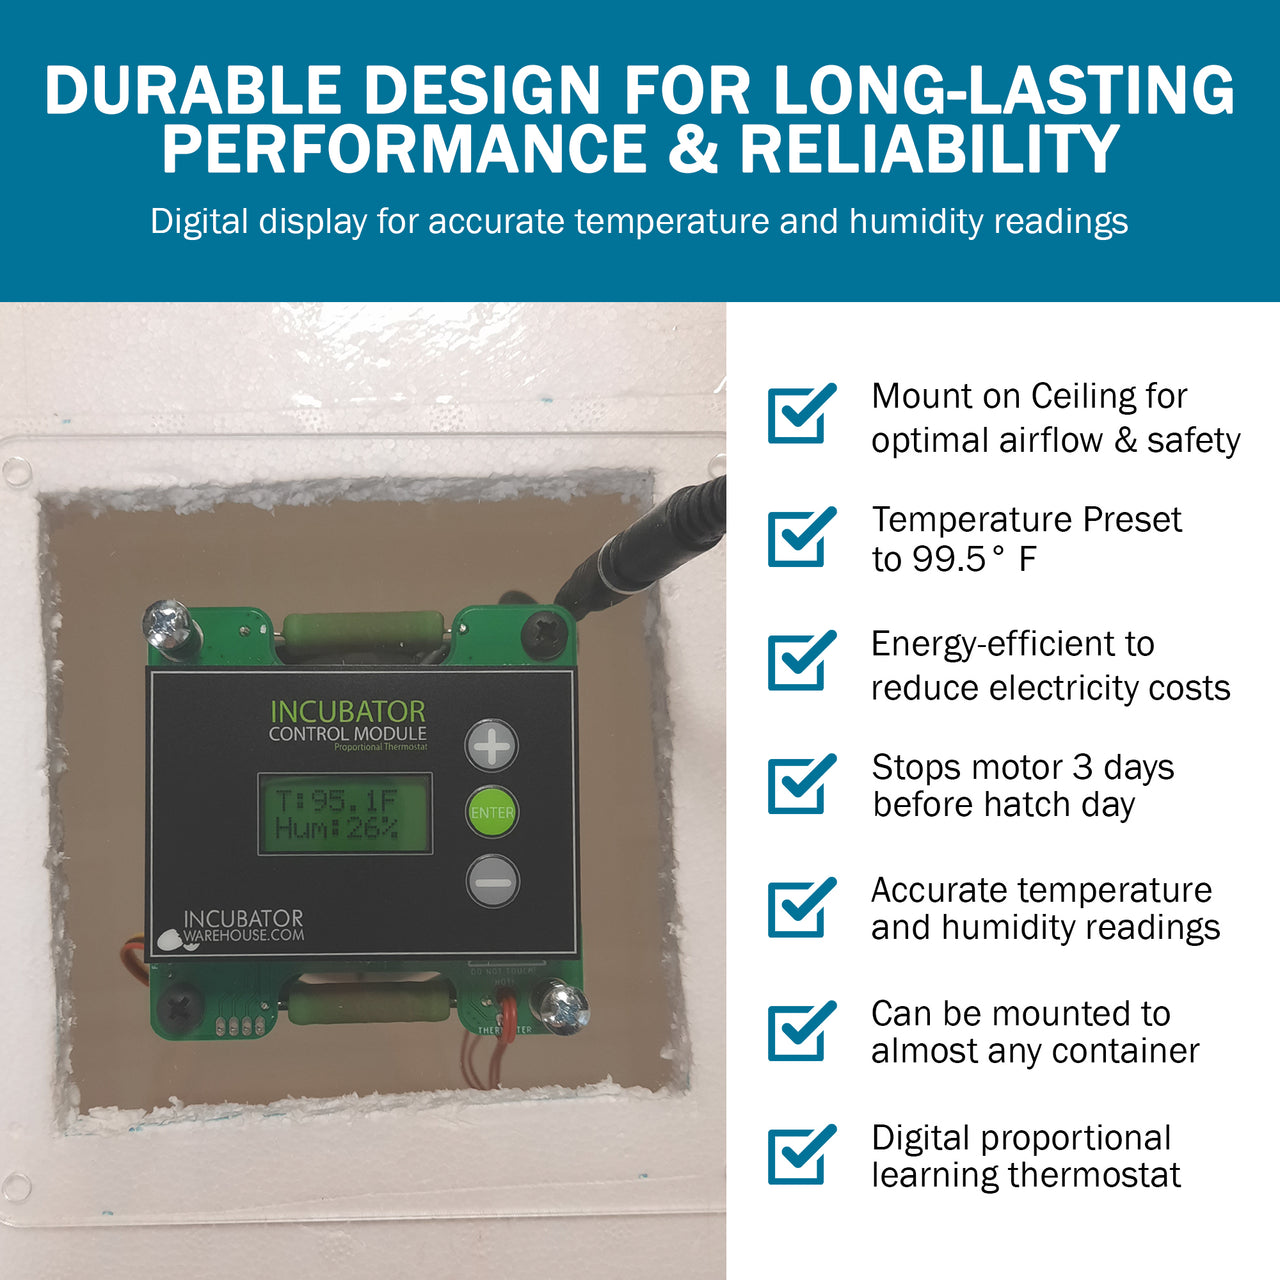
AI-Powered Digital Thermostat: A proportional electronic thermostat adjusts power output in real time to stabilize temperature and minimize fluctuations.
Preset to 99.5°F – Fully Adjustable: Designed for poultry eggs but adjustable for reptiles, exotics, or any specialty hatching needs.
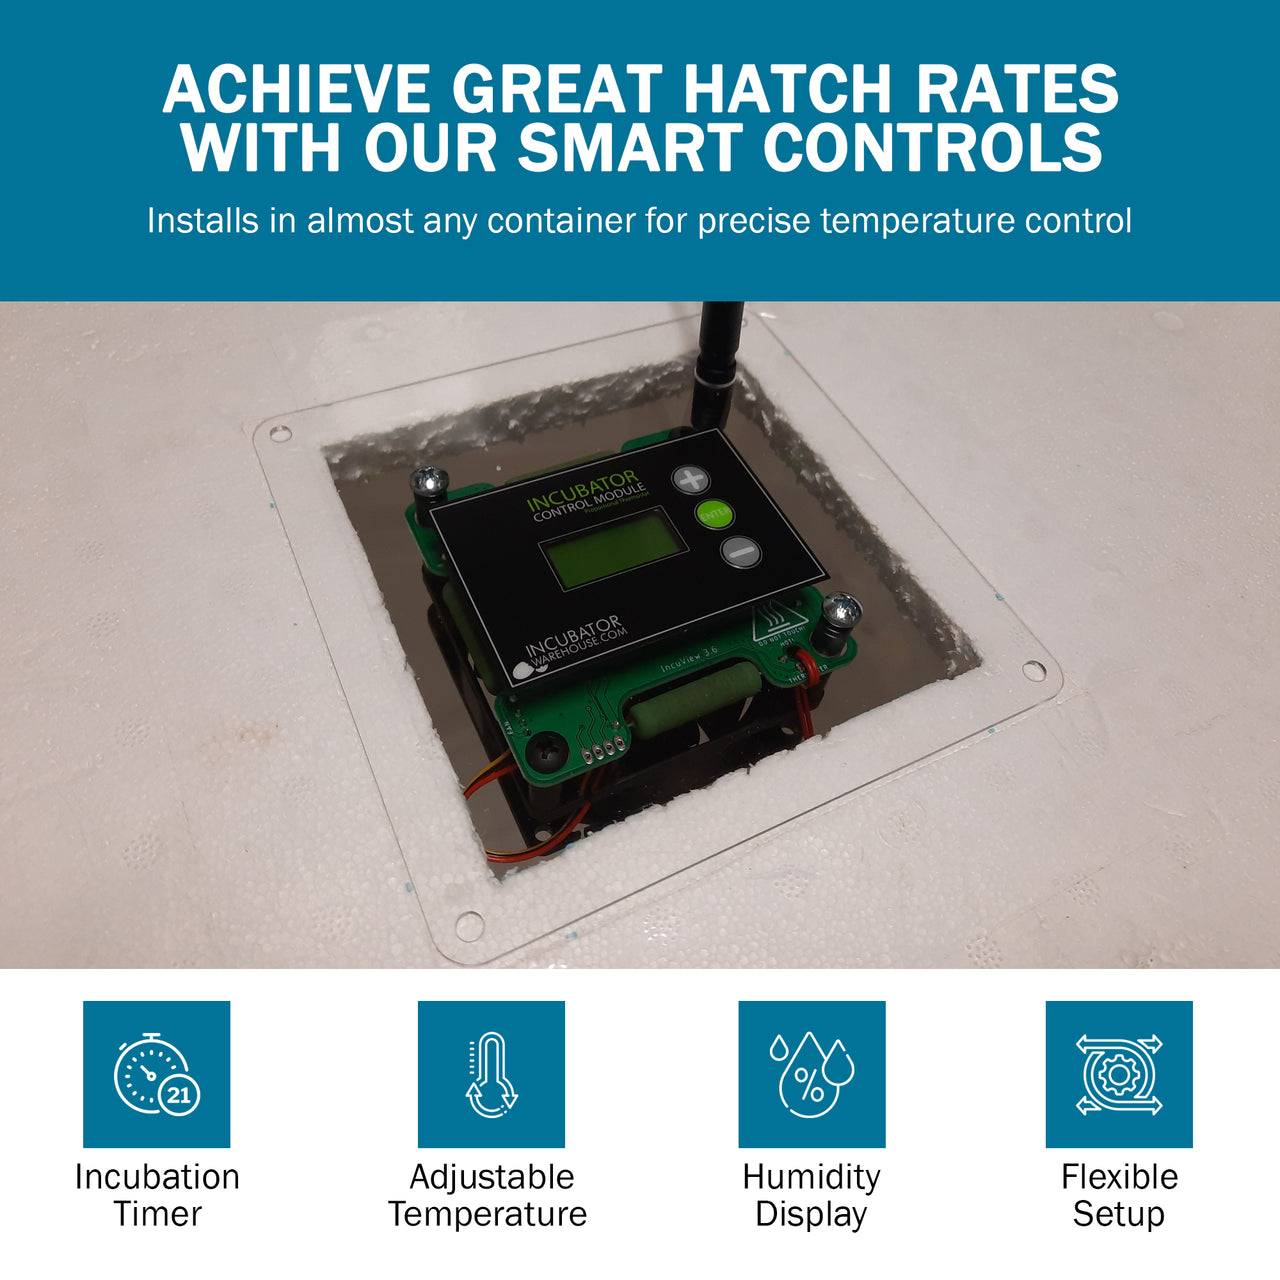
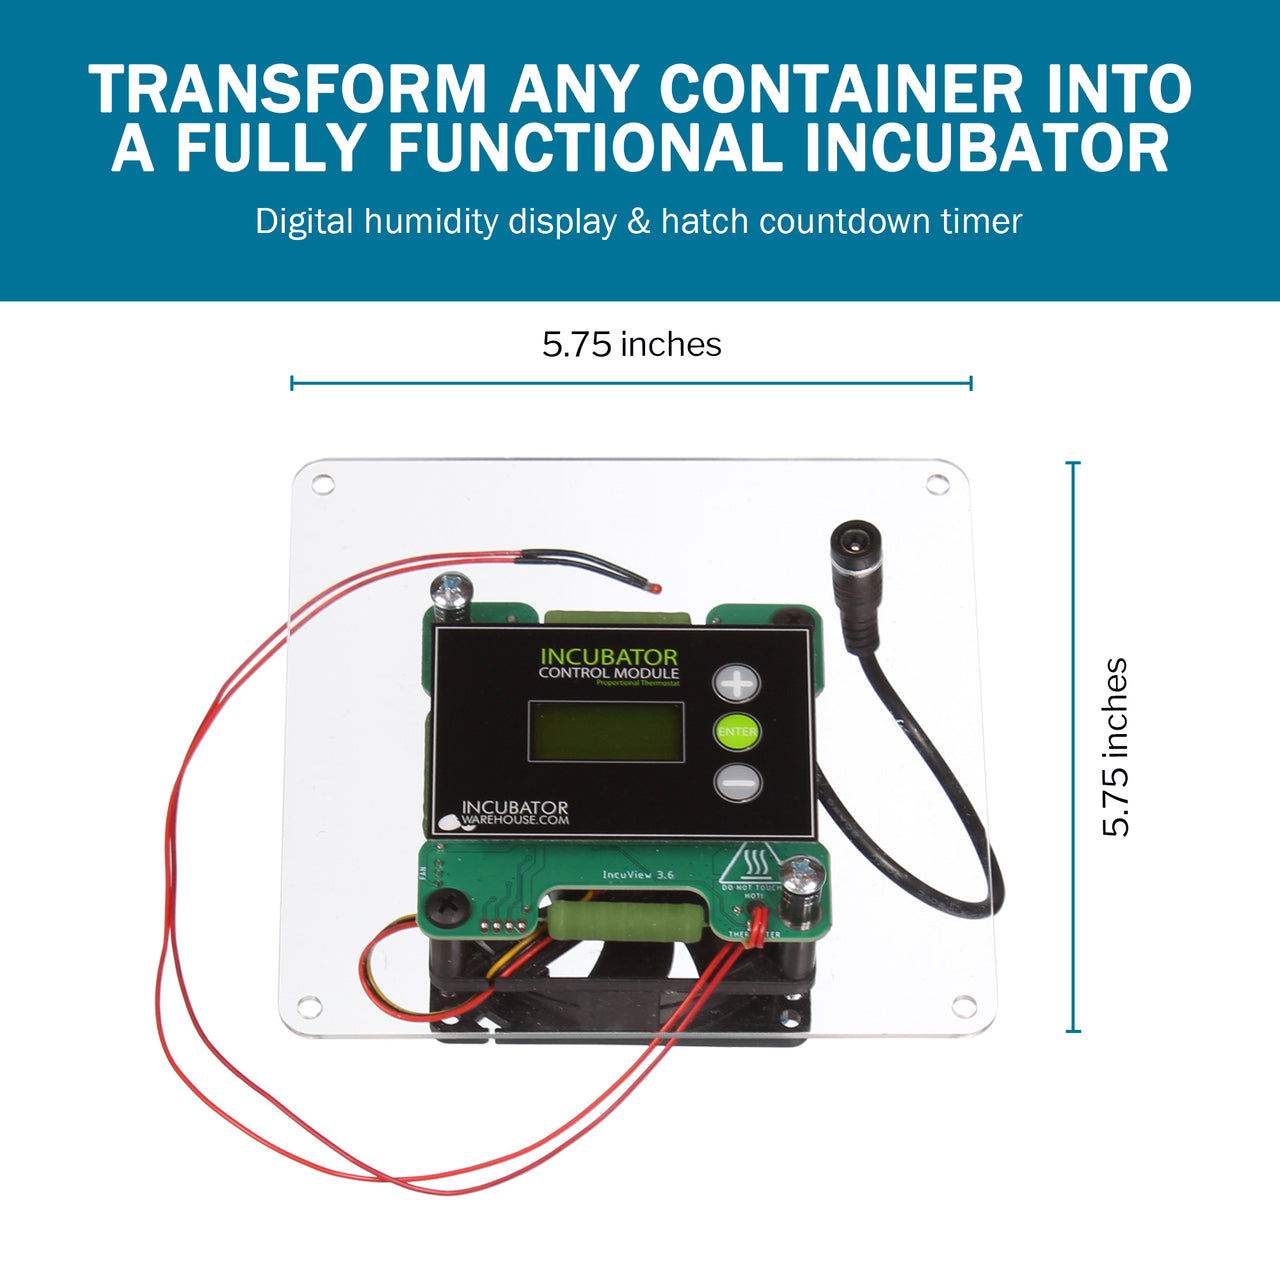
Humidity Display + Hatch Countdown Timer: Digitally monitor conditions and keep track of hatch days for peace of mind.
Ultra-Efficient 60W Heater + High-Speed Fan: Ensures consistent heat distribution and optimal airflow across all egg zones.
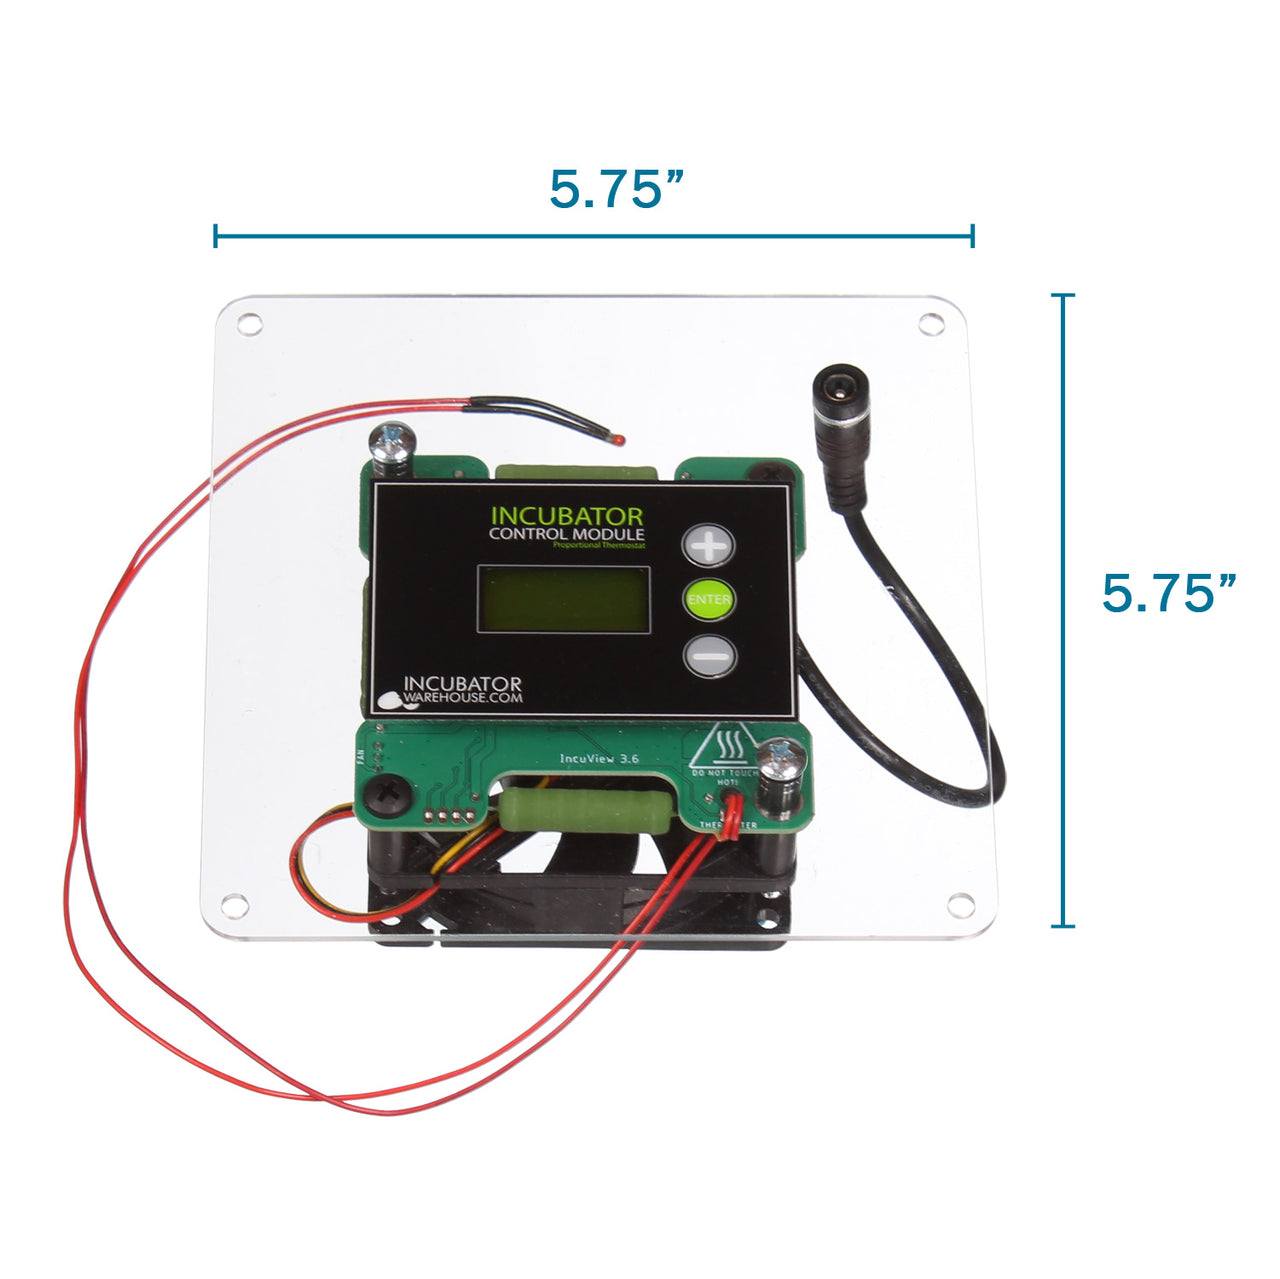
Compact 5.75” x 5.75” Panel: Sized to install into virtually any container, making it ideal for DIY builds.
12V DC Power with Versatile Input Options: Works with standard wall outlets (110V or 220V), 12V battery systems, or even a car adapter for mobile hatching setups.
Remote Sensor for Accurate Readings: Ensures precision temperature control by separating the sensor from the heating source.
Includes 2-Year IncuCare Warranty.
Product Description:
Building your own incubator shouldn't be complicated or frustrating. Whether you're a passionate hobbyist, a first-time backyard breeder, a classroom educator, or a seasoned reptile keeper, achieving perfect incubation conditions is key to hatching success. The IncuKit™ MINI 2 incubator thermostat with fan and heater provides the precision, simplicity, and versatility to create a fully optimized hatchery from almost any insulated container.
This intelligent, compact module was engineered from the ground up to solve a problem that many DIYers face: maintaining consistent and reliable temperature and airflow in a homemade incubator. This device eliminates the guesswork of incubation by providing a feature-rich, all-in-one solution that converts any container into a professional-grade incubator.
A Smarter, Simpler Way to Build an Incubator
Why settle for inconsistent temps or unreliable heating pads? With the IncuKit™ MINI 2, you get an innovative system that seamlessly combines:
A proportional digital thermostat for advanced heat regulation
An integrated circulation fan for even air distribution
A precisely tuned 48W heater for optimal warmth
An easy-to-use digital interface with real-time monitoring
The module installs easily into most plastic bins, Styrofoam coolers, or wooden boxes meaning you can DIY with confidence.
AI-Powered Proportional Thermostat
Unlike basic thermostats that only switch on or off when the temperature crosses a threshold, the IncuKit MINI 2 uses a proportional-integral-derivative (PID) learning algorithm. This allows it to continuously adjust the heater's power output, smoothing out temperature swings and minimizing fluctuations.
With this feature, your hatchlings receive a stable thermal environment that closely mimics natural conditions, resulting in higher success rates and healthier chicks or reptiles.
Built-In Fan for Circulating Warmth Evenly
The built-in fan ensures that no hot or cold spots form within your incubator. Even air distribution is critical for ensuring that all eggs are exposed to the same temperature and humidity conditions, especially when incubating large batches or multiple species.
This feature also reduces the need to rotate or move eggs to prevent uneven development constantly.
Digital Humidity Readout for Monitoring Conditions
Humidity is just as important as temperature. Too low, and your eggs might dehydrate. Too high, and they may not hatch properly. That's why the IncuKit™ MINI 2 includes a digital humidity display, so you can keep a close eye on levels without opening your incubator and disturbing the environment.
Pair this with your preferred humidity system, whether it's water trays or a humidity pump and you'll always know when adjustments are needed.
Flexible Power Options: At Home or On the Road
What makes this product a game-changer is its ability to operate on both AC and DC power. Use the included AC-to-DC converter for traditional wall power, or hook up a 12V battery (battery connectors sold separately) for off-grid or mobile setups. You can even use a car power adapter (also sold separately), making it perfect for:
Queen bee cell transportation
Classroom experiments
Emergency power outages
Mobile hatching on the go
Countdown Hatch Timer Built-In
Forget sticky notes or spreadsheets. The built-in incubation timer makes it easy to track hatching progress. Know exactly how many days are left before your eggs hatch — a small feature with big benefits for planning and success.
What's in the Box:
1x IncuKit™ MINI 2 Smart Thermostat Heater & Fan
1x Clear mounting plate (5.75" x 5.75")
1x 12V DC power supply adapter (universal 110/220V input)
1x Digital control interface with LED display
1x Installation guide
2-Year IncuCare Warranty
Hatch Everything from Chickens to Chameleons
The versatility of the IncuKit™ MINI 2 makes it ideal for a wide range of species:
Poultry: chickens, ducks, quail, turkeys
Reptiles: snakes, geckos, turtles, lizards
Exotic birds: parrots, finches, canaries
Bees: queen cell transport and hatching
Whether you need an egg incubator for a science fair or you're building a dedicated reptile hatch box, this tool has the adaptability to deliver results.
Will It Work With My Container?
Great question! Here's a simple test:
Place a 60W incandescent bulb in your container and seal it like an incubator. If the internal temperature reaches or exceeds 100°F (37.8°C) and stays consistent, the IncuKit™ MINI 2 will be sufficient for your project.
For best performance, your container should be:
Insulated (like a Styrofoam cooler or double-walled bin)
Between 10–25 liters in volume
Kept in a relatively stable room temperature environment
Why Our Customers Love It
People everywhere are turning to the IncuKit™ MINI 2 because it combines reliability, adaptability, and ease of use. DIY incubator builders have called it a "game changer," a "must-have for tinkerers," and a "stress-free solution to egg hatching."
It's also a favorite among educators, who use it to teach biology and embryology in classrooms.
Order Now and Build the Ultimate DIY Incubator!
Ready to hatch smarter, not harder? Join thousands of happy DIYers and elevate your incubation game today with the IncuKit™ MINI 2—built by innovators and trusted by hatchers.
Product Features:
Seamless Compatibility: Designed specifically for the HovaBator 1588 Genesis incubator.
OEM Manufacturer Quality: A trusted replacement part for reliable incubation.
Digital Temperature Control: Provides accurate, stable heat for optimal hatching conditions.
Easy Installation: Quickly replace your old thermostat and restore precise temperature control.
Reliable Performance: Keeps your incubator running smoothly for consistent hatching success.
Thermostat Only: This purchase does not include the fan or heater, so check if you need those separately.
Includes 2-year IncuCare Warranty.
Product Description:
If you own a HovaBator Genesis 1588 Egg Incubator, maintaining a stable and precise temperature is essential for successful hatching. Over time, incubator components can wear out, leading to inconsistencies in temperature control. When that happens, replacing the old thermostat is one of the best ways to restore your incubator's functionality without purchasing an entirely new unit.
This digital thermostat replacement is an OEM (Original Equipment Manufacturer) part designed to fit seamlessly into your existing incubator. With its digital control center, this thermostat ensures the temperature remains steady, creating the right conditions for hatching eggs.
Product Specifications
Compatible With: HovaBator Genesis 1588 Incubator
Type: Digital Thermostat Replacement
OEM Replacement Part: Yes
Installation: Easy, plug-and-play design
Warranty: 2-Year IncuCare Warranty from Incubator Warehouse
Includes: Thermostat Only (Fan and Heater Not Included)
When Should You Replace Your Thermostat?
If you're experiencing any of the following issues, it may be time to replace your incubator thermostat:
Inconsistent Temperature Readings: If your incubator's temperature fluctuates or fails to maintain the desired settings, the thermostat could be the issue. A faulty thermostat can lead to poor hatch rates, making timely replacement crucial.
Unit Not Heating Properly: If your incubator is running too cold or too hot, the thermostat may not be functioning correctly even after adjusting settings.
Display Malfunctions: If your digital control center is unresponsive, displaying incorrect readings, or failing to power on, replacing the thermostat can often resolve these issues.
Age & Wear: Components naturally degrade over time if you've been using your incubator for an extended period. Proactively replacing the thermostat can help prevent failures during critical incubation periods.
Why You Need a High-Quality Thermostat for Your HovaBator 1588 Genesis
The HovaBator Genesis 1588 is one of the most popular and reliable egg incubators on the market, but even the best equipment needs maintenance and occasional part replacements. A malfunctioning thermostat can lead to temperature spikes or drops, jeopardizing the health and viability of your eggs.
Here's why a properly functioning thermostat is essential for your incubator:
Prevents overheating or underheating, which can negatively impact embryo development.
Ensures steady temperatures throughout the incubation period.
Reduces stress on eggs, improving the chances of a successful hatch.
Improves incubation efficiency, leading to better hatch rates.
With this replacement thermostat, you can restore your HovaBator 1588 Genesis incubator to its original performance and confidently hatch eggs.
How to Install the HovaBator 1588 Replacement Thermostat
Replacing your thermostat is quick and easy. Follow these simple steps:
Turn off and unplug your incubator before starting any installation.
Remove the old thermostat by carefully disconnecting it from the control center.
Attach the new thermostat, ensuring all connections are secure.
Test the temperature control before placing eggs inside the incubator.
Monitor the temperature for stability before beginning a new incubation cycle.
Important Notes:
This listing is for the thermostat only; it does not include the fan or heater.
Ensure compatibility with your HovaBator 1588 Genesis incubator before purchasing.
Installation is straightforward, but our support team is ready to help if you need assistance.
Don't let a faulty thermostat ruin your incubation process. Upgrade to a brand-new HovaBator Genesis 1588 Replacement Thermostat today and experience reliable, stable temperature control once again.
Click "Add to Cart" Now & Ensure a Successful Hatch.
About This Item
Keep your flock hydrated with ease using our Automatic Low-Pressure Poultry Waterer. Designed for smart climate control and precision hydration, this waterer integrates seamlessly into your farm equipment setup for efficient poultry care. It’s ideal for small farms, backyard flocks, and hobbyists who need a reliable watering solution.
Product Description
The Automatic Low-Pressure Poultry Waterer offers hands-free water delivery for chickens and game birds. Built to connect directly to a low-pressure line or bucket system, it reduces spillage and keeps your coop dry. Its intuitive design makes it a great pairing with your chick brooder or egg hatcher setup.
Whether you’re building a full poultry station or upgrading your existing one, this tool complements your temperature controller, digital thermostat, and thermostat box systems keeping heat and hydration balanced. It’s compatible with thermostat calibration tools and can be housed in a control box or alongside a thermostat switch.
Product Information
Type: Automatic poultry waterer
Use: Low-pressure systems only
Ideal for: Chickens, quail, game birds
Install method: Bucket, gravity, or low-pressure line
Maintenance: Easy clean design, anti-drip
Technical Details
Connection Type: 1/4" or 3/8" tubing
Material: Food-grade plastic
Pressure Requirement: Under 5 PSI
Water Output: On-demand
Dimensions: Compact and coop-safe
Additional Information
Pair with your electronic thermostat, thermostat controller, and heater thermostat for a fully integrated poultry system. Works well with humidity control and heat control systems in your coop or brooder.
Warranty & Support
Every purchase is backed by Incubator Warehouse's support team. If your thermostat plug, remote sensor, or waterer requires assistance, our U.S.-based team is ready to help. 1-year warranty included.
Egg Incubator Thermostats
An incubator thermostat controls when your heater turns on and off, keeping the air inside your incubator at the steady temperature your eggs need to develop properly. Even a small swing of a few degrees can affect hatch rates, so a reliable thermostat is one of the most important parts in your setup.
We carry both wafer and digital thermostats, along with model-specific replacements for HovaBator, Little Giant, and DIY incubator builds. Every thermostat ships with a 2-year IncuCare™ warranty and free shipping on orders over $25.
Wafer vs Digital Thermostat
Type
Control
Best Use
Wafer (mechanical)
Manual dial, no display, gas-filled wafer opens and closes the circuit
Off-grid setups, DIY builds, breeders who want a simple fail-safe option
Digital
Set-point display with built-in temperature readout
Anyone who wants precise, at-a-glance temperature control
Fitment
Incubator
Thermostat Options
HovaBator 1588 / Genesis
Wafer replacement or OEM digital control center
Little Giant 9300 / 10300 / 11300
Digital controller and sensor combo
DIY incubators
Bi-metal thermostat kit or all-in-one IncuKit thermostat module
Not sure which thermostat matches your incubator? Our EGGsperts can confirm fit before you order.
Replacing Yours
If your incubator is running too hot, too cold, or the temperature keeps drifting even after adjustment, the thermostat is usually the first part to check. Swapping in a new one restores steady control without replacing the whole incubator.
Why Shop Incubator Warehouse
Every thermostat we sell comes with a 2-year IncuCare™ warranty and US-based EGGspert support, with free shipping on orders over $25 (contiguous US).