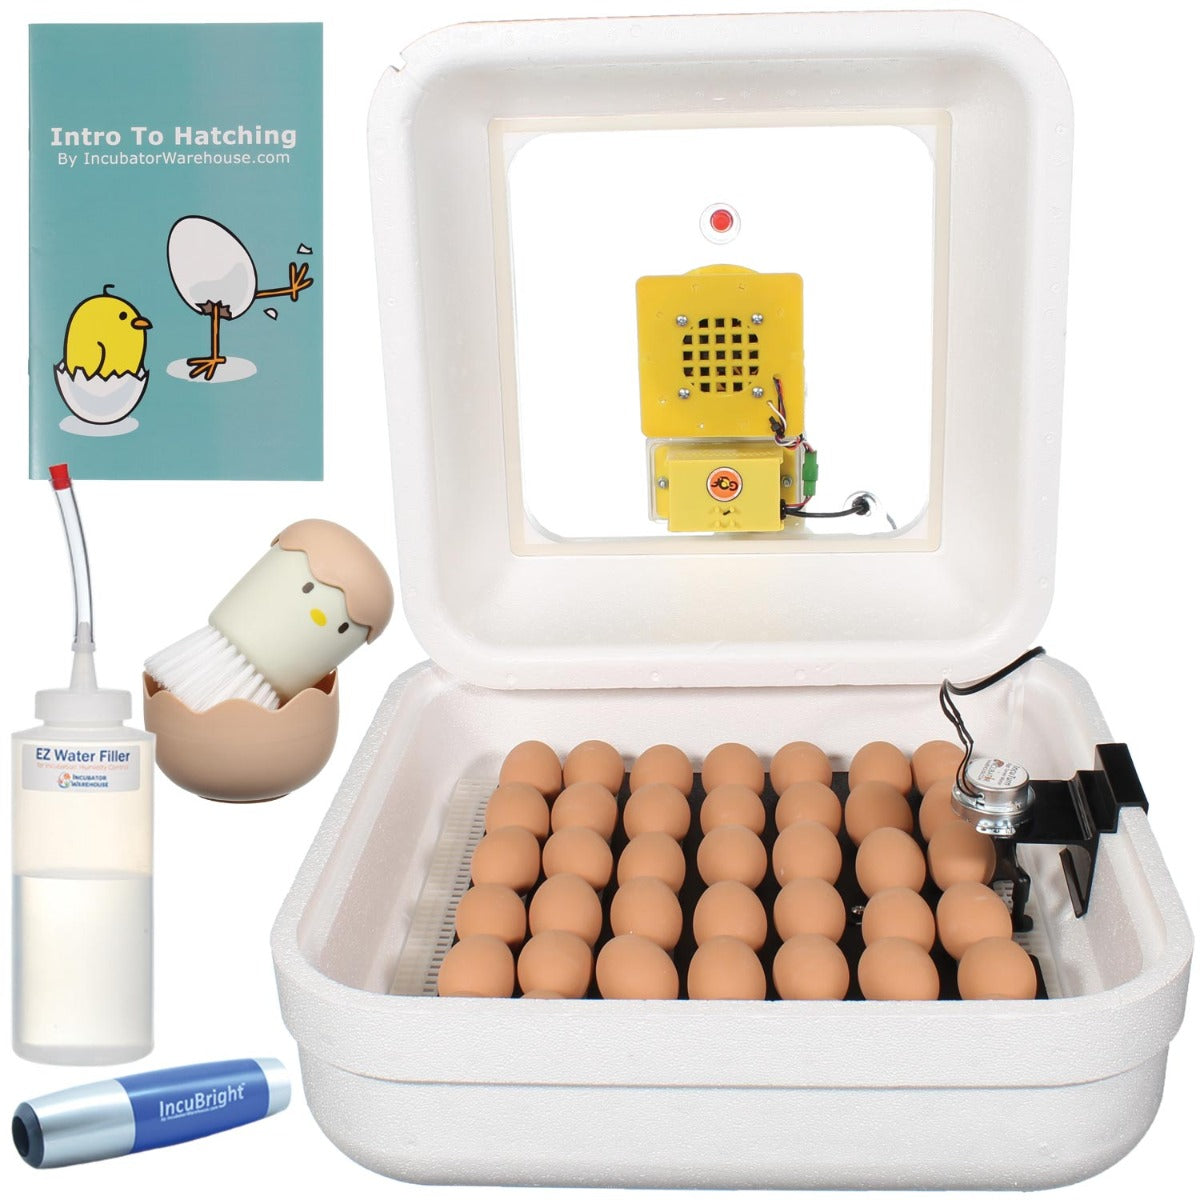
Hova Bator Genesis 1588 12v Digital Egg Incubator Deluxe Combo Kit
from $209.00
$258.99
Product Features:
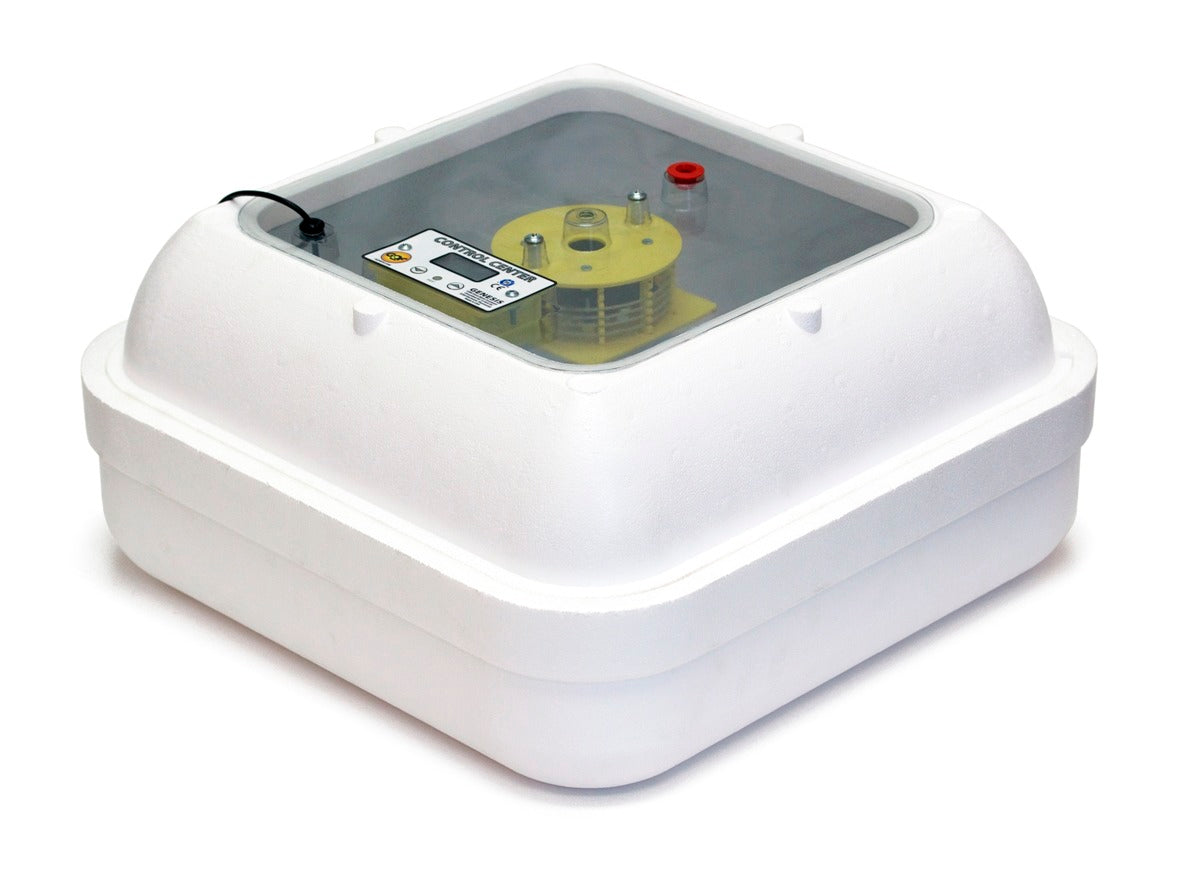
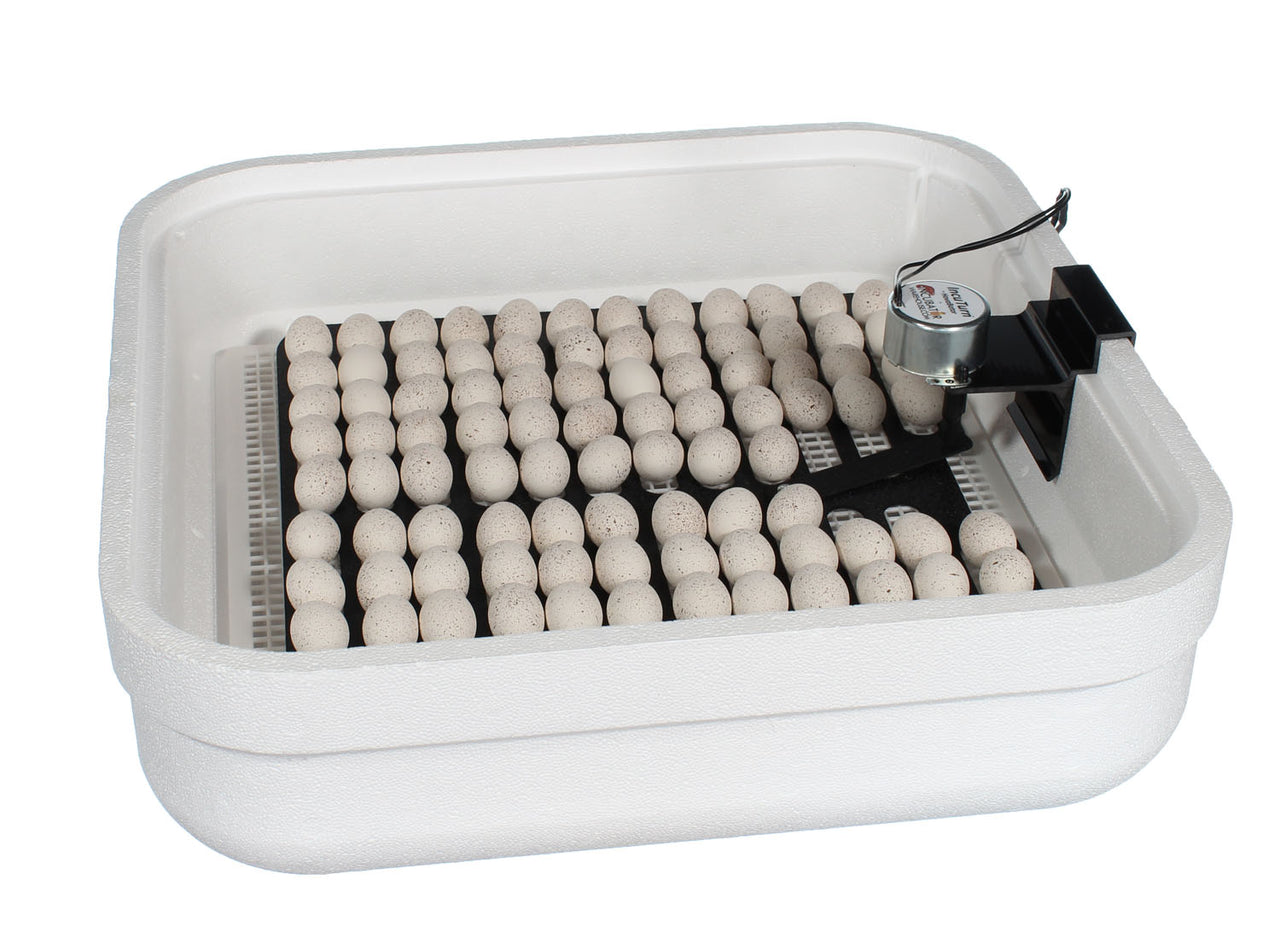
Hova Bator 1588 Genesis Digital Egg Incubator
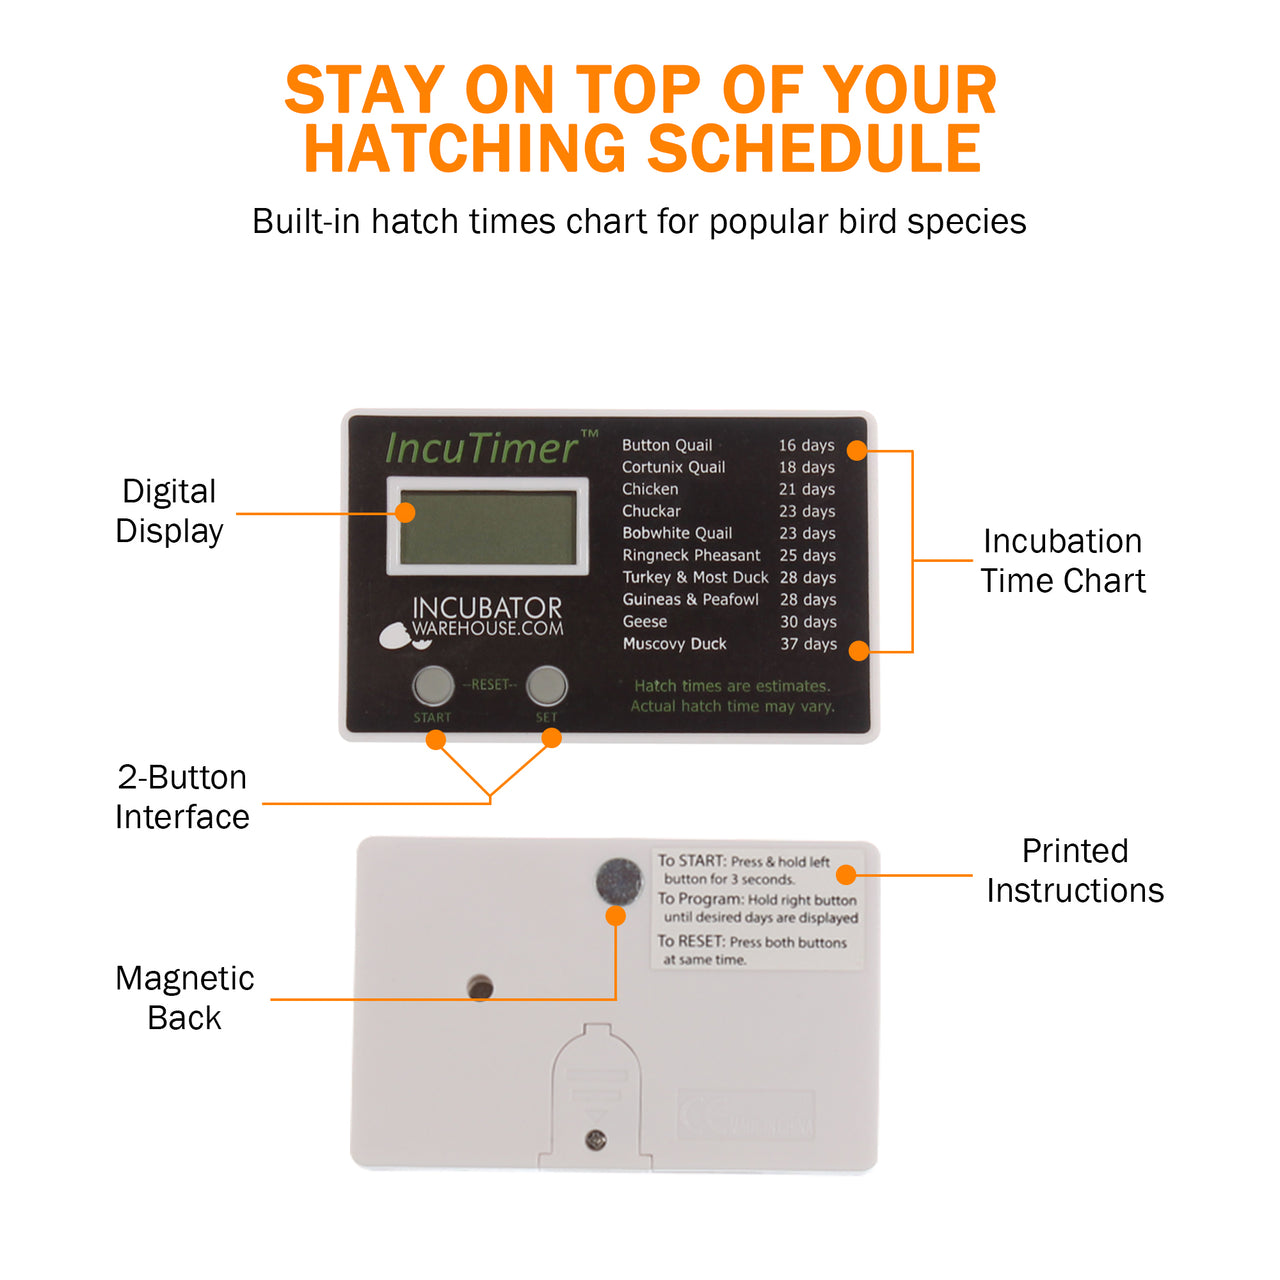
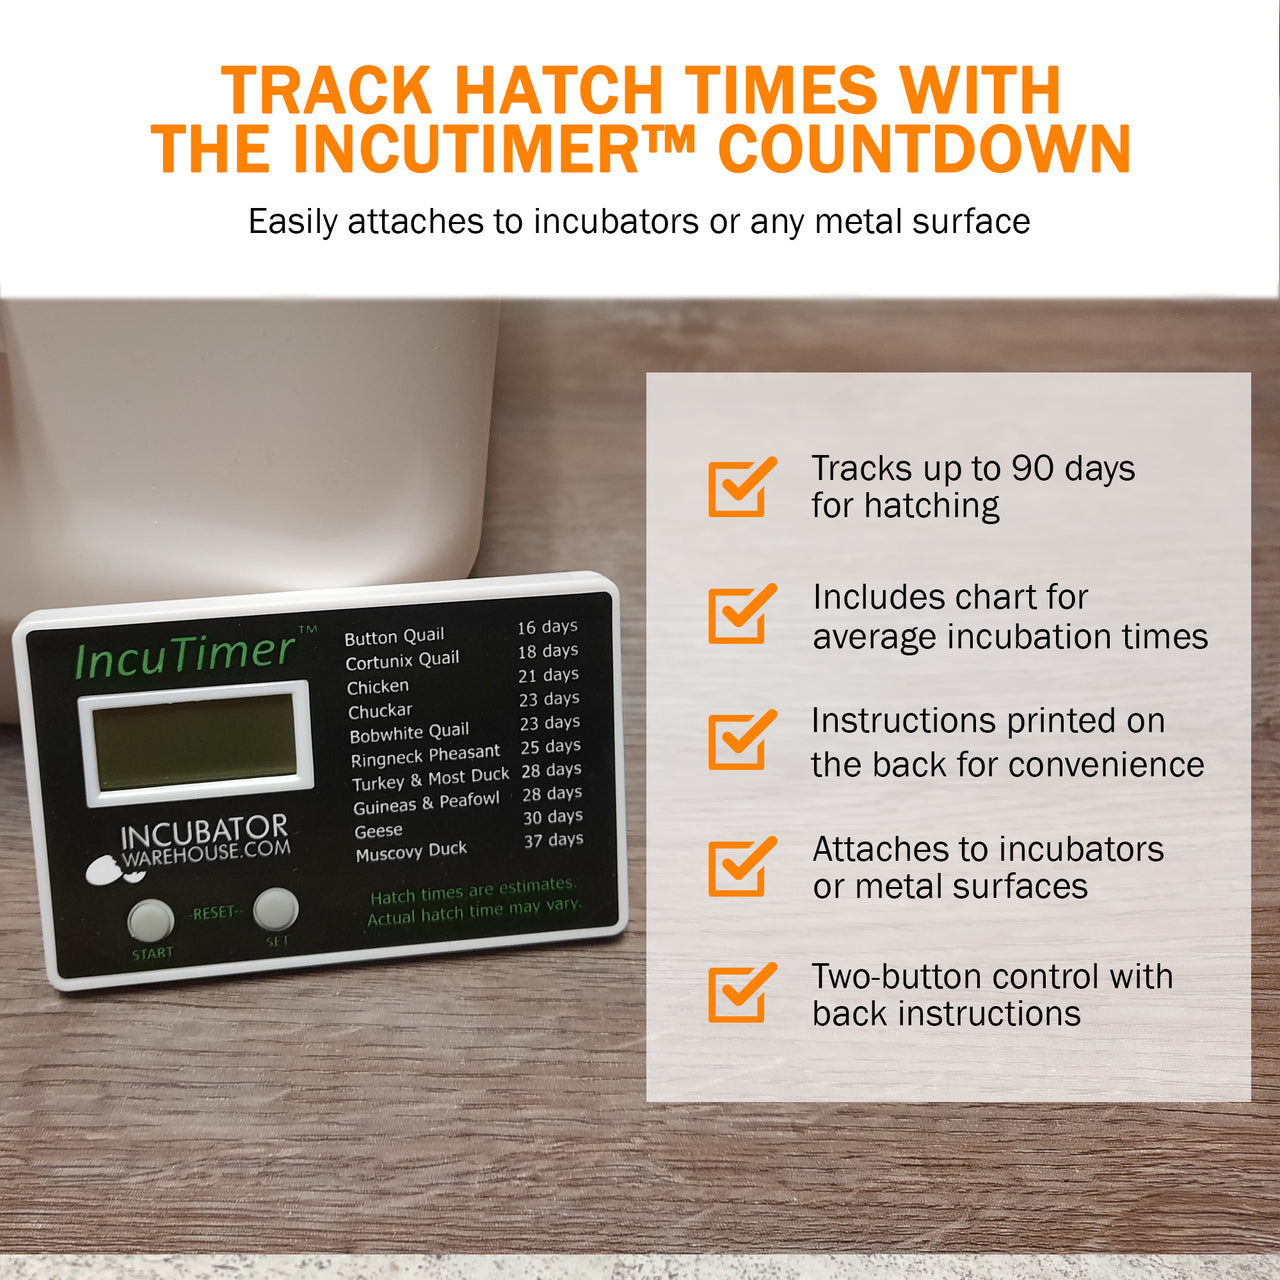
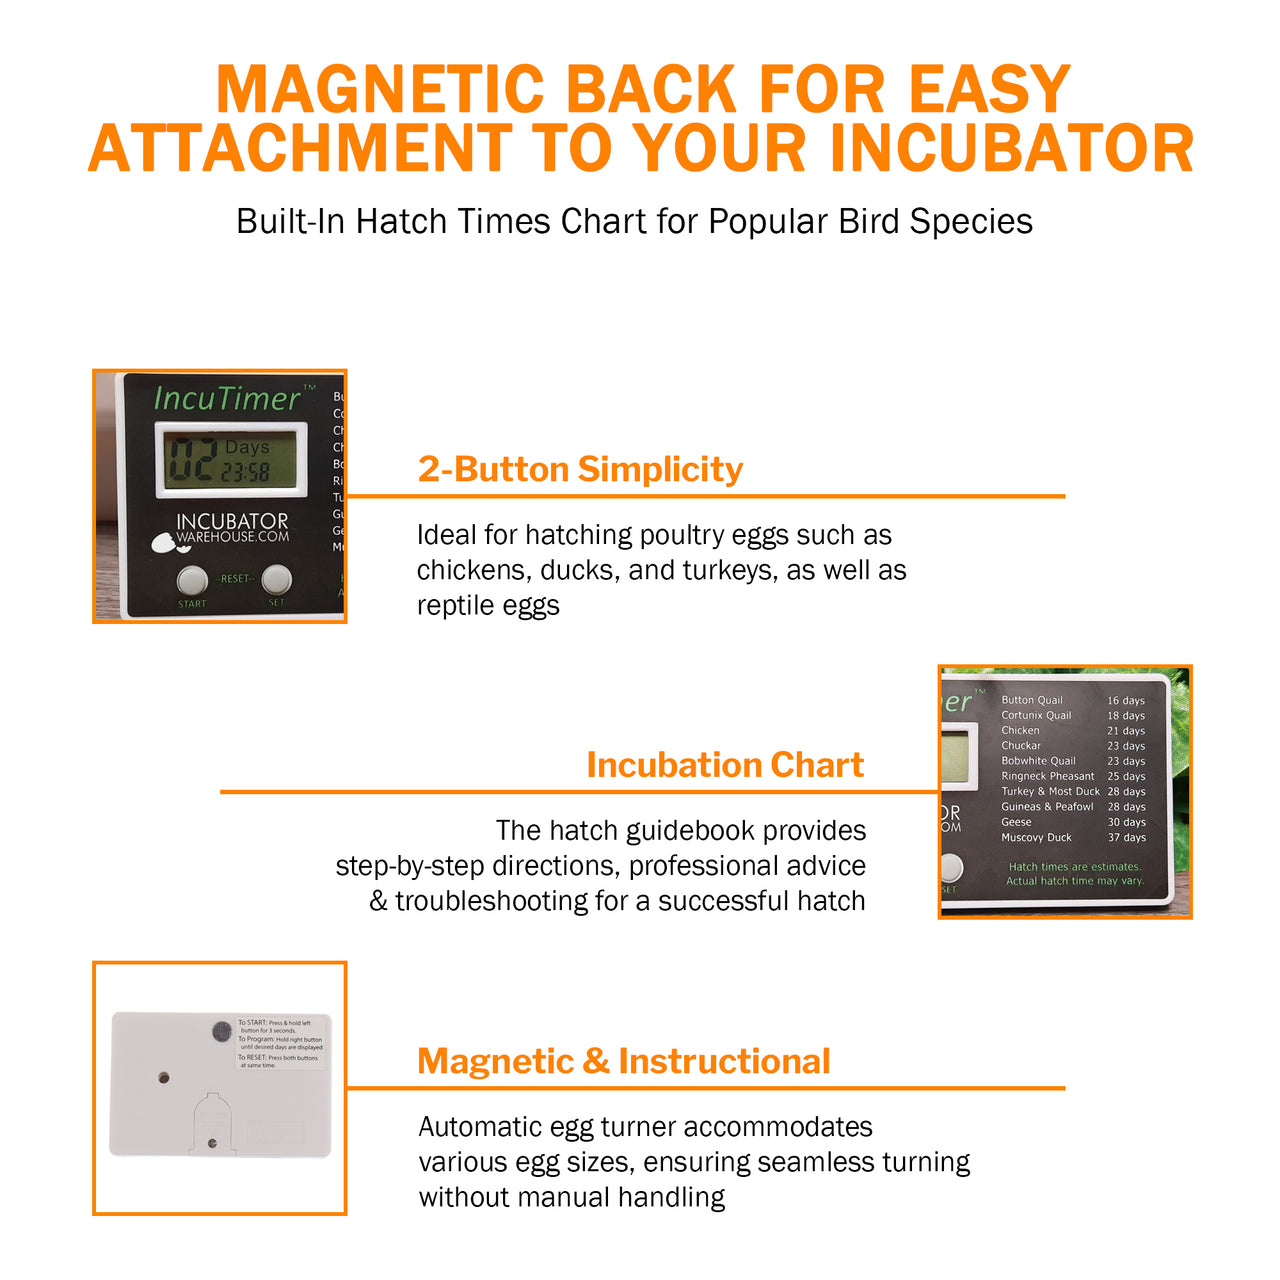
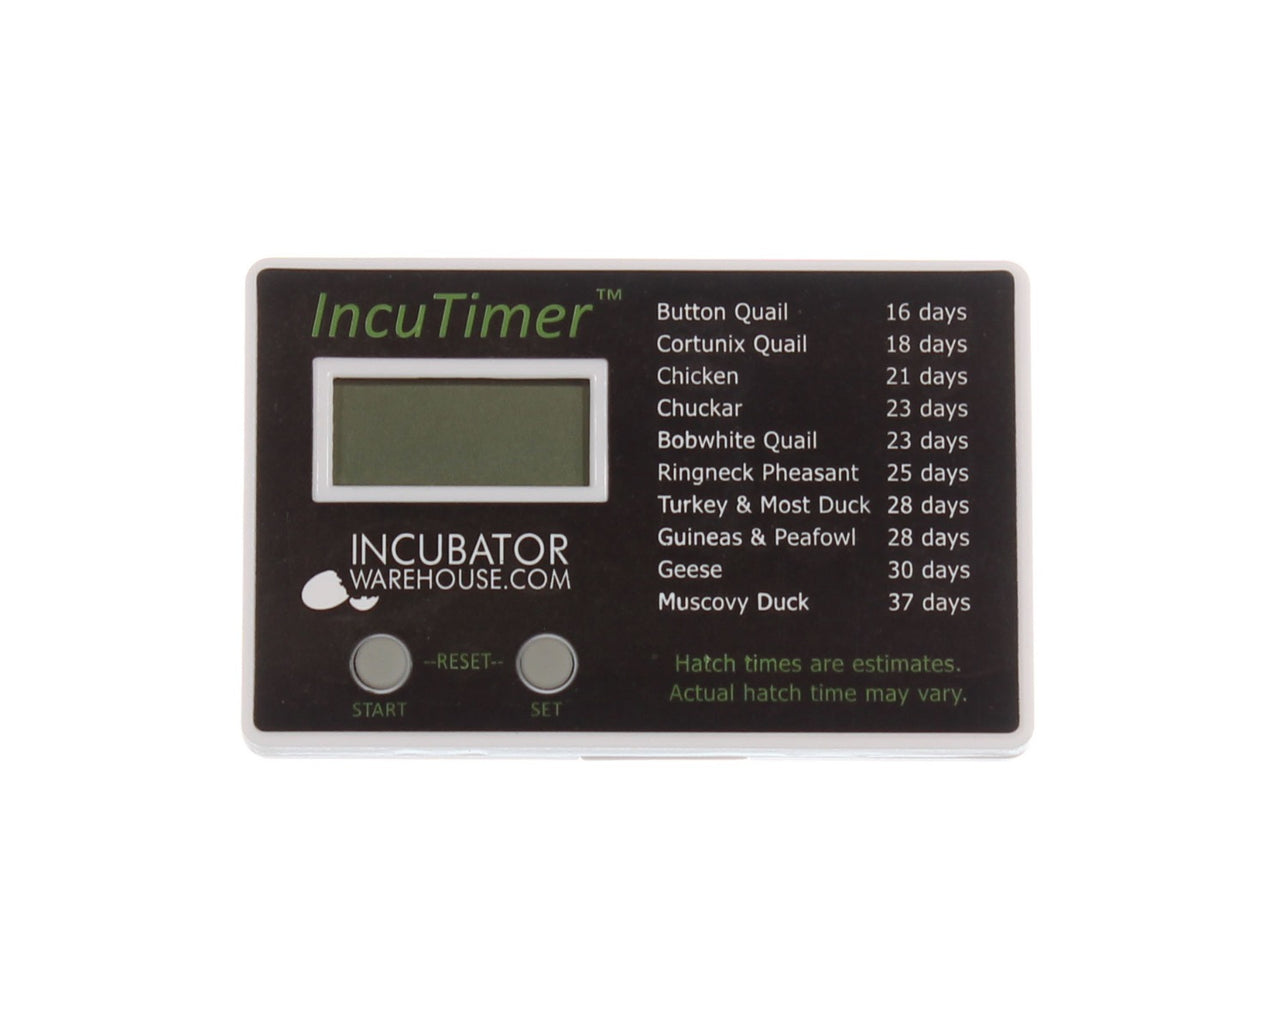
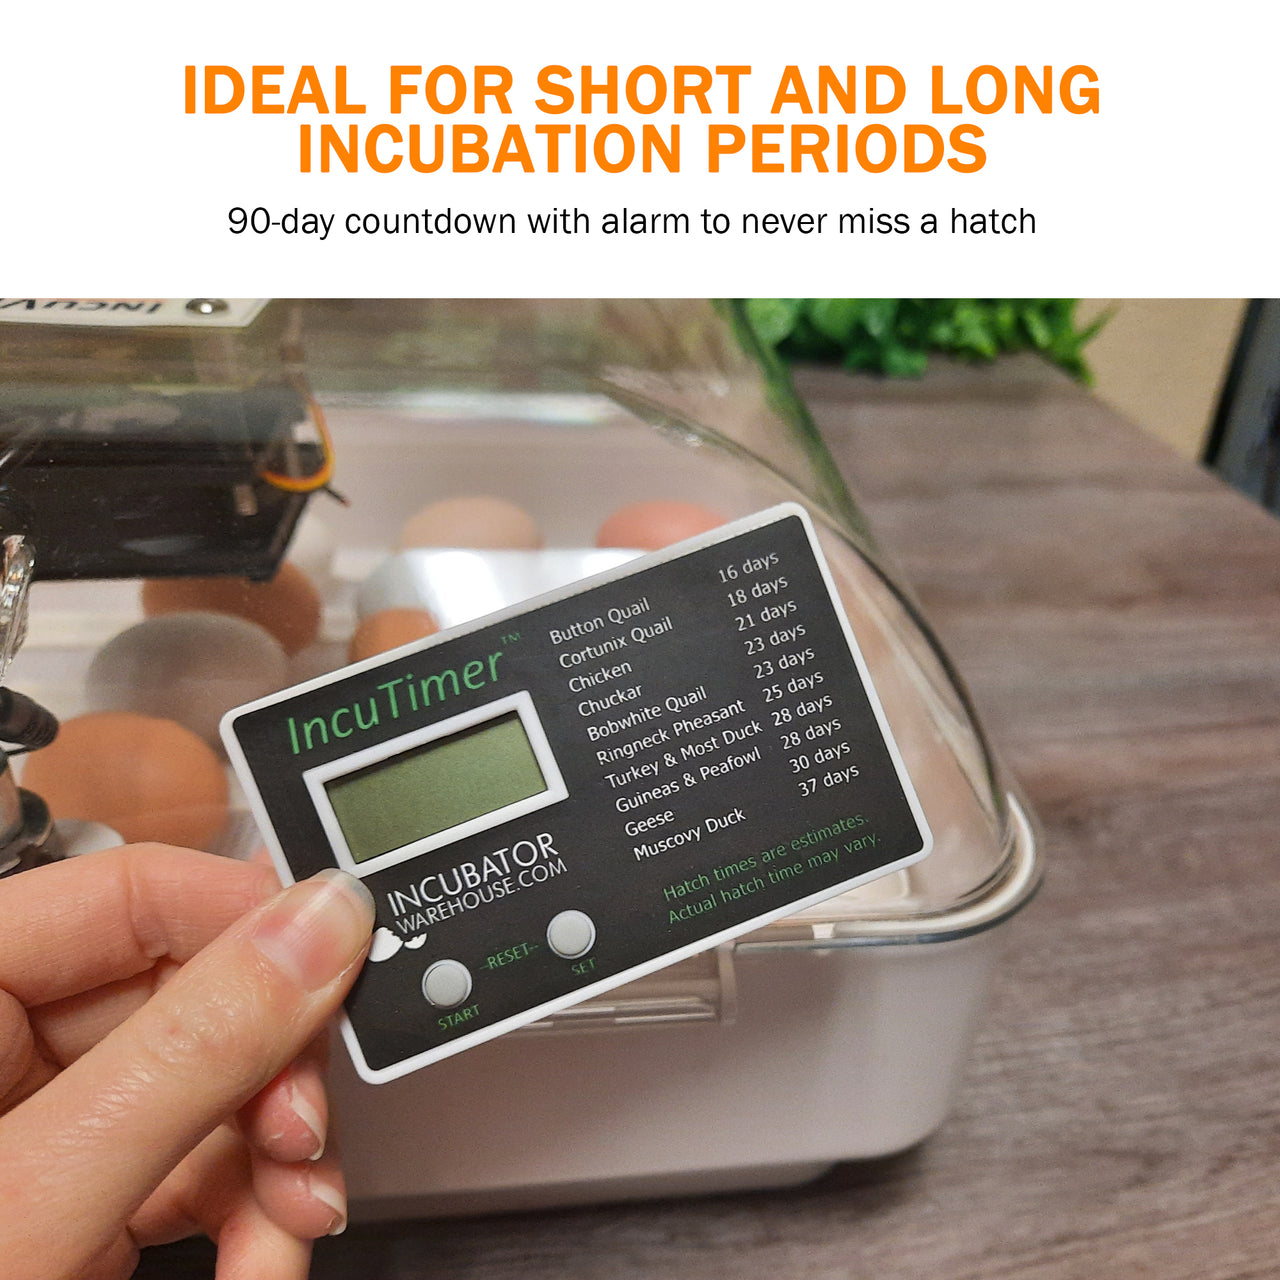
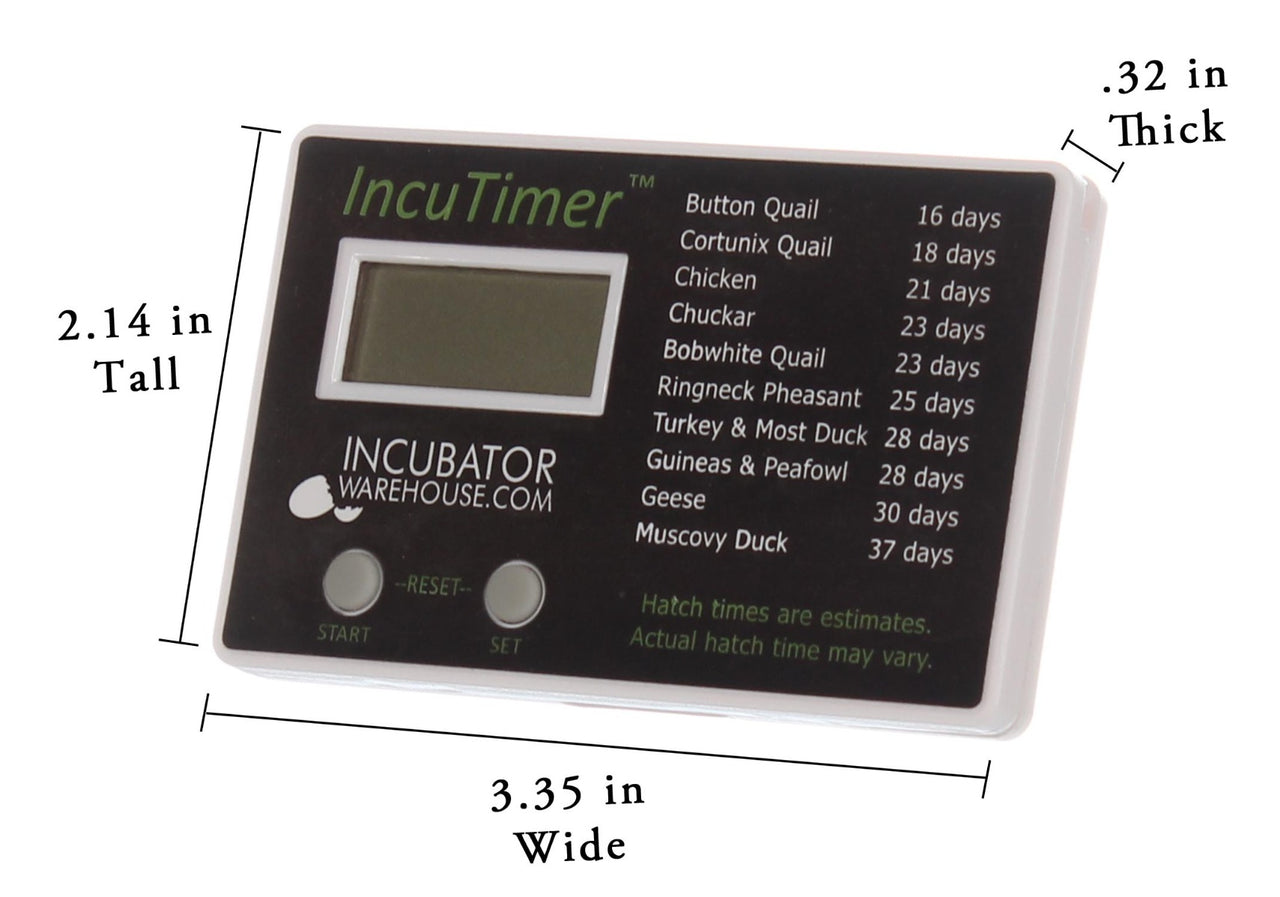
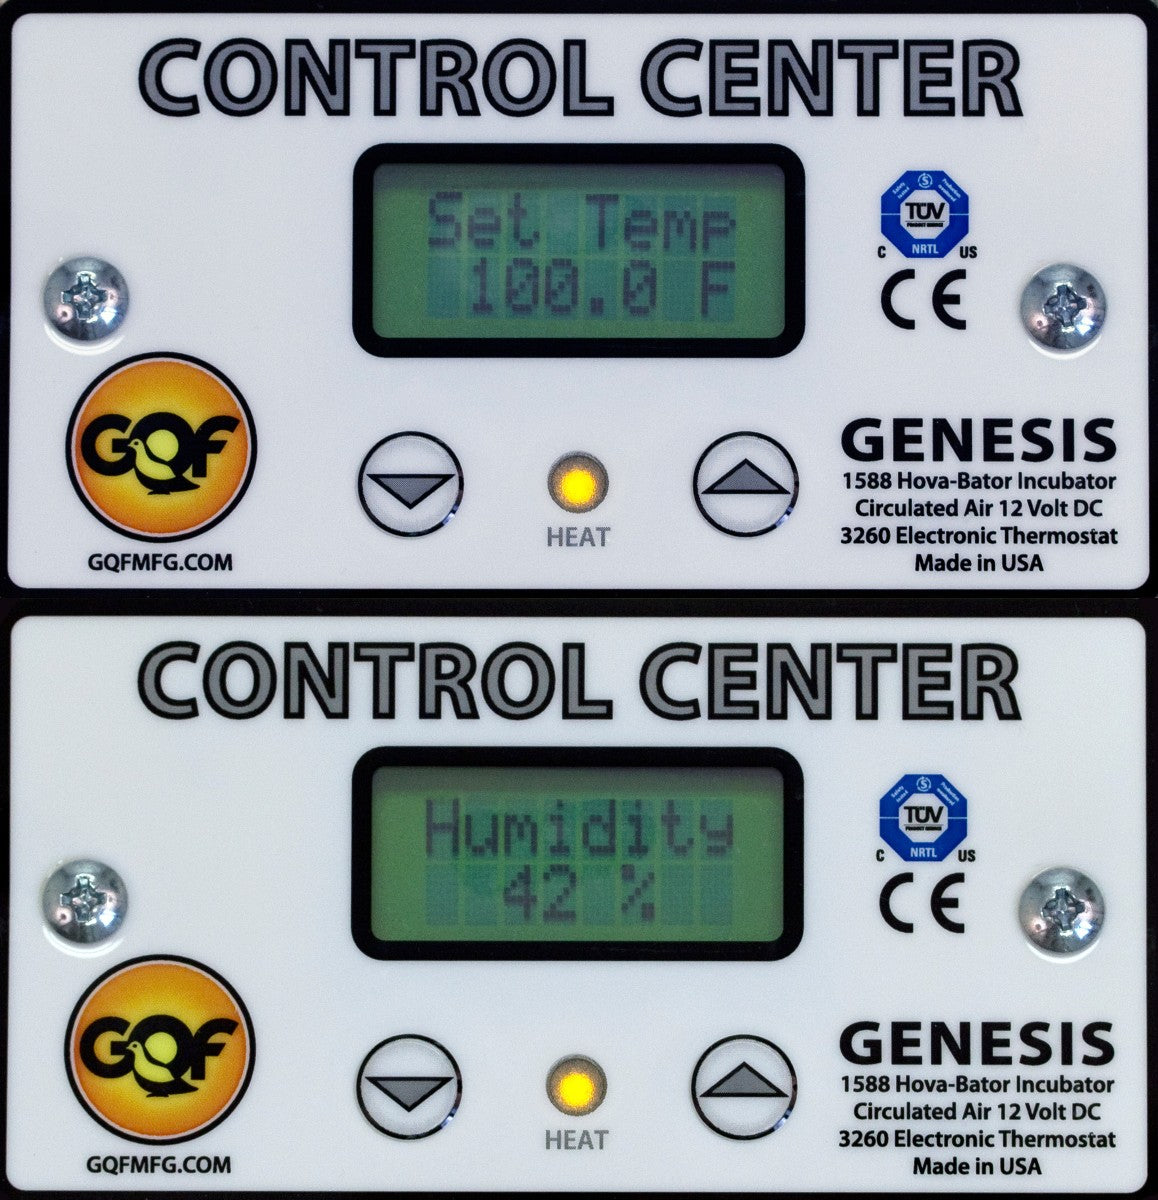
Digital Control Center: View and adjust temperature, monitor humidity, and keep track of days until hatch with the day counter. Ideal for keeping the incubation process on track.
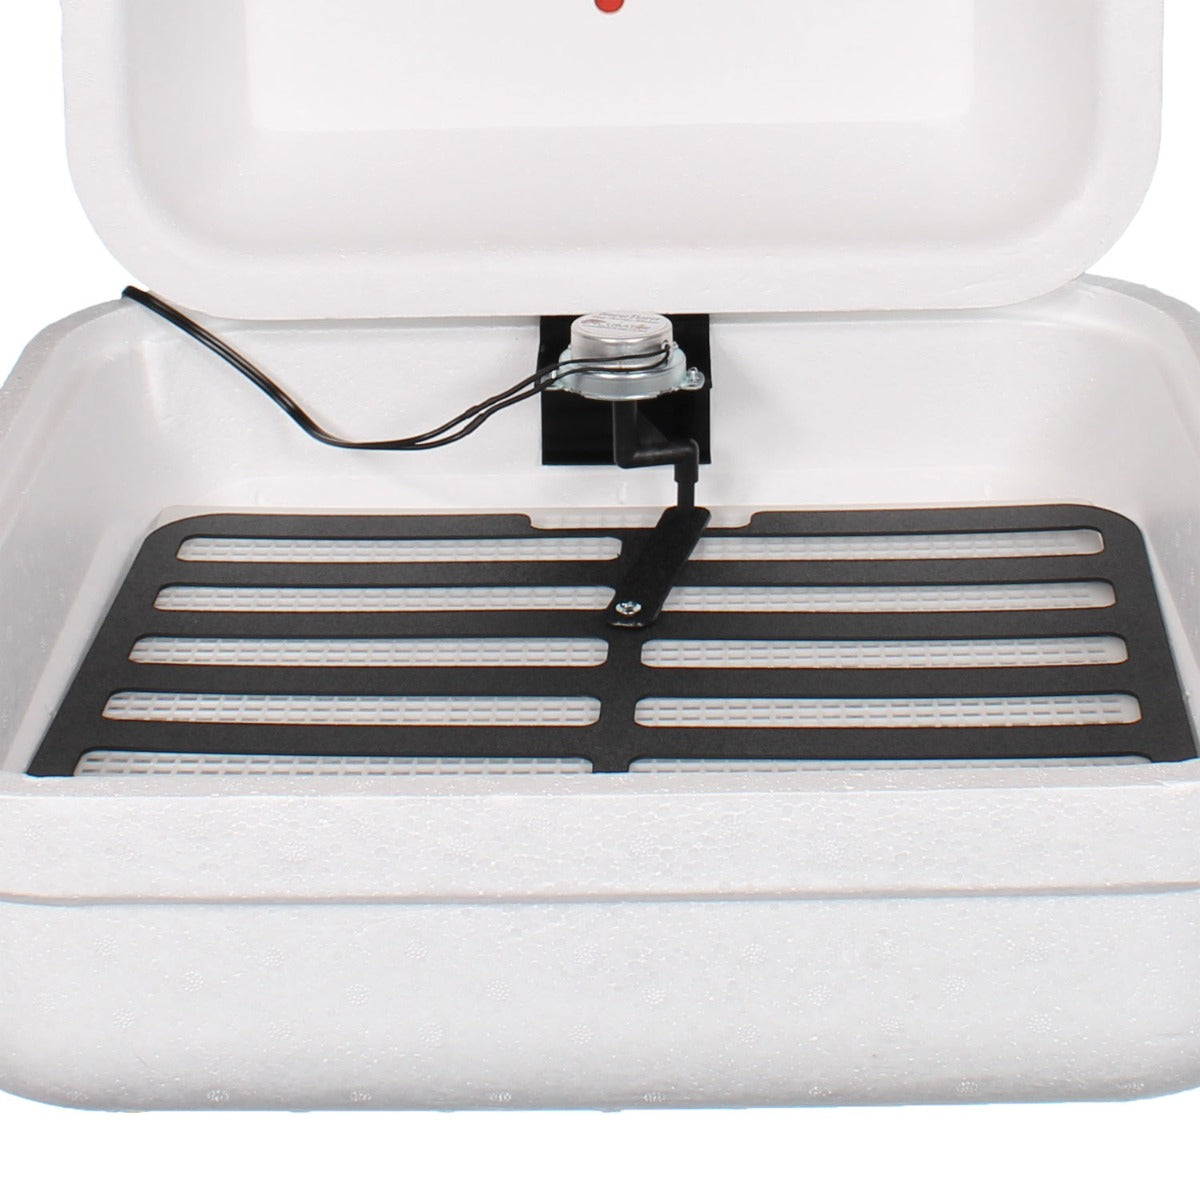
Adjustable Thermostat and fan for Poultry and Reptiles: Control the temperature to accommodate various egg types, including reptiles. The fan can be turned off as needed.
Soft-Air Fan Technology: Circulates air gently to maintain an even temperature and provide essential oxygen.
High Egg Capacity: Holds up to 50 chicken-sized eggs or 140 quail eggs, perfect for those needing a high-capacity tabletop egg incubator.
Low Voltage, Safe 12V System: Operates on a safe 12V DC power supply compatible with both 110V and 220V outlets and is TUV listed for added peace of mind.
Deluxe Kit Accessories
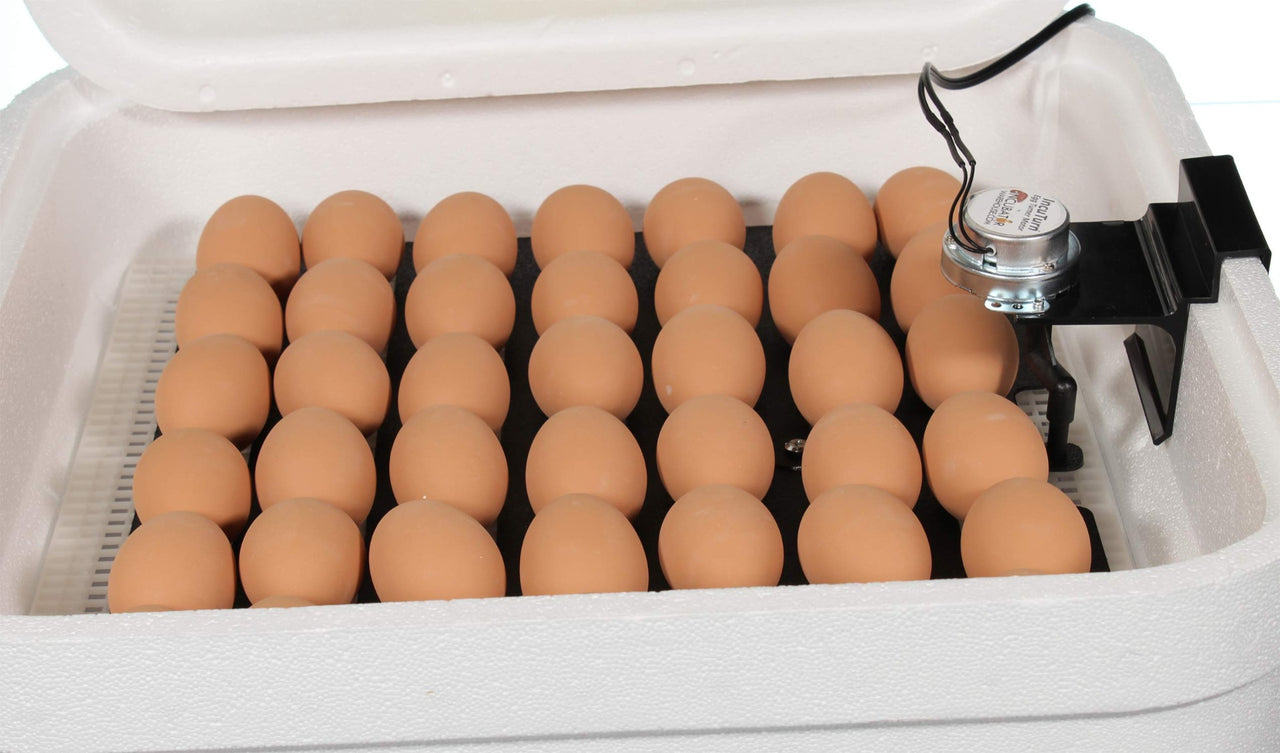
IncuTurn™ Automatic Egg Turner with Universal Egg Tray: Rotates eggs six times daily for optimal embryo development. The side-laying egg position mimics natural turning.
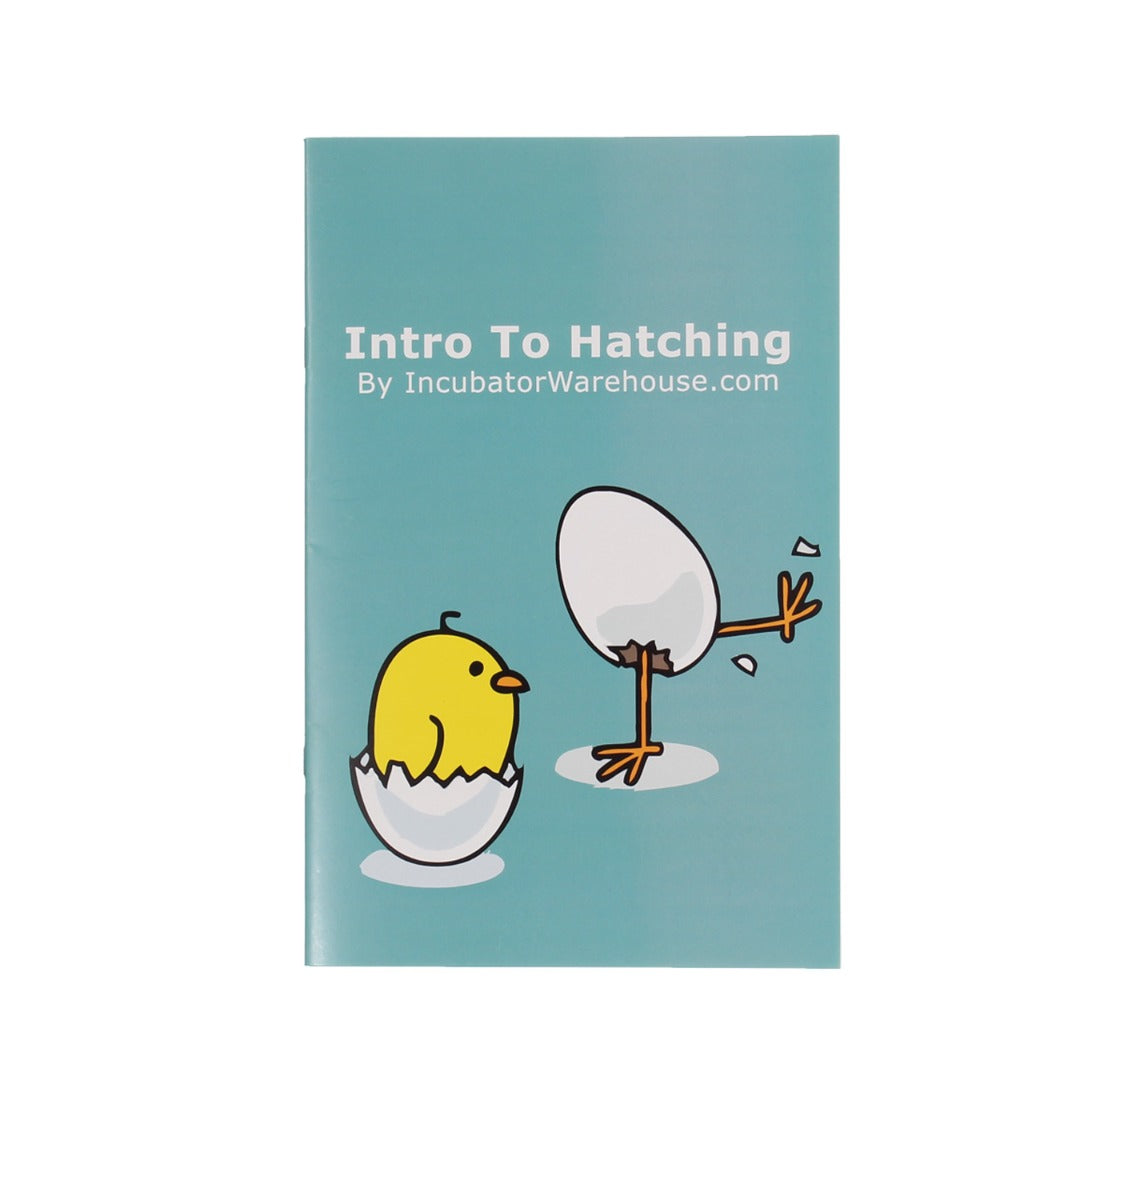
Hatching Guidebook: Step-by-step guidance, ideal for both newcomers and experienced breeders.
EZ Clean Chick Brush: The ideal chick grooming brush designed to remove dirt and debris effectively, promoting poultry cleanliness and healthier environments. Essential for chicken care and small flock maintenance.
IncuBright LED Egg Candler: A bright LED egg candler crafted for easy and precise egg monitoring. Perfect for egg-hatching supplies and incubation lighting needs, it allows you to observe embryo development without disturbing delicate eggs.
EZ Water Filler (12 oz): This spill-proof water filler for chicks provides a consistent water source and is designed for easy refills to keep your poultry hydrated. A reliable solution for chick care and poultry hydration, especially in smaller setups.
Optional Upgrades
IncuTurn Quail Tray (Optional Add-On): Increases IncuTurn capacity to 116 quail eggs, providing greater capacity for small bird hatching.
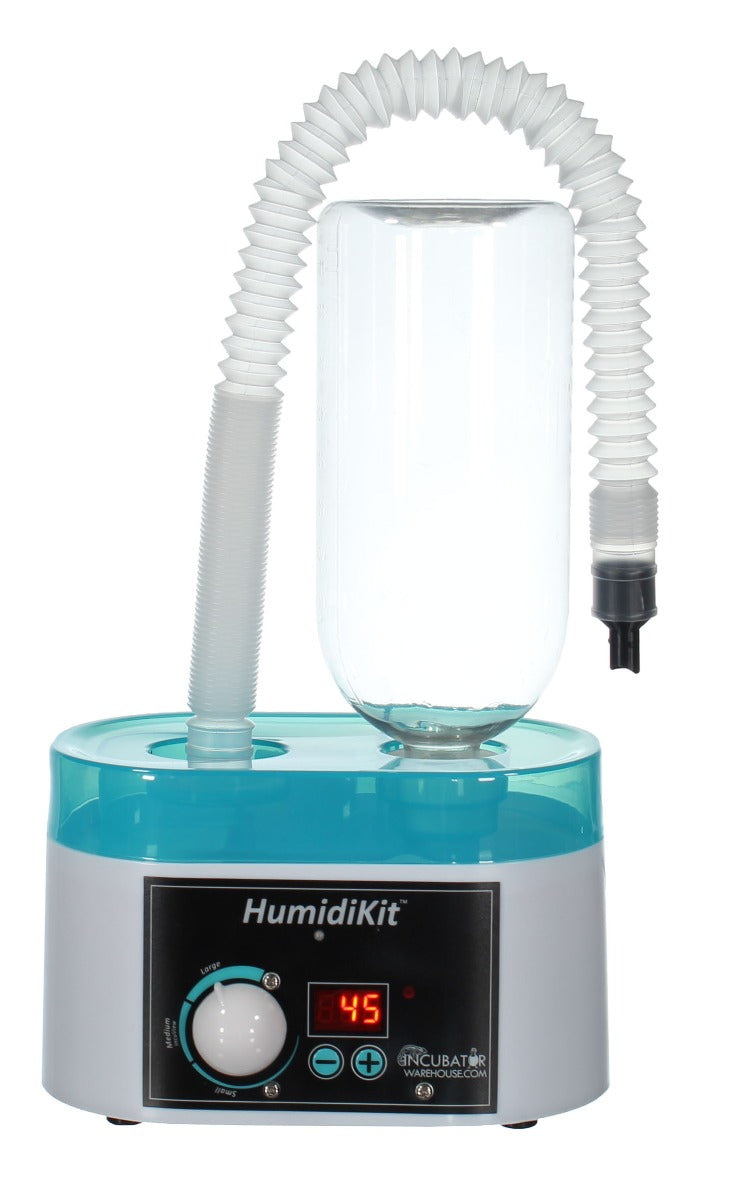
HumidiKit™ Auto Humidity System (Optional Add-On): Automatically maintains set humidity level with an adjustable digital hygrostat, eliminating the need for manual adjustments.
Two-Year IncuCare Warranty
Comprehensive Warranty: Gives peace of mind and reliable ongoing support.
Product Description:
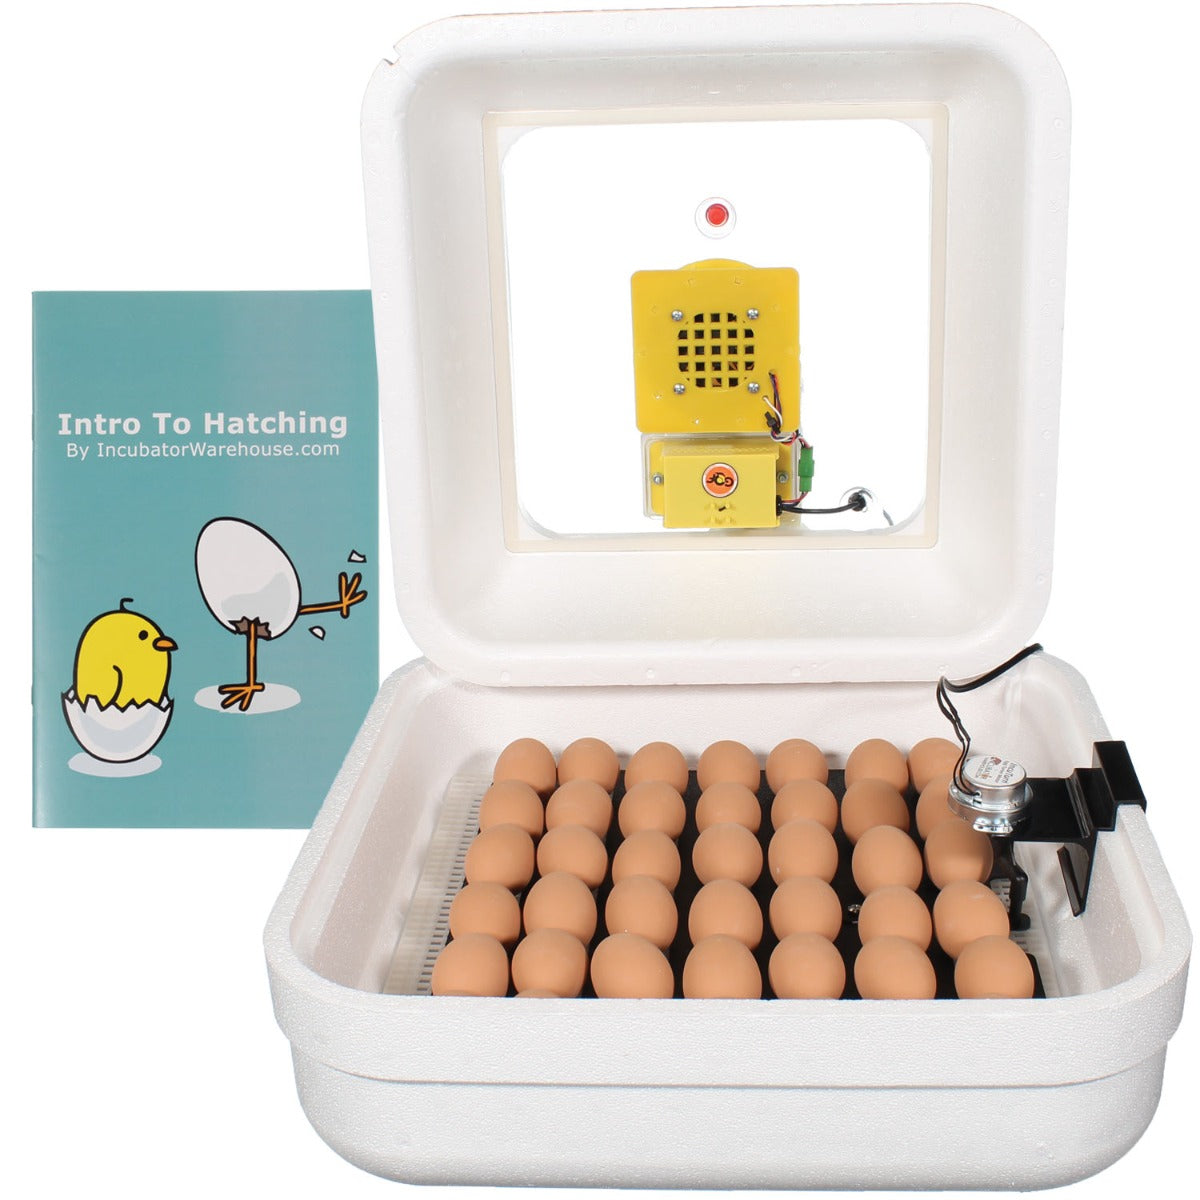
The Hova Bator Genesis 1588 Egg Incubator is the perfect choice for beginners to advanced poultry enthusiasts and educators. This digital egg incubator provides an easy-to-read control center, displaying real-time temperature and humidity, and an incubation day counter, making it an ideal tool for home, classroom egg incubation, or hobby farm use.
The incubator's adjustable Thermostat allows precise temperature control, pre-set to 100°F and adjustable to as low as 80°F for versatility across poultry and reptile eggs. Its unique soft-air fan technology gently circulates fresh air, ensuring optimal oxygen flow without direct exposure to the eggs, creating a safe and nurturing environment.
Built for easy egg incubation in household, educational, and professional settings, the Hova Bator Genesis 1588 combines innovation with user-friendly features. The low-voltage egg incubator design ensures energy efficiency, while the styrofoam construction helps maintain temperature stability. The clear plastic window allows easy viewing, making it a tremendous asset to view your hatching experience. This incubator is safe, reliable, and beginner-friendly, perfect for hands-on learning and small-scale hatching projects.
IncuTurn™ Automatic Egg Turner for HovaBator Egg Incubators
The IncuTurn™ Automatic Egg Turner is specifically designed for HovaBator Egg Incubators. The universal egg tray holds any egg size—from quail to chicken to goose eggs; eliminating the need for multiple expensive egg racks. Side-laying eggs mimic the natural egg-rolling process; they turn eggs six times daily, preventing yolk settling and providing vital embryo exercise for high hatch success. The low-profile turner tray allows for hatching in place; no need to remove the turner before hatching. Simply unplug the turner when going into lockdown. Perfect for both beginners and experienced hatchers, the IncuTurn™ egg turner makes egg-turning simple, efficient, and reliable.
Features:
Universal Egg Tray: Accommodates 42 chicken, 70 quail, or 28 goose eggs, providing ultimate versatility without requiring additional racks.
Natural Rolling Motion: Gently roll eggs six times daily, simulating natural turning to prevent yolk settling and support healthy embryo development.
Quick & Easy Installation: This automatic egg turner is set up in seconds.
110V Hatch-in-Place design: The low-profile turning tray allows for hatching in the tray; no need to move the eggs. For use in the US and other countries with 110V power. Use a power converter for using 220V.
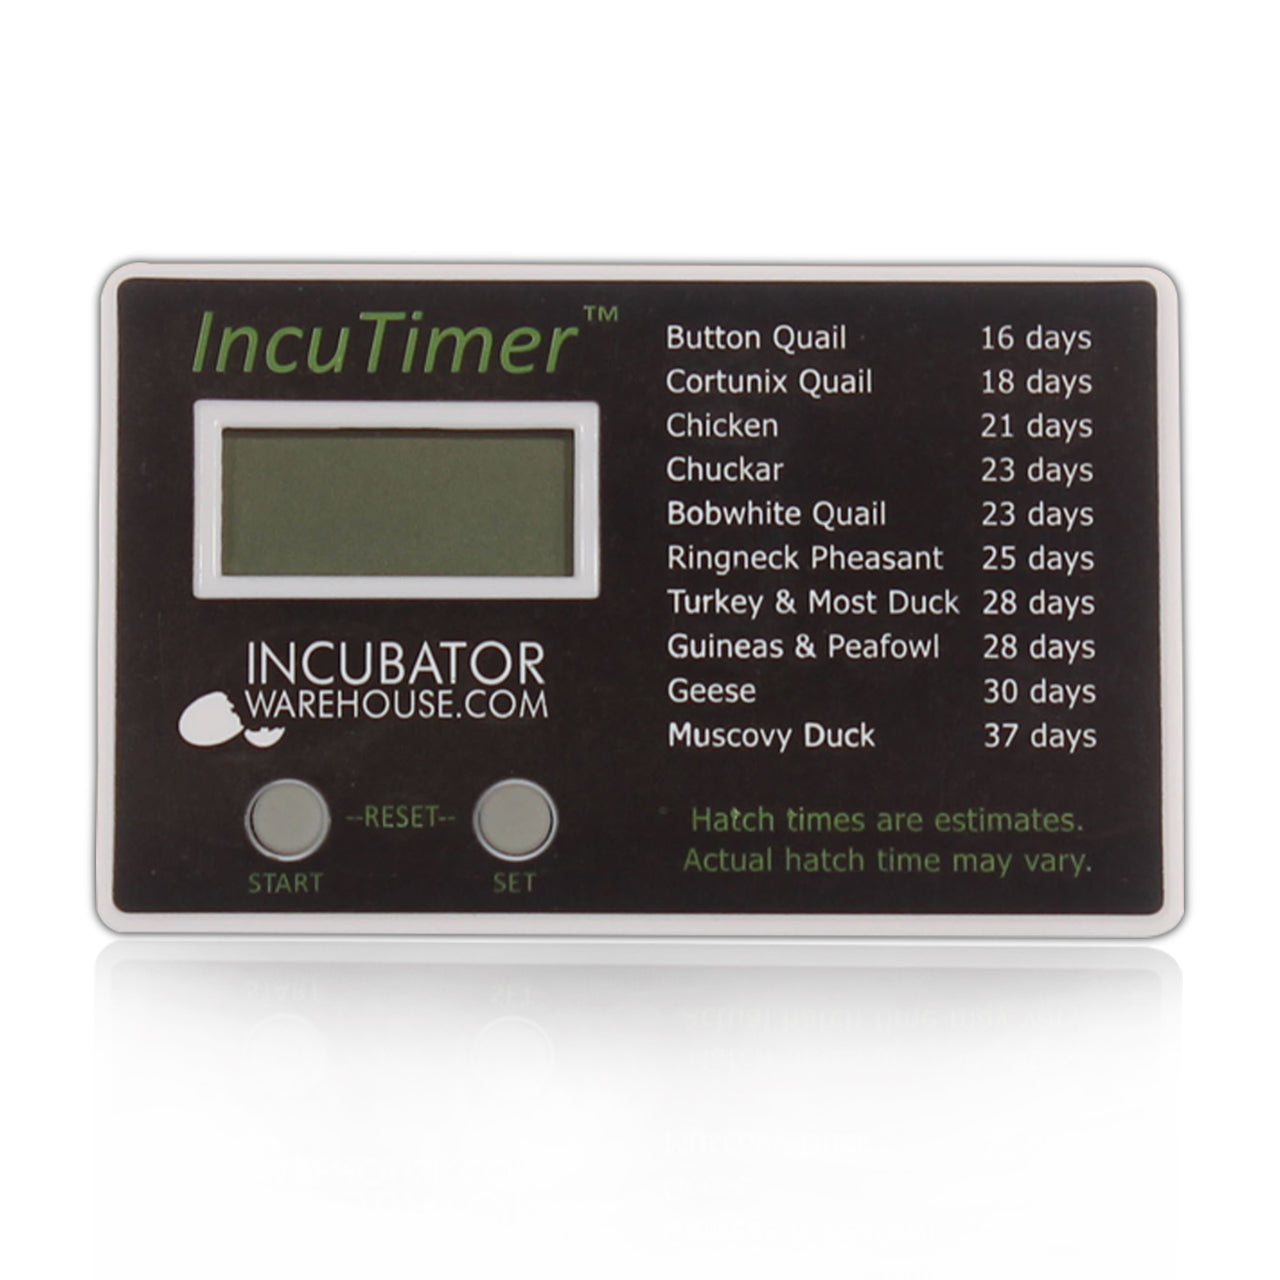
Incubator Warehouse Hatch Guidebook
The Incubator Warehouse Hatch Guidebook is an illustrated, 28-page companion to our popular 4-Part Intro to Hatching YouTube Series, designed for beginners and seasoned hatchers alike. This printed guide provides an overview of egg incubation and chick brooding, with easy-to-follow illustrations and practical tips. Whether you're new to hatching or looking to refine your process, this guidebook offers valuable insights to help every hatch succeed.
YouTube Video Series: Intro to Hatching
Part 1: Setup - Watch Video
Part 2: Incubation Period - Watch Video
Part 3: Hatching Period - Watch Video
Part 4: After Hatch - Watch Video
Quail Tray for IncuTurn™ Egg Turner (Optional Selection)
Enhance your egg incubation setup with the Quail Tray for IncuTurn™, specially designed to accommodate quail and small bird eggs. This tray optimizes space, increasing egg capacity up to 116 quail eggs, compared to the 70 eggs the universal tray holds.
Features:
High Capacity: Holds up to 116 quail eggs, offering greater capacity than the universal egg tray.
Ideal for Small Eggs: Perfectly suited for quail and small bird eggs, ensuring stable placement during incubation.
Seamless Compatibility: Designed as an optional accessory for the IncuTurn™ Automatic Egg Turner for HovaBator incubators.
Incubator Warehouse EZ-Clean Chick Brush for Cleaning Incubators & Eggs
Keep your incubator spotless with the EZ-Clean Chick Brush – a compact and efficient cleaning brush designed specifically for cleaning incubators and eggs. This chick brush cleaner is an essential tool for maintaining a safe and hygienic environment, ideal for all hatchery setups. Its 3" x 4" size" is designed to reach every corner, ensuring no debris or contaminants remain.
Features:
Specialized Cleaning: The EZ-Clean Chick Brush removes dirt and debris without harming delicate surfaces, which is ideal for poultry incubator cleaning.
Cute & Functional: Adorable chick design adds a bit of charm to your cleaning routine.
Perfect Size: The compact design makes it easy to handle and ideal for egg cleaning and incubator maintenance.
The EZ-Clean Chick Brush is the perfect solution if you're looking for a safe, effective, and easy-to-use egg-cleaning tool. It's a must-have for anyone looking to keep their egg incubator in pristine condition with minimal effort.
IncuBright™ LED Egg Candler
Experience the joy of egg candling with the innovative IncuBright™ LED Egg Candler. Using advanced LED light technology, this incubation candler light provides a crystal-clear view of the embryo's development stages, even in dark or larger eggs. Featuring a universal silicone rubber ring, the IncuBright™ Egg Candler securely fits any egg size, making it an invaluable tool for hobbyists and professionals.
Features:
Super Bright CREE LED: The LED egg candler has a powerful CREE bulb for high visibility, enabling easy viewing of even the darkest eggs.
Universal Silicone Protector Ring: Ensures a secure, snug fit for any egg size, keeping eggs safe during candling.
Cordless & Portable: Battery-operated for ease of use (batteries included), making it perfect for portable candling.
The IncuBright™ LED Egg Candler is an essential tool for anyone incubating eggs, providing a safe, effective way to monitor the progress of your embryos. Its portable egg candler design makes it a reliable and convenient choice for precise egg candling at any stage.
E-Z Water Filler 12 oz for Incubators
Say goodbye to messy refills with the EZ Incubator Water Filler! This 12 oz water trough filler is designed for precise, spill-free filing of incubators, ensuring you achieve the perfect humidity levels for hatching. Ideal for use in any incubator, this no-spill water filler makes adding water fast, easy, and accurate.
Features:
Precision Filling: The EZ Water Filler'sFiller'sallows controlled water placement, eliminating spills and overflows for poultry incubators.
Easy-to-Use Spout: Comfortable grip and extended spout ensure easy handling and mess-free water filling.
Perfect Capacity: The 12 oz size is ideal for standard incubators, reducing the frequency of refills and improving convenience.
Designed for beginners and seasoned breeders, the EZ Incubator Water Filler takes the guesswork out of humidity control. With this no-spill incubator water filler, you'll always enjoy precise water management for optimal incubation conditions.
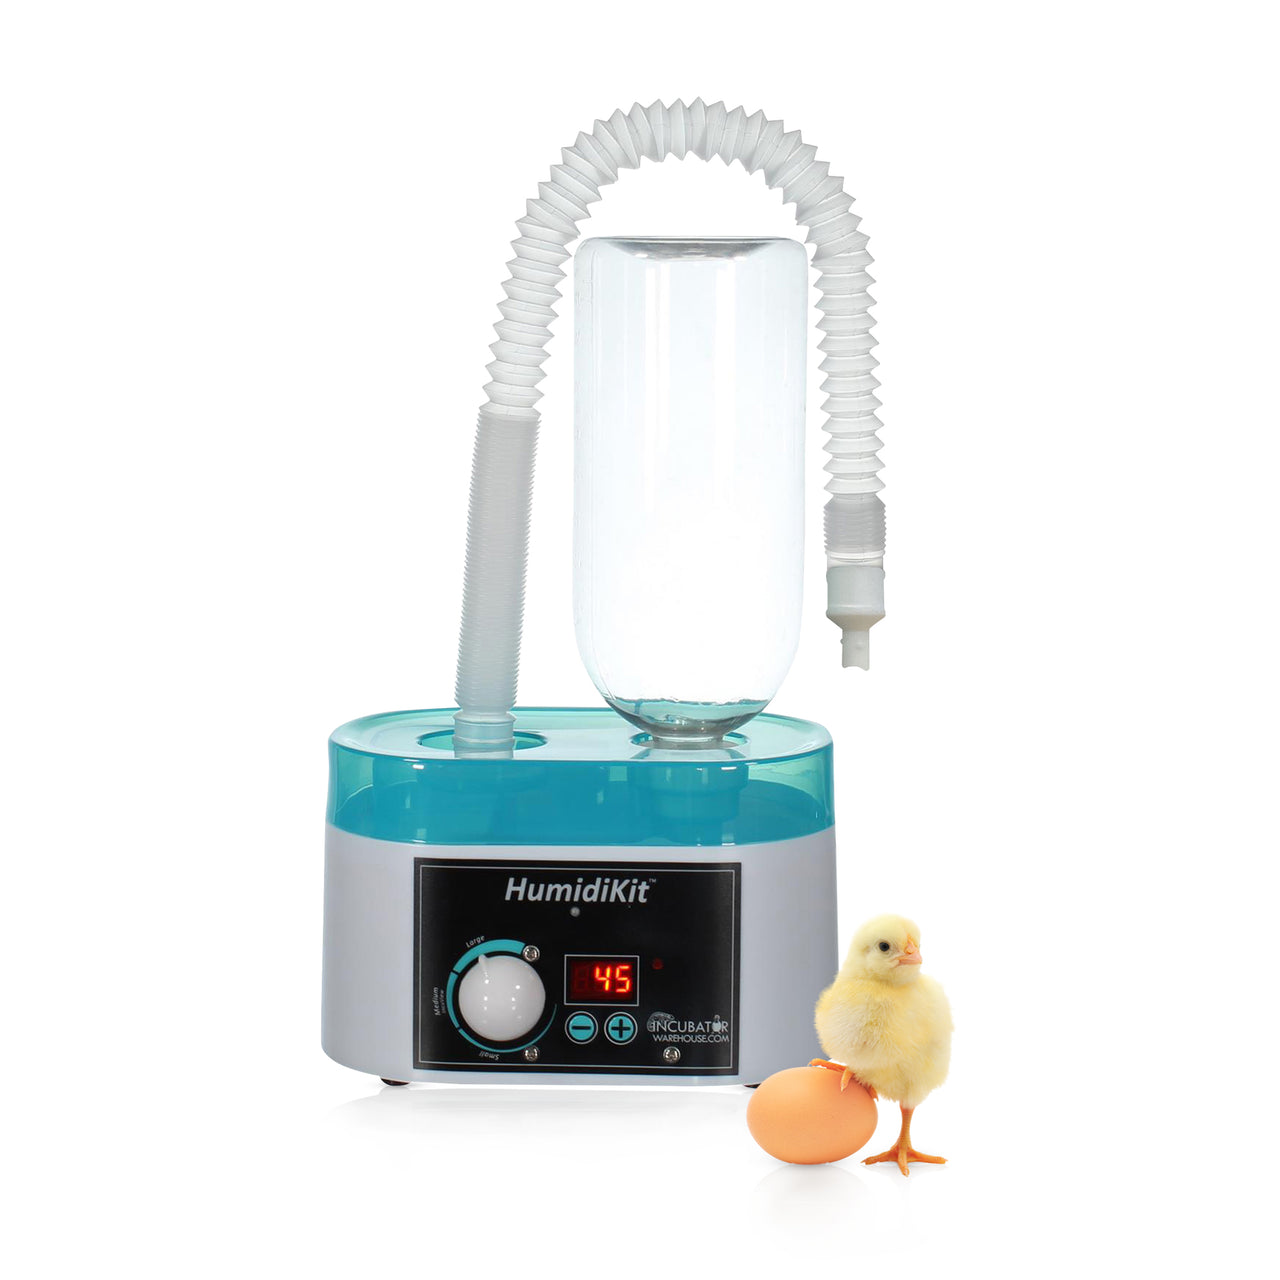
HumidiKit™ Auto Humidity System for Egg Incubators (Optional Selection)
Experience effortless humidity control for egg incubators with the HumidiKit™ Auto Humidity System. This system is designed to maintain precise humidity levels without constant refills, ensuring an ideal egg-hatching environment. The digital hygrostat humidity control lets you adjust the settings to the perfect range for incubation, giving you peace of mind as it manages humidity automatically. This automatic humidity system for egg incubators includes a one-liter water bottle, typically requiring just a weekly refill. For optimal performance, use distilled water to extend the system's life.
Features:
Automatic Humidity Control: Hands-free humidity management with an adjustable digital hygrostat that maintains the exact moisture levels needed for successful hatching.
Easy-to-Use Setup: It comes ready to install. Place the sensor, connect the hose, fill the water bottle, and plug it in.
Consistent Fresh Air and Moisture Delivery: Provides accurate, reliable humidity that promotes healthy embryo development.
Low-Maintenance Water Reservoir: Includes a one-liter water bottle that only requires weekly refills in most environments.
The HumidiKit™ Auto Humidity System is essential for consistent, hands-free humidity control in egg incubators. This product ensures a smooth and controlled incubation process with its digital hygrostat and reliable humidifier. Perfect for beginner and expert hatchers alike, it takes the guesswork out of humidity maintenance, offering a reliable solution for high-hatching success.
What's Included?
HovaBator Genesis Egg Incubator
HovaBator Genesis Egg Incubator
Incubator with insulating Styrofoam case, full window and digital control center
12V DC power supply, compatible with both 110V and 220V outlets
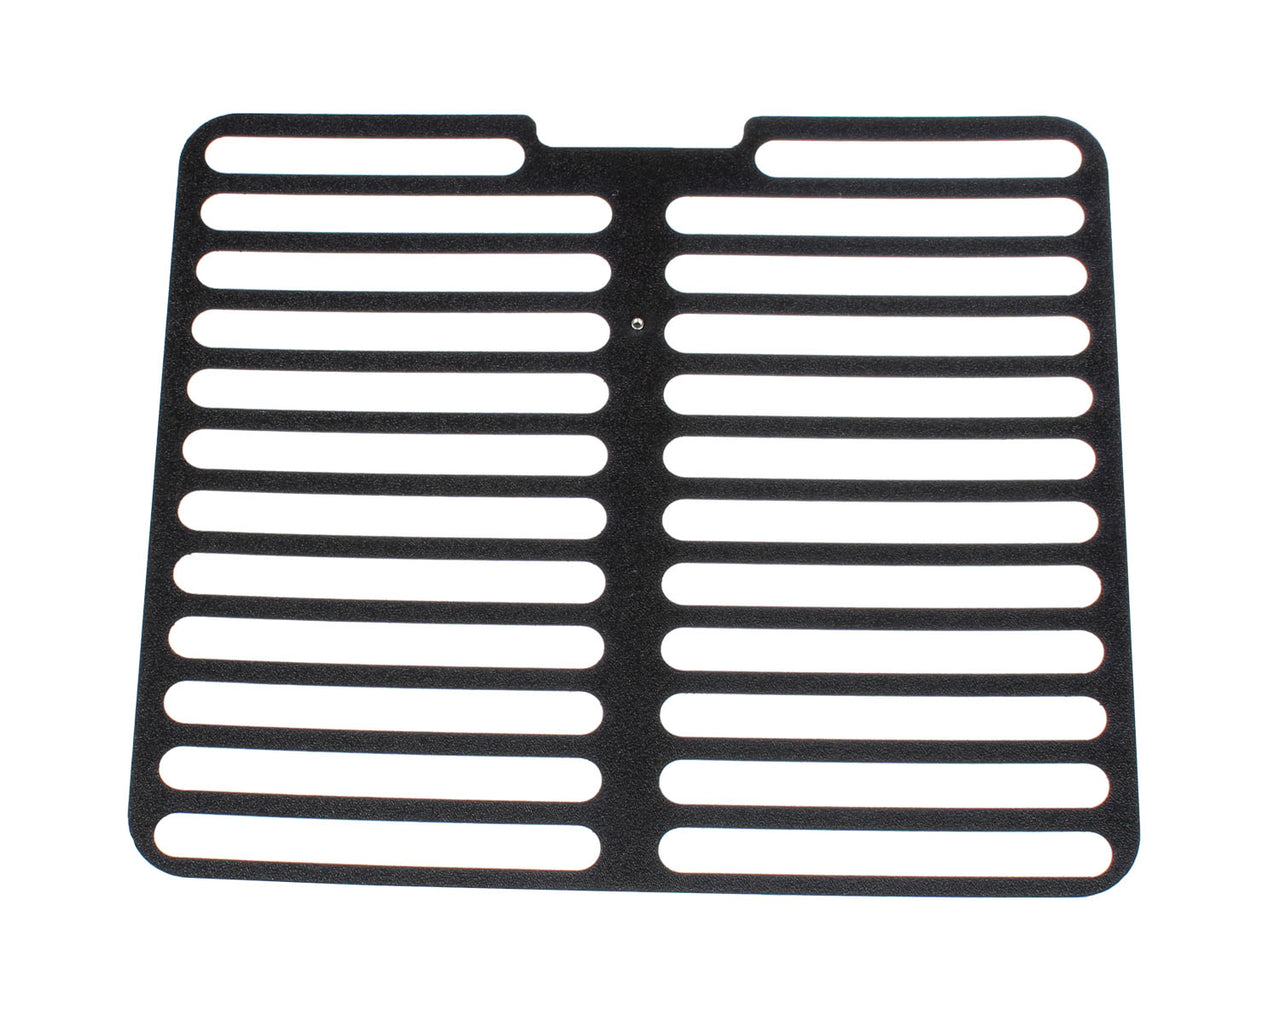
Mesh floor and plastic sanitation liner
Clear, step-by-step instructions
IncuTurn™ Automatic Egg Turner
Motor mount assembly
Universal egg tray
Incubator Warehouse Hatch Guidebook
Deluxe Egg Incubation Kit
IncuBright egg candler
E-Z Water filler 12 oz for incubators
EZ-Clean chick brush for cleaning incubators & eggs
Two-Year IncuCare Warranty for ongoing support
Optional Upgrades include:
Quail Tray for the IncuTurn™ Automatic Egg Turner
HumidiKit™ Automatic Humidity System
Humidifier with Digital Hygrostat
Expandable Tubing with Adapters
1-Liter bottle
Water Bottle Adapter Cap
Make the Hova Bator Genesis 1588 part of your hatching journey and experience the ease and reliability of a professional-grade egg incubator.